skip to main |
skip to sidebar
This recipe is from... but I bet you already KNOW where it's from and whose it is. You won't even have to guess. Thaaaaat's right. Dan Lepard, the latest man in my life. He's only lately been in my life, though. Until a couple of weeks back, my No. 1 baking man was Hollywood. Paul Hollywood.
I don't know about you folks outside the UK, but in the UK, The Great British Bake-Off is one of the most watched baking shows. And with good reason... one of the judges, the man with ice-blue eyes, Paul Hollywood, is most watchable. Eminently watchable. Even more than the show, much as I love it. So, carried along by the rush of my crush, I bought his book "How To Bake".
It's a good book, don't get me wrong - it's got good photos of him and his breads, and there are recipes I want to try. But a lot of them require a Kitchen Aid-type of food processor (if that's what they're called), with a dough hook. I don't have a dough hook, much less a Kitchen Aid. In my kitchen, my arms are my aid. So until I get one of them Aids (erk... not meant the way that sounds!), or figure out how to get around not having a hook (being fairly sure that Abu Hamza al-Masri would not be amenable to helping me out), I'll just have to stick with recipes that require arm-power, not hook-power.
Which brings me back to Dan Lepard who, going by his photo in The Guardian, is not an ice-blue-eyed killer-smiled baking heart-throb... but - and this is a BIG but - his baking recipes are doable. As eminently doable as Paul Hollywood is eminently watchable. For the time being, doability trumps watchability. And that, my friends, is saying a LOT!
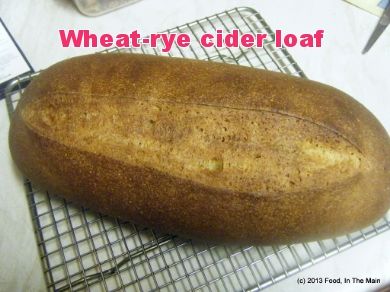
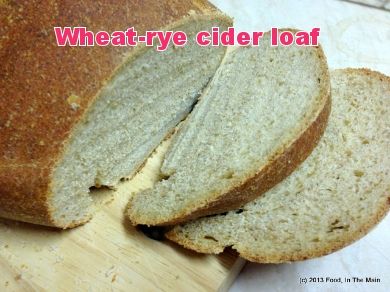
 Recipe for: Wheat-rye cider loaf
Ingredients:
1 tsp fast action yeast
1 tbsp agave nectar or honey
150 ml warm water
175 ml dry cider
375 gm (2-3/4 cups) strong white bread flour
75 gm wholegrain rye flour (just over 1/2 cup)
50 gm olive oil
1.5 tsp salt
a little oil for kneading (if required)
Method:
1. Mix the water and cider in a big bowl, then stir in the yeast and syrup till dissolved.
2. Add the olive oil, bread flour and rye flour to the bowl, and finally the salt. Stir quickly and evenly until mixed, and the dough comes together into a rough ball. Cover the bowl and leave it for 10 minutes.
3. Now lightly oil your worktop or kneading board, and scrape the dough onto the board. Knead lightly for 10 seconds, then return the dough to the bowl. leaving it to rest for 10 minutes. Repeat the kneading/resting procedure two more times.
4. After the third time, put the dough back into the bowl and let it rise undisturbed until it's puffy and looks like it has more or less doubled in size. Lightly flour the worktop/board. Punch the dough down and put it on the floured board. Pat it or use a rolling pin to shape it into a rough rectangle with the long side facing you.
5. Now roll up the flattened dough from the far end towards you, as tightly as you can manage it. Place it seam-side down on a tray lined with nonstick baking paper. Cover with a clean cloth and let it rise for 1-2 hours or till it has risen again.
6. Heat the oven to 220C (200C/425F in a fan-assisted oven). Cut a 1-cm deep slash down the centre of the loaf and bake it in the hot oven for about 40 minutes or till golden brown on top and hollow-sounding when tapped on the bottom.
Let cool before slicing.
 Original version of the recipe on Fine Cooking
Aparna's post on her blog My Diverse Kitchen
Let's get one thing clear from the start - making croissants was not my first choice, nor even my hundredth choice. In fact, it didn't even figure as a fleeting choice on my "would like to try" list. But I made them. I made them because it was the recipe for February in the "We Knead to Bake" challenge. There is no way that I would have tried this otherwise, none. I cannot stress that enough. I wish I could say that I enjoyed the three-day process so much that I wanted to do it all over gain... I COULD say it, but it would be a big fat lie.
Do you think this might be a bit of a negativity overkill?
Ok, to be fair, I'm glad I tried the recipe. Glad that Aparna made me go way outside my comfort zone (it took me a week to make my way back - ha ha). Glad that I know how much hard work goes into making the flaky, buttery, delicious croissants that I love. Glad that there are bakeries and cafes where I can walk in and simply buy a croissant. And, most of all, glad that faced up to my croissant demon... and if I didn't quite vanquish it, at least I can say truthfully that I didn't just give up.
My croissants were reasonably good, more than edible (jeez, all that butter - why WOULDN'T they be tasty!), and the ones with chopped chocolate filling were actually extremely moreish. I only did a few of those, though, perhaps about 4. The rest were plain croissants. While Pete liked them, and so did I, I just felt that the end result was not good enough for the effort that went into making them. I guess I'm just being picky, and I guess that's because I do love a well-made, fresh, flaky croissant.
I think I need a tame croissant baker who would be at my beck and call for baked goods. Any takers?
 Recipe for: Classic croissants
Ingredients:
For the dough:
2 cups all-purpose flour, and a little more for dusting/ rolling out dough
1/4 cup plus 1 tbsp cold water
1/4 cup plus 1 tbsp cold milk (I used 2%)
1/8 cup granulated sugar
20gm soft unsalted butter (1.5 tbsp)
1/2 tbsp plus scant 1/4 tsp instant yeast
1 tsp salt
For the butter layer:
125 gm cold unsalted butter
Or 1 egg for egg wash
Finely chopped dark or plain chocolate for filling (optional)
Method:
Day 1 - Make the dough (and refrigerate overnight)
Combine all the ingredients for the dough in the bowl of a stand mixer fitted with the dough hook. You can also use a food processor with the plastic blade, or do this by hand.
Mix everything on low speed for 3 minutes, scraping the sides of the mixing bowl once if necessary. Then mix further on medium speed for 3 minutes. Lightly flour a 10-inch pie pan or a dinner plate. And place the ball of dough on this.
Gently shape the dough into a flat ball by pressing it down before storing it in the fridge, this makes rolling out next morning easier. Making a tight ball will strengthen the gluten which you do not need. Lightly dust the top of the dough with flour and wrap well with plastic so it doesn’t dry out. Refrigerate overnight.
Day 2 - Make the butter layer
The next day, cut out 2 pieces of parchment or waxed paper into 10” squares each. Cut the cold butter into 1/2-inch-thick slabs. Place these pieces on one piece of parchment/ waxed paper so they form a 5- to 6-inch square. Cut the butter further into pieces as required to fit the square. Top with the other piece of parchment/ waxed paper.
Using a rolling pin, pound the butter with light, even strokes. As the pieces begin to stick together, use more force. Pound the butter until it flattens out evenly into a square that’s approximately 7-1/2”. Trim the edges of the butter to make a neat square. Put the trimmings on top of the square and pound them in lightly with the rolling pin. Refrigerate this while you roll out the dough.
Laminate the dough
Unwrap and lay the dough on a lightly floured work surface. Roll it out to a 10-1/2-inch square, and brush off the excess flour. Take the butter out from the refrigerator —it should be cold but pliable. If it isn’t refrigerate it till it is. This so that when you roll out the dough with the butter in ti, neither should it be soft enough to melt, or hard enough to break. Unwrap the butter and place it on the square of dough in the centre, so that it forms a “diamond” shape on the dough.
Fold one flap of dough over the butter toward you, stretching it slightly so that the point just reaches the middle of the butter square. Bring the opposite flap to the middle, slightly overlapping the previous one. Similarly repeat with the other two so that the dough forms an envelope around the butter. Lightly press the edges together to completely seal the butter inside the dough to ensure the butter doesn’t escape when you roll out the dough later.
Lightly flour the top and bottom of the dough. With the rolling pin, firmly press along the dough uniformly to elongate it slightly. Now begin rolling instead of pressing, focusing on lengthening rather than widening the dough and keeping the edges straight.
Roll the dough into an 8” by 24” rectangle. If the ends lose their square shape, gently reshape the corners with your hands. Brush off the excess flour. Mark the dough lightly equally into three along the long side. Using this as a guideline, pick up one short end of the dough and fold 1/3rd of it back over the dough, so that 1/3rd of the other end of dough is exposed. Now fold the 1/3rd exposed dough over the folded side. Basically, the dough is folded like 3-fold letter before it goes into an envelope (letter fold). Put the folded dough on a floured baking sheet, cover with plastic wrap, and freeze for 15 to 20 minutes to relax and chill the dough.
Repeat the rolling and folding, this time rolling in the direction of the two open ends (from the shorter sides to lengthen the longer sides) until the dough is about 8” by 24”. Once again fold the dough in thirds, brushing off excess flour and turning under any rounded edges or short ends with exposed or smeared layers. Cover once again with plastic wrap and freeze for another 15 to 20 minutes.
Roll and fold the dough exactly in the same way for the third time and put it baking sheet. Cover with plastic wrap, tucking the plastic under all four sides and refrigerate overnight.
Day 3 - Divide the dough
The next day, unwrap and lightly flour the top and bottom of the dough. Cut the dough along the longer side into halves. Cover one half with plastic wrap and refrigerate it while working on the other half.
“Wake up the dough up” by pressing firmly along its length with the rolling pin. Don’t widen the dough but simply begin to lengthen it with these first strokes. Slowly roll the dough into a long and narrow strip, approximately 8” by 22”. If the dough sticks as you roll, sprinkle with flour.
Once the dough is about half to two-thirds of its final length, it may start to resist rolling and even shrink back. If this happens, fold the dough in thirds, cover, and refrigerate for about 10 minutes; then unfold the dough and finish rolling.
Lift the dough an inch or so off the table at its midpoint and allow it to shrink from both sides and prevent the dough from shrinking when it’s cut. Check that there’s enough excess dough on either end so that when you trim the edges to straighten them, you have a strip of dough that is 20’ inches long. Now trim the edges so they’re straight. Cut the dough into equal sized triangles, marking them off first if you prefer, before cutting.
Shape the croissants
Now work with one piece of triangular dough at a time. Using your rolling pin, very lightly roll (do not make it thin but only stretch it slightly) the triangle to stretch it a little, until it is about 6” long. This will give your croissants height and layers. You can stretch it by hand too, but if you don’t have the practise, your stretching could be uneven.
Using a sharp small knife, make a 1/2- to 3/4-inch-long notch in the centre of the short side of each triangle. The notch helps the rolled croissant curl into a crescent.
Place the triangle on the work surface with the notched side closest to you. This is the time to add your filling, if you're using any. With one hand on each side of the notch, begin to roll the dough away from you, towards the pointed end.
Flare your hands outward as you roll so that the notched “legs” become longer. Roll the triangle tight enough but not too tight to compress it, until you reach the “pointy” end which should be under the croissant.
Now bend the two legs towards you to form a tight crescent shape and gently press the tips of the legs together (they’ll come apart while proofing but keep their crescent shape).
Shape all the triangles like this into croissants and place them on a greased or parchment lined baking sheet leaving as much space between them as they will rise quite a bit.
Proof the croissants
Brush the croissants with milk (or a mix of milk and cream). If you use eggs, make an egg wash by whisking one egg with 1 tsp water in a small bowl until very smooth. Lightly brush this on each croissant.
Refrigerate the remaining milk/ milk+cream (or egg wash) for brushing the croissants again later. Place the croissants in a cool and draft-free place (the butter should not melt) for proofing/ rising for about 1 1/2 to 2 hours. They might need longer than 2 hours to proof, maybe as much as 3 hours, so make sure to let croissants take the time to proof. The croissants will be distinctly larger but not doubled in size. They’re ready if you can see the layers of dough from the side, and if you lightly shake the sheets, the croissants will wiggle.
Bake the croissants
Just before the croissants are fully proofed, pre-heat your oven to 200C (400F) in a convection oven or 220C (425F) in a regular oven. Brush the croissants with milk/ milk+cream (or egg wash) a second time, and place your baking sheets on the top and lower thirds of your oven (if regular) or bake one tray at a time in the convection oven.
Bake them for about 15 to 20 minutes till they’re done and golden brown on top and just beginning to brown at the sides. In a regular oven, remember to turn your baking sheets halfway through. If they seem to be darkening too quickly during baking, lower the oven temperature by 10C (25F). Cool the croissants on the baking sheets on racks.
Serve warm. This recipe makes 10 mini croissants.
This is yet another Dan Lepard recipe, kind of - that is, I took his basic never-fail white loaf recipe, substituted quick-rise with fresh yeast, changed the flour content to 2:1 white to wholewheat, substituted 1 cup water with 50ml Greek yogurt thinned with 50ml water and, as a final touch, added 1 tbsp vinegar because I'd read somewhere that it helped keep the loaf soft for longer.
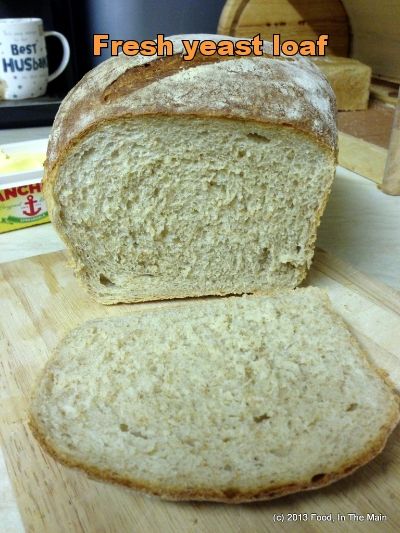
Perhaps I should have made one substitution at a time per loaf, rather than all the substitutions in one loaf - because I can't say for sure if it was the yogurt or the vinegar or the combination that actually made the loaf come out so well! What I CAN say for certain is that this was a lovely, lovely loaf - rose well, baked well, sliced well, toasted well...
I might be blowing my own trumpet here a wee bit, but... it might just be that I've got my bread baking mojo back!
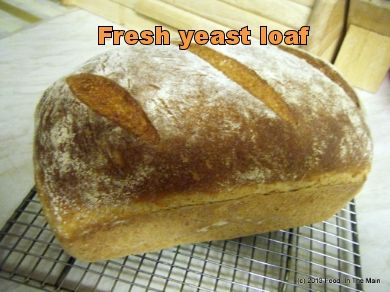
Recipe for: Fresh yeast white-wholewheat loaf
Ingredients:
2-1/2 cups strong white white flour + 1 cup strong wholewheat flour
30gm fresh yeast OR 1 tsp dry instant/quick-rise yeast
1 tsp sugar
1-1/2 tsp salt
200 ml warm (NOT hot) water
50 ml Greek yogurt + 50 ml water
1 tbsp vinegar (I used apple cider vinegar)
a little oil for kneading
Method:
1. Check that the yeast is alive by crumbling it into the warm water along with 1 tsp sugar, and whisking it. Leave it for 15 minutes. If it's starting to bubble, it's alive and can be used successfully. (If you're using instant yeast, skip this step and go straight to step 2, adding the instant yeast to the flour.)
2. Put the flours in a bowl and whisk in the salt. Make a well in the middle and pour in the yeast starter along with the yogurt and vinegar. Mix to form a rough dough. Cover and let it be for minutes.
3. Now oil your worktop or kneading board lightly, and scrape the dough onto it. Knead lightly for 10 seconds, then let it rest for 10 minutes. Do the kneading/resting procedure twice more, for a total of three times, oiling the board and/or your hands as required.
4. After the fourth 10-second knead, put the dough back in the bowl, cover it, and let it rise for 45 minutes to an hour, or until it has doubled.
5. Lightly flour the kneading board. Punch down the dough and return it to the kneading board, rolling it gently or patting it into a rough oblong. Now roll it up tightly along the long side, and place it seam-side down on a floured tray. You can also place it in a lightly greased 7" x 5" loaf tin. Either way, flour the top of the loaf, cover it with a clean tea towel and leave it to rise for another hour or so. When the dough looks like it has more or less doubled, or when it is about 2 inches above the rim of the tin, make a 1cm deep cut down the middle with a sharp knife, or three diagonal slashes - whichever way you prefer it.
6. Preheat the oven to 200C/425F. Just before putting the bread in to bake, place a tray of boiling water on the oven floor. The steam will help the crust become a rich colour. Bake the bread for about 35-40 minutes. The bread is done when the top turns golden brown and the bottom sounds hollow when it is tapped. Let cool before slicing.
I've been on a baking binge over the last 2 weeks - only on the weekends, though, because weekdays are just not long enough for baking bread if you're not demonically organised, which I am not.
Ever since I discovered Dan Lepard's recipes in The Guardian, I've gone through some 300-odd recipes in his column published over the past so many years, and scouted out all the bread recipes that seemed interesting and easy. And printed them. And now I'm trying to bake them all, one by one.
The saffron bloomer got made twice. Then this one, which is really good. There's also a wheat & rye cider loaf, and a loaf made with fresh yeast... but I'm getting ahead of myself. Those recipes will follow in due course.
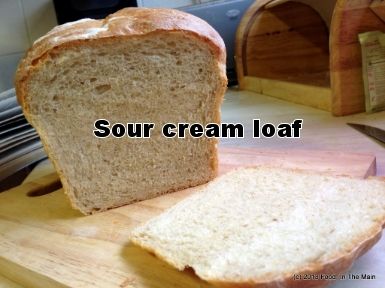
For this loaf, it was serendipitous that I had half a carton of sour cream in the fridge. It may have been just a teensy bit past its use-by date, but I didn't say that and you didn't read it. Besides, we're both alive, so there was no harm done.

I've never been so pleased with bread I've baked - this loaf could have come from a proper bakery, I kid you not. I SO like Dan Lepard, because he says there's no need to knead like a maniac to get good bread, and believe me, that man speaks true. I'm all for an easier life, and he does make it easier. I may have said that before, but it remains true nevertheless.
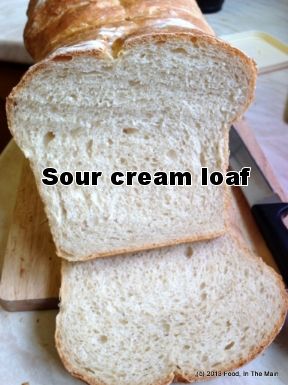
Recipe for: Sour cream loaf
Ingredients:
125g (4 oz or 1/2 cup) cold sour cream
1.5 tsp salt
2 tsp caster sugar
1 sachet (7g) fast action yeast
550g (1 lb 4 oz) strong white bread flour, plus more for shaping
Oil, for kneading
Method:
1. In a large bowl, mix the sour cream with 150ml cold water and 100ml boiling water.
2. Add the sugar and yeast and whisk it together, then mix in the flour and salt until it forms a rough ball. It will be quite sticky. Cover the bowl and leave the dough to sit for 10 minutes.
3. Lightly oil your working area (worktop or kneading board) and gently knead the dough on it for 10 seconds. Put the dough back in the bowl and let it rest covered for 10 minutes.
4. Repeat the 10-second-kneading/10-minute-resting procedure twice more, oiling the worktop again if required to stop the dough from sticking too much. After that, leave the dough covered in its bowl for an hour or so, until it has doubled in size.
5. Butter the base and sides of a large, deep, 8" (19cm) loaf tin. Line the base with non-stick baking paper.
6. Lightly flour the kneading board now and place the punched-down dough on it. Pat or roll it out into 1 2-cm thick rectangle that's the length of the loaf tin, then roll the dough up towards you as well as you can. Place it seam-side down in the loaf tin, flour the top lightly, cover with a towel and let it rise for 60-90 minutes until it is doubled again.
7. Bake at 200C (180C/350C for fan-assisted or convection ovens) for about 45 minutes till it is golden brown on top and sounds hollow when you tap the loaf on the bottom (you gotta remove it from the baking tin for this, so definitely use oven gloves!).
Let cool before slicing.
Chana dal sundal (cooked chana dal stir fried in spiced oil with mustard seeds) is one of my favourite things to eat as a side dish with rice and mor kuzhambu. I like to mix the rice and sundal together (as weird as that may sound), which is why I thought that this recipe would work. There's no mor kuzhambu involved this time, though. Just the rice and chana dal. Oh, and some vegetables.
If you think about it, recipes that combine protein, carbs and vegetables in a tasty package have to be top of the list for those occasions where you don't want to spend ages in the kitchen but also don't want to be tempted to order a takeaway. This recipe takes about 30 minutes from start to finish, especially if you prep and cook the vegetables while the rice is cooking. If you have leftover rice, this recipe is even quicker to make. And it tastes lovely.
A word of warning with regard to the chana dal - because it's easy to cook it to mush, I don't add any extra water while cooking it with the rice. I like my chana dal very slightly undercooked so that it still has a gentle bite. If you prefer it well soft, feel free to add another 1/8 cup of water while cooking the rice & dal.
Recipe for: Chana dal-vegetable masala rice

Ingredients:
1 cup basmati rice
1/4 cup chana dal
1 medium potato, chopped into small cubes
1/4 cup sliced runner beans (or green beans)
1 medium tomato, chopped
1 fat clove garlic, sliced
2 medium onions, sliced thin
1 tbsp oil
3-4 green chillies, sliced (to taste)
1 tsp chana masala/garam masala/curry powder
1 tsp cumin seeds
Salt to taste
Chopped coriander leaves for garnish
Roasted peanuts, for garnish (optional)
Method:
1. Wash and soak the basmati rice and chana dal together for 15 minutes. Then place in a saucepan along with 2 cups water over high heat. When the water begins to bubble and holes appear in the rice, stir the rice, turn down the heat to the lowest setting, and cover the pan with a lid placed over a clean tea towel (the towel will absorb the steam). Let it be for about 8-10 minutes, then turn off the heat. Let the rice stay undisturbed for 10 minutes so that it can absorb the moisture, then fluff it up.
2. While the rice is cooking, heat the oil in a saute pan until it shimmers, add the cumin seeds and fry them for 10 seconds, then add the green chillies and garlic and stir-fry for 30 seconds or so. Stir in the onions and cook them till they turn soft.
3. Now add the chopped tomato, potato and runner beans/green beans and stir well. Cover the pan and cook on simmer for 10-15 minutes, till the vegetables are done. Stir in the chana masala/garam masala/curry powder and salt to taste.
4. Finally, add the rice-chana dal and mix it in gently but thoroughly with the vegetable masala. Sprinkle with coriander leaves and peanuts, and serve hot with any raita.
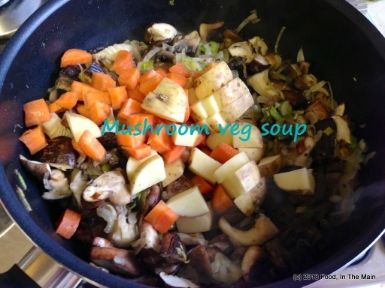
I made a version of this soup last month when I was with my family in Seattle, to go with the herby cheese pull-apart bread that was our first baking challenge set by Aparna Balasubramaniam. The soup is not exactly as I made it the first time, because mixed vegetable soup can be whatever you make of it.

If you're a wannabe Masterchef contestant or judge, or have more money than sense, you can use expensively exotic ingredients - mushrooms that have been grown in soil imported from a remote corner of the Brazilian rain forest and watered with dew gathered in moonlight on a full moon night in June; the rarest blue-spotted heirloom potatoes from Venezuela that have been hand picked by an endangered tribe (gotta support them, don't y'know); cream from milk where the cattle were exclusively hand fed on the finest grass prepared by Cordon Bleu chefs while classical music was played by the London Philharmonic live in their air-conditioned, state-of-the-art barn (the cows' barn, I mean, not the London Philharmonic's. The London Philharmonic wouldn't be allowed to live in the same building as these super-exclusive posh cows!)... you get the idea.
OR, you could just use whatever vegetables you have in your refrigerator that need using up, and standard chestnut or white mushrooms (or whatever you can get), to make this soup. It's a guide more than a recipe, anyway.
That said, though, I bought the mushrooms specifically to make this soup. But because I have more sense than I have money, I bought them from the "reduced for quick sale" section. Yay me!
Recipe for:
Vegetable-mushroom soup

Ingredients:
4 small onions, sliced thinly
2 baby leeks (green and white parts), sliced thinly
4 cups mixed mushrooms (I used portobello/cremini, shiitake and oyster), sliced
1 medium potato, chopped (skin on)
1 medium carrot, chopped
1 litre (4-5 cups) vegetable stock/broth
1 tsp dried thyme or Italian herb mix
1 bay leaf
4 sprigs fresh thyme
1 tbsp olive oil + 1 tbsp butter
2 tbsp sour cream/Greek yogurt or full fat milk (optional)
Salt and pepper to taste
2 tbsp parsley for garnish
Method:
1. Heat the oil and butter in a large pan, add the onions and leeks and cook over medium heat till they begin to soften (about 5 minutes), stirring frequently.
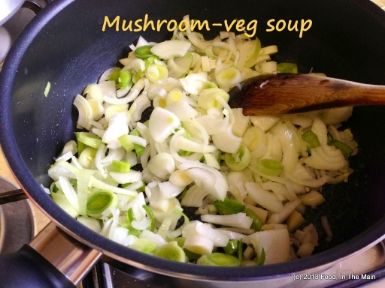
2. Add the mushrooms and cook for 2-3 minutes or till they start to reduce.
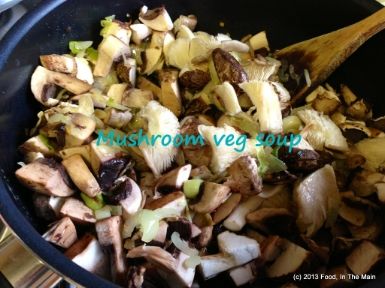
3. Add the potatoes and carrots along with the dried herbs and bay leaf. Stir for a couple of minutes.
4. Then add the stock and the fresh thyme sprigs.

Bring this to a boil, cover the pan and let the stock simmer for 10-15 minutes or till the carrots and potatoes are soft and cooked.
5. Fish out the fresh thyme sprigs and bay leaf, then turn off the heat. Let the soup cool, then blend it to a smooth consistency.
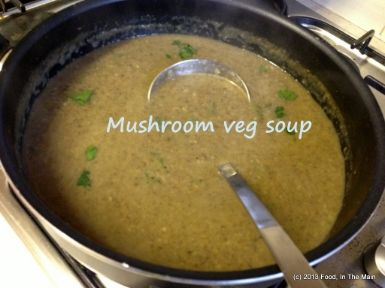
If you would like a bit more texture to the soup, blend only about 3/4 of the soup smooth, then add it to the remaining unblended soup in the pan. Add the milk or sour cream/yogurt, if using, and stir it in. Add salt and pepper to taste. Reheat on low heat till thoroughly warmed, but do not let it boil. Serve with parsley sprinkled on top, and croutons if you like, and crunchy buttered toast on the side.
This recipe is pretty much exactly as detailed by Dan Lepard in The Guardian newspaper. It just seemed like a simple thing to make, and it pretty much was. While I like kneading bread, it's also a nice change to NOT have to knead bread. This bread doesn't need much effort, just 30 seconds of light kneading in total, 10 minutes apart. What's not to like?
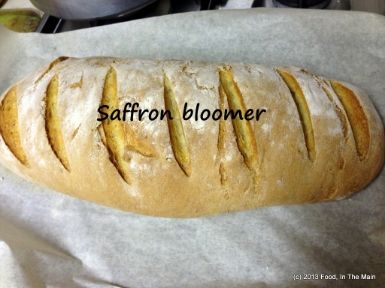
The saffron taste and aroma was gentle but there, and the bread was just lovely. The most it takes up is time, and I watched two movies while waiting for the dough to prove. They were "Premonition", starring Sandra Bullock, and "One Small Hitch", starring an actor called Shane McRae. The first was a sort of paranormal suspense move, and the second a light comedy. While I really like Sandra Bullock, the movie itself was pretty much a clunker - I don't like unhappy endings, so that just made it worse. Shane McRae was pretty cute, though. I thought "One Small Hitch" was a good timepass movie.
And now, because this is meant to be a food blog, I will stop here and dream about Shane McRae in private. Do try this lovely bread, though. I'll be making it again for sure.
P.S. It makes fantastic toast! Try it with marmalade and peanut butter (or ok, maybe that's just me).
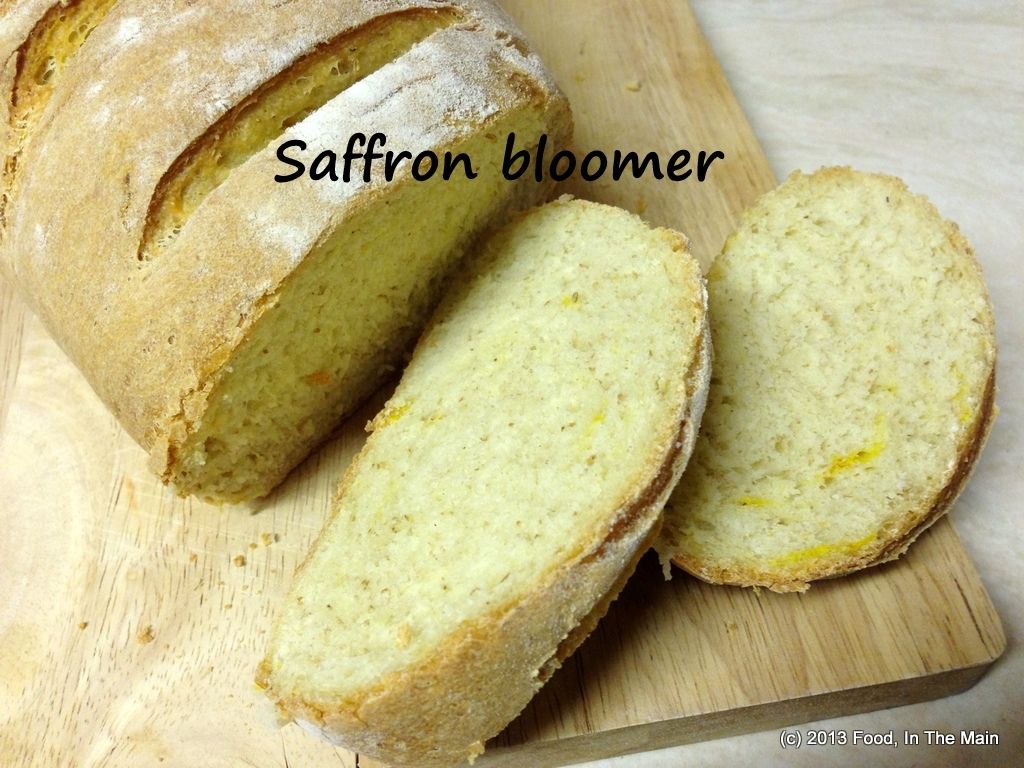 Recipe for: Saffron bloomer loaf
Ingredients:
A good pinch or two of saffron
150ml boiling water
150ml cold water
1 tsp fast-action yeast
100g ricotta
500g (4 cups) strong white bread flour, plus extra for shaping
50g (1/2 cup) wholemeal flour
2 tsp fine salt
Oil, for kneading
Method:
1. Put the saffron in a large mixing bowl, pour on the boiling water and leave for 10 minutes. Then add the cold water and yeast, stir well to dissolve the yeast, crumble in the ricotta and mix well.
2. Add the flours and salt, mix everything to a smooth dough, then cover and leave for 10 minutes.
3. Now lightly oil a kneading board or your kitchen worktop, and knead the dough lightly for 10 seconds. Return the dough to the bowl, leave for 10 minutes, then repeat this light knead twice more at 10-minute intervals, before leaving the dough, covered, for about an hour.
4. Lightly flour the worktop, pat the dough into a rectangle and roll up very tightly. Place the dough seam-side down on a tray lined with nonstick paper, lightly flour the top, cover with a cloth and leave for an hour until it nearly doubles.
5. Slash the risen dough three or four times with a sharp knife along the top,
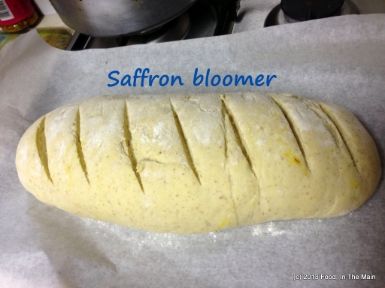
and bake at 220C (200C fan-assisted)/425F/gas mark 7) for about 40 minutes.
Tip: Fill a metal dish with boiling water and place on the lowest shelf of the oven, before putting the dough in to bake, to help give the your loaf's crust a golden colour.

