skip to main |
skip to sidebar
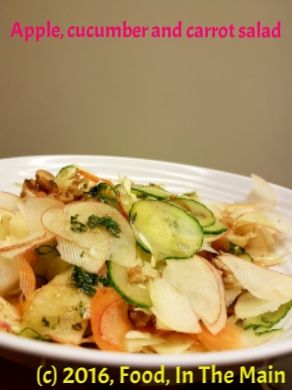
Salads aren't my most favourite food, if I am to be honest. Seeing a recipe for salad on anyone's blog doesn't usually float my boat. So I don't expect this simple recipe to turn the Internet's head and send millions of unique visitors my way. But it really was a refreshing salad when I ate it yesterday, and I thought it worthwhile to make a post of it. The best part was that the apples were from my own little container tree, which has done rather well this year. i think I got about 20 apples from it, all told. It's only got two branches!
I had picked a couple of apples to see if they were edible or whether I would have to make an apple crisp or cake, because last month when I tried one, it was much too sour to make pleasant eating. (I made a cake with the apples then). They are meant to be eating apples, you see. But this time they were perfect, beautifully juicy and sweet with the right amount of tartness. Really lovely. Why I fancied a salad using the apples, I have no idea. I don't usually want a salad for dinner. But I had also picked some mint too, and I wanted to use that. So here it is. I can assure you that the salad is refreshing and I really enjoyed it. It is not any more exciting than that, unfortunately.
No wait, that's not quite true. There was SOME excitement while I was slicing the vegetables - I used a mandoline to make wafer-thin slices, and it was so viciously sharp and efficient at its job that I found I had sliced a bit off the side of my forefinger before I knew it. I cursed a bit and ran cold water over my finger, then went back to the mandoline. And it happened AGAIN, this time to my thumb. It was painful, but at least I can claim that I put myself into my salad. You don't have to do the same, though. I'm sure the salad would taste just as nice without the blood, sweat (metaphorically speaking) and tears.
Recipe for: Apple, cucumber and carrot salad
Ingredients:
2 medium eating apples
1 small cucumber
1 medium carrot
2 tbsp walnuts
handful of Chinese cabbage or lettuce, shredded very fine
For the dressing:
1 tbsp lime juice
1 tbsp olive oil
1 tbsp very finely chopped mint
1 tbsp honey
1 tsp apple balsamic vinegar
Salt to taste
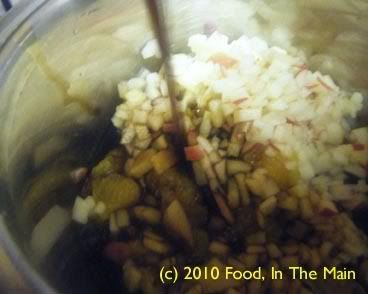
1. Slice the cucumber, apples and carrot very thinly (I used a mandoline).
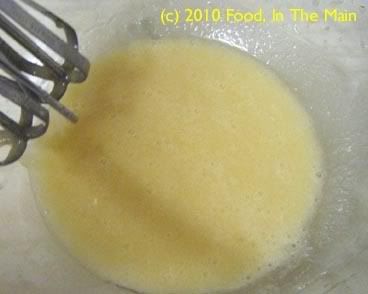
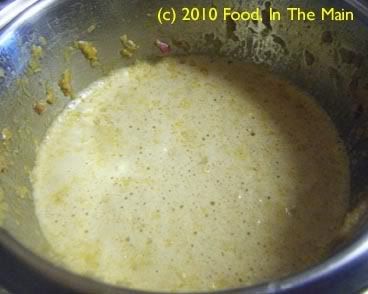
2. Whisk together the ingredients for the dressing. Adjust the taste to your requirement.
3. Mix the salad vegetables together, then add the dressing a little at a time - you may not require all of it, so go easy. Sprinkle the walnuts on top and eat immediately.
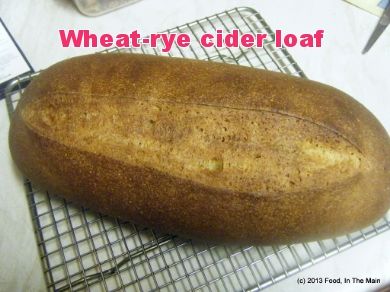
This recipe is from... but I bet you already KNOW where it's from and whose it is. You won't even have to guess. Thaaaaat's right. Dan Lepard, the latest man in my life. He's only lately been in my life, though. Until a couple of weeks back, my No. 1 baking man was Hollywood. Paul Hollywood.
I don't know about you folks outside the UK, but in the UK, The Great British Bake-Off is one of the most watched baking shows. And with good reason... one of the judges, the man with ice-blue eyes, Paul Hollywood, is most watchable. Eminently watchable. Even more than the show, much as I love it. So, carried along by the rush of my crush, I bought his book "How To Bake".
It's a good book, don't get me wrong - it's got good photos of him and his breads, and there are recipes I want to try. But a lot of them require a Kitchen Aid-type of food processor (if that's what they're called), with a dough hook. I don't have a dough hook, much less a Kitchen Aid. In my kitchen, my arms are my aid. So until I get one of them Aids (erk... not meant the way that sounds!), or figure out how to get around not having a hook (being fairly sure that Abu Hamza al-Masri would not be amenable to helping me out), I'll just have to stick with recipes that require arm-power, not hook-power.
Which brings me back to Dan Lepard who, going by his photo in The Guardian, is not an ice-blue-eyed killer-smiled baking heart-throb... but - and this is a BIG but - his baking recipes are doable. As eminently doable as Paul Hollywood is eminently watchable. For the time being, doability trumps watchability. And that, my friends, is saying a LOT!
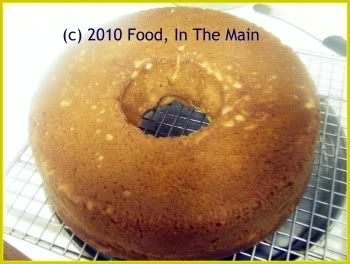
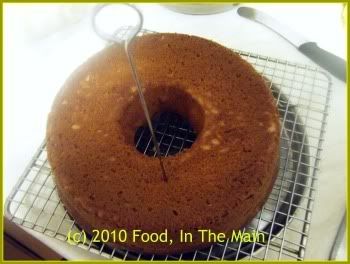
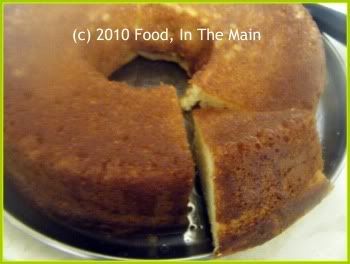
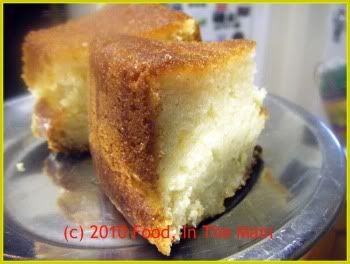
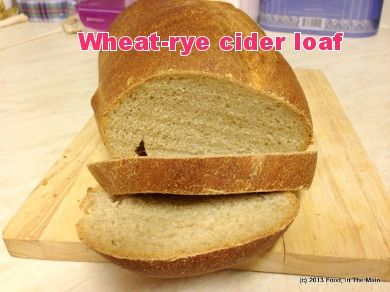 Recipe for: Wheat-rye cider loaf
Ingredients:
1 tsp fast action yeast
1 tbsp agave nectar or honey
150 ml warm water
175 ml dry cider
375 gm (2-3/4 cups) strong white bread flour
75 gm wholegrain rye flour (just over 1/2 cup)
50 gm olive oil
1.5 tsp salt
a little oil for kneading (if required)
Method:
1. Mix the water and cider in a big bowl, then stir in the yeast and syrup till dissolved.
2. Add the olive oil, bread flour and rye flour to the bowl, and finally the salt. Stir quickly and evenly until mixed, and the dough comes together into a rough ball. Cover the bowl and leave it for 10 minutes.
3. Now lightly oil your worktop or kneading board, and scrape the dough onto the board. Knead lightly for 10 seconds, then return the dough to the bowl. leaving it to rest for 10 minutes. Repeat the kneading/resting procedure two more times.
4. After the third time, put the dough back into the bowl and let it rise undisturbed until it's puffy and looks like it has more or less doubled in size. Lightly flour the worktop/board. Punch the dough down and put it on the floured board. Pat it or use a rolling pin to shape it into a rough rectangle with the long side facing you.
5. Now roll up the flattened dough from the far end towards you, as tightly as you can manage it. Place it seam-side down on a tray lined with nonstick baking paper. Cover with a clean cloth and let it rise for 1-2 hours or till it has risen again.
6. Heat the oven to 220C (200C/425F in a fan-assisted oven). Cut a 1-cm deep slash down the centre of the loaf and bake it in the hot oven for about 40 minutes or till golden brown on top and hollow-sounding when tapped on the bottom.
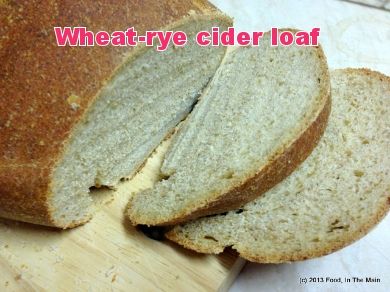
Let cool before slicing.
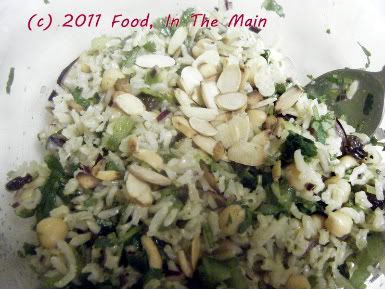
Yep, I've jumped onto the "rice salad" bandwagon, despite my doubts about what a salad actually is. :) Or perhaps I should call this a no-cook "raw" pulao. A salad by any other name - probably tastes exactly the same... right? I actually wasn't entirely certain if this would be to my taste, but as it turned out, it's delicious - IF you like raw onions. I do, and I think the salad tasted even better for sitting overnight in the fridge, when I had it the next day for lunch. At room temperature, I should add. I don't like to eat anything that's refrigerator-cold... not even sandwiches. It has to be room temperature, at the very least.
PS. I saw this recipe on someone's blog, but for the life of me I can't remember whose it was. If you recognise this recipe, dear blogger, please give me a heads-up and I will add a link to your original recipe together with an acknowledgement.
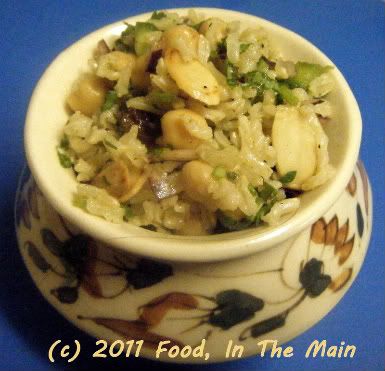
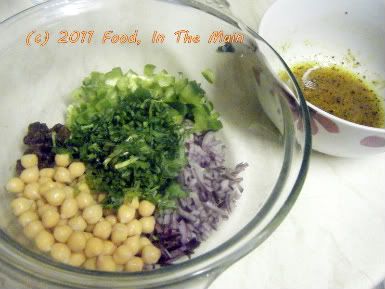
Recipe for: Curried brown rice salad
 Ingredients:
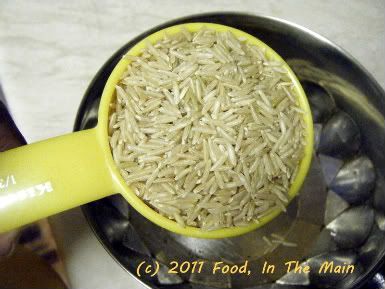 1/3 cup brown basmati rice
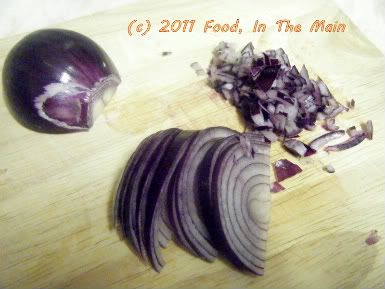 2 tbsp red onion, minced
2 tbsp green bell pepper, minced
1/3 cup chickpeas, cooked (fresh or canned)
3 tbsp coriander, chopped fine
1 tsp sultanas/raisins
2 tbsp red onion, minced
2 tbsp green bell pepper, minced
1/3 cup chickpeas, cooked (fresh or canned)
3 tbsp coriander, chopped fine
1 tsp sultanas/raisins
 1 tsp sliced almonds, toasted, for garnish
For the dressing:
1 tbsp lime juice
1 tsp orange blossom honey
2 tsp extra virgin olive oil
1 tsp commercial curry powder (I used Schwartz medium-hot)
Salt and pepper to taste
Method:
1. Soak the brown rice for a few hours if possible; put the soaked rice in a pan with a well fitting lid and add 2/3 cup water. Bring to a boil, then turn the heat down to a gentle simmer, cover the pan and let the rice cook till all the water has been absorbed (about 15 minutes). Let the cooked rice sit undisturbed for 15 minutes.
1 tsp sliced almonds, toasted, for garnish
For the dressing:
1 tbsp lime juice
1 tsp orange blossom honey
2 tsp extra virgin olive oil
1 tsp commercial curry powder (I used Schwartz medium-hot)
Salt and pepper to taste
Method:
1. Soak the brown rice for a few hours if possible; put the soaked rice in a pan with a well fitting lid and add 2/3 cup water. Bring to a boil, then turn the heat down to a gentle simmer, cover the pan and let the rice cook till all the water has been absorbed (about 15 minutes). Let the cooked rice sit undisturbed for 15 minutes.
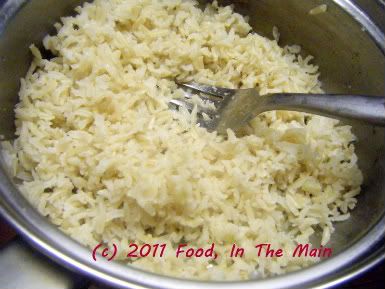 Once it has cooled, fluff gently with a fork. Reserve.
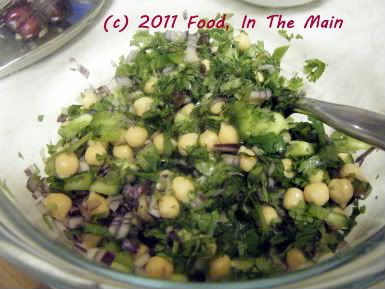
2. In a medium bowl, mix the salad ingredients bar the toasted almonds.
Once it has cooled, fluff gently with a fork. Reserve.
2. In a medium bowl, mix the salad ingredients bar the toasted almonds.
 Then add the rice and mix gently to combine.
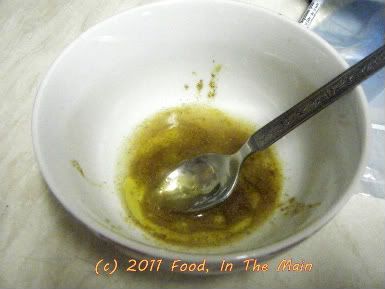
3. In a small bowl, whisk the ingredients for the dressing.
Then add the rice and mix gently to combine.
3. In a small bowl, whisk the ingredients for the dressing.
 Pour the dressing over the salad and mix again, adding salt and pepper. Taste and adjust the dressing ingredients.
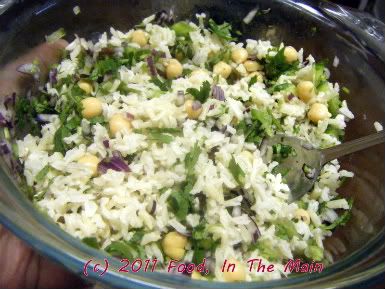 Fluff with a fork so as not to make the rice mushy.
 Sprinkle the toasted almonds over. Serve at room temperature, or chilled.
RECIPE: CURRIED BROWN RICE SALAD
Ingredients:
1/3 cup brown rice
2 tbsp red onion, minced
2 tbsp green bell pepper, minced
1/3 cup chickpeas
3 tbsp coriander, chopped fine
1 tsp sultana/raisins
1 tsp sliced almonds, toasted
For the dressing:
1 tbsp lime juice
1 tsp orange blossom honey
1 tsp extra virgin olive oil
1 tsp commercial curry powder (I used Schwartz medium-hot)
Salt and pepper to taste
Method:
1. Soak the brown rice for a few hours if possible; put the soaked rice in a pan with a well fitting lid and add 2/3 cup water. Bring to a boil, then turn the heat down to a gentle simmer, cover the pan and let the rice cook till all the water has been absorbed (about 15 minutes). Let the cooked rice sit undisturbed for 15 minutes. Once it has cooled, fluff gently with a fork. Reserve.
2. In a medium bowl, mix the salad ingredients bar the toasted almonds. Then add the rice and mix gently to combine.
3. In a small bowl, whisk the ingredients for the dressing. Pour the dressing over the salad and mix again, adding salt and pepper. Taste and adjust the dressing ingredients. Fluff with a fork so as not to make the rice mushy. Serve at room temperature.
Sprinkle the toasted almonds over. Serve at room temperature, or chilled.
RECIPE: CURRIED BROWN RICE SALAD
Ingredients:
1/3 cup brown rice
2 tbsp red onion, minced
2 tbsp green bell pepper, minced
1/3 cup chickpeas
3 tbsp coriander, chopped fine
1 tsp sultana/raisins
1 tsp sliced almonds, toasted
For the dressing:
1 tbsp lime juice
1 tsp orange blossom honey
1 tsp extra virgin olive oil
1 tsp commercial curry powder (I used Schwartz medium-hot)
Salt and pepper to taste
Method:
1. Soak the brown rice for a few hours if possible; put the soaked rice in a pan with a well fitting lid and add 2/3 cup water. Bring to a boil, then turn the heat down to a gentle simmer, cover the pan and let the rice cook till all the water has been absorbed (about 15 minutes). Let the cooked rice sit undisturbed for 15 minutes. Once it has cooled, fluff gently with a fork. Reserve.
2. In a medium bowl, mix the salad ingredients bar the toasted almonds. Then add the rice and mix gently to combine.
3. In a small bowl, whisk the ingredients for the dressing. Pour the dressing over the salad and mix again, adding salt and pepper. Taste and adjust the dressing ingredients. Fluff with a fork so as not to make the rice mushy. Serve at room temperature.
I saw this recipe by Rachel Allen on one of her shows – I like her because she’s lovely and because she’s Irish and because of the way she talks with a gentle Irish accent (rather than a strongly incomprehensible – but still lovely - accent), and because those of her recipes that I’ve tried have worked well - according to my husband. I can’t personally attest to this because while I may cook non-vegetarian dishes for him, I don’t taste them at any point during the process.
Cooking on this basis, coupled with the fact that I’m not experienced in non-veg cookery, is very much a case of “man, I hope this doesn’t kill Pete or my guests”. I’m a bit more confident with cooking chicken now, but I’m not entirely sure about pork/beef unless I’ve pressure-cooked it, and I’m frankly absolutely terrified of fish.
So the one thing that I can happily try, and which usually work, are cakes – and as always, the easier the recipe, the happier it makes me.
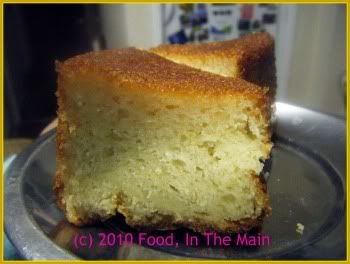
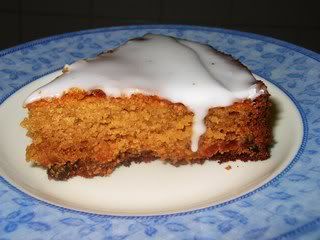
This cake, sharp and lemony and sweet and moist, with a very slightly grainy crumb because of the ground almonds, was so gorgeous that I’m tempted to experiment with making it again but this time without eggs, so that the non-egg eaters among my readers and family can also ooh and aah over it.
It’s easy enough to make, if slightly more time-consuming than my favourite put-all-the-ingredients-in-a-bowl-and-stir type of recipes. But the few extra minutes are SO worth it for this citrusy cake. The rosewater flavour in the soaking syrup is mild, though, even though I used rosehip syrup to try and boost the rose aroma and taste.
Oh well... at least I tried.
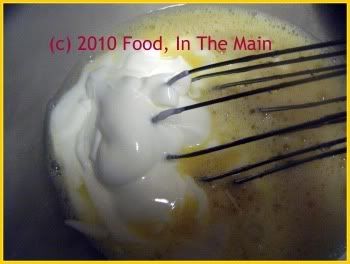
Recipe for: Lemon yogurt cake
 Ingredients:
1-1/2 cups self-raising flour
1 tsp baking powder
1/2 cup ground almonds
3/4 cup caster sugar (I used Tate & Lyle's)
1/4 tsp salt
2 large eggs
1 tbsp honey
1-1/4 cup lightly stirred Greek yogurt (I used Total brand)
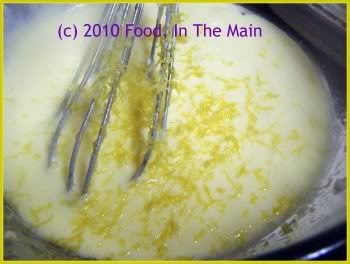
Zest of one large lemon
3/4 cup oil
For the syrup
3/4 cup sugar
1/2 cup water
Juice of one lemon (Use the one you zested)
10 drops rosehip syrup
1 tbsp rosewater (use 2 tbsp if you dont have rosehip syrup)
Tip: Make the syrup while the cake is cooking.
Method:
Ingredients:
1-1/2 cups self-raising flour
1 tsp baking powder
1/2 cup ground almonds
3/4 cup caster sugar (I used Tate & Lyle's)
1/4 tsp salt
2 large eggs
1 tbsp honey
1-1/4 cup lightly stirred Greek yogurt (I used Total brand)
Zest of one large lemon
3/4 cup oil
For the syrup
3/4 cup sugar
1/2 cup water
Juice of one lemon (Use the one you zested)
10 drops rosehip syrup
1 tbsp rosewater (use 2 tbsp if you dont have rosehip syrup)
Tip: Make the syrup while the cake is cooking.
Method:
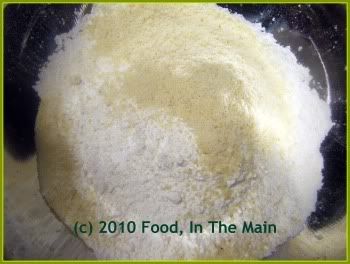
1. Sift together the self-raising flour and baking powder.
 3. Whisk the eggs, add the honey
 then add the yogurt,
 lime zest
 and oil.
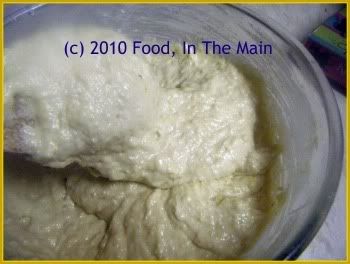
4. Add the dry ingredients to the wet and fold in till combined.
and oil.
4. Add the dry ingredients to the wet and fold in till combined.
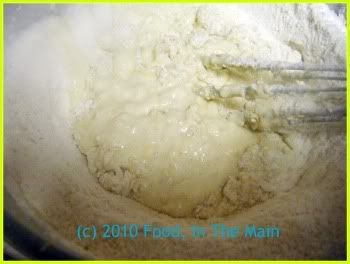 Do not beat. The batter will be quite thick.
 5. Grease an 8” round baking tin with butter, or spray with Pam or other non-stick spray.
6. Pour the batter into the pan and smooth the top, occasionally dipping the spatula in warm water to make the smoothing process easier. Bake in a 180C/350F preheated oven till the cake is cooked (about 30 minutes, but check with a tester.) It should have pulled away slightly from the sides of the pan.
7. Let the cake rest in the tin for 5 minutes, then turn it out onto a wire tray placed over a plate.
5. Grease an 8” round baking tin with butter, or spray with Pam or other non-stick spray.
6. Pour the batter into the pan and smooth the top, occasionally dipping the spatula in warm water to make the smoothing process easier. Bake in a 180C/350F preheated oven till the cake is cooked (about 30 minutes, but check with a tester.) It should have pulled away slightly from the sides of the pan.
7. Let the cake rest in the tin for 5 minutes, then turn it out onto a wire tray placed over a plate.
 8. Cool the cake for a bit, then while it’s still warm, poke holes all over it with a skewer, including the edges of the cake.
 9. Spoon the lemon-rosewater syrup little by little evenly over the cake, waiting till it’s absorbed before adding more. Continue till the syrup is used up. Allow the cake to sit for 30 minutes before cutting.
 Serve the cake at room temperature.
 To make the syrup:
Place the sugar and water in a saucepan and heat till the sugar dissolves. Bring the sugar-water to a boil and let it bubble on medium-high for 7 minutes. Add the lemon juice, boil for 2 more minutes, then turn the heat off and let the syrup cool. When the syrup is cool, stir in the rosewater and rosehip syrup. Reserve till required.
RECIPE: LEMON YOGURT CAKE
Ingredients:
1-1/2 cups self-raising flour
1 tsp baking powder
1/2 cup ground almonds
3/4 cup caster sugar
1/4 tsp salt
2 large eggs
1 tbsp honey
1-1/4 cup lightly stirred Greek yogurt (I used Total brand)
Zest of one large lemon
3/4 cup oil
For the syrup:
3/4 cup sugar
1/2 cup water
Juice of one lemon (Use the one you zested)
10 drops rosehip syrup
1 tbsp rosewater (use 2 tbsp if you dont have rosehip syrup)
Tip: Make the syrup while the cake is cooking.
Method:
1. Sift together the self-raising flour and baking powder.
2. Stir in the ground almonds, caster sugar and salt.
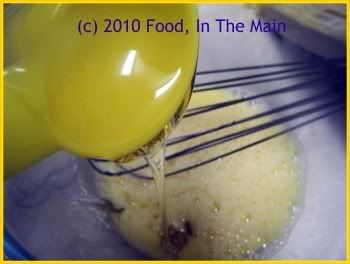
3. Whisk the eggs, then whisk in the honey, yogurt, lime zest and oil.
4. Add the dry ingredients to the wet and fold in till combined. Do not beat. The batter will be quite thick.
5. Grease an 8” round baking tin with butter or spray Pam or other non-stick spray.
6. Pour the batter into the pan and smooth the top, occasionally dipping the spatula in warm water to make the smoothing process easier. Bake in a 180C/350F preheated oven till the cake is cooked (about 30 minutes, but check with a tester.) It should have pulled away slightly from the sides of the pan.
7. Let the cake rest in the tin for 5 minutes, then turn it out onto a wire tray placed over a plate.
8. Cool the cake for a bit, then while it’s still warm, poke holes all over it with a skewer, including the edges of the cake.
9. Spoon the lemon-rosewater syrup little by little evenly over the cake, waiting till it’s absorbed before adding more. Continue till the syrup is used up. Allow the cake to sit for 30 minutes before cutting. Serve the cake at room temperature.
To make the syrup:
Place the sugar and water in a saucepan and heat till the sugar dissolves. Bring the sugar-water to a boil and let it bubble on medium-high for 7 minutes. Add the lemon juice, boil for 2 more minutes, then turn the heat off and let the syrup cool. When the syrup is cool, stir in the rosewater and rosehip syrup. Reserve till required.
RECIPE: LEMON YOGURT CAKE
Ingredients:
1-1/2 cups self-raising flour
1 tsp baking powder
1/2 cup ground almonds
3/4 cup caster sugar
1/4 tsp salt
2 large eggs
1 tbsp honey
1-1/4 cup lightly stirred Greek yogurt (I used Total brand)
Zest of one large lemon
3/4 cup oil
For the syrup:
3/4 cup sugar
1/2 cup water
Juice of one lemon (Use the one you zested)
10 drops rosehip syrup
1 tbsp rosewater (use 2 tbsp if you dont have rosehip syrup)
Tip: Make the syrup while the cake is cooking.
Method:
1. Sift together the self-raising flour and baking powder.
2. Stir in the ground almonds, caster sugar and salt.
3. Whisk the eggs, then whisk in the honey, yogurt, lime zest and oil.
4. Add the dry ingredients to the wet and fold in till combined. Do not beat. The batter will be quite thick.
5. Grease an 8” round baking tin with butter or spray Pam or other non-stick spray.
6. Pour the batter into the pan and smooth the top, occasionally dipping the spatula in warm water to make the smoothing process easier. Bake in a 180C/350F preheated oven till the cake is cooked (about 30 minutes, but check with a tester.) It should have pulled away slightly from the sides of the pan.
7. Let the cake rest in the tin for 5 minutes, then turn it out onto a wire tray placed over a plate.
8. Cool the cake for a bit, then while it’s still warm, poke holes all over it with a skewer, including the edges of the cake.
9. Spoon the lemon-rosewater syrup little by little evenly over the cake, waiting till it’s absorbed before adding more. Continue till the syrup is used up. Allow the cake to sit for 30 minutes before cutting. Serve the cake at room temperature.
To make the syrup:
Place the sugar and water in a saucepan and heat till the sugar dissolves. Bring the sugar-water to a boil and let it bubble on medium-high for 7 minutes. Add the lemon juice, boil for 2 more minutes, then turn the heat off and let the syrup cool. When the syrup is cool, stir in the rosewater and rosehip syrup. Reserve till required.
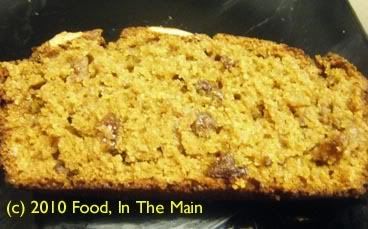
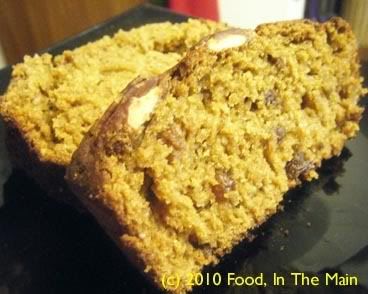
If someone gave you an orange, an apple, some brewed coffee, cloves and some honey, would your first thought be: “Oooh, now I can bake a cake!”? No? Thought not.
No surprise, it would certainly never have crossed my mind that these were actually ingredients for a very special cake, had I not come across these items in a recipe on the Net, led there by a series of blog hops (starting with Shankari & Rajesh’s blog, Sacramento Spice, where she has a regular feature called “Sundays with Marlena Spieler”, showcasing Jewish recipes).
Eventually I moved on to google for general information on Jewish culture and Jewish food traditions, and pretty soon I was goggling at a cake recipe that called for the apparently random selection of ingredients I'd mentioned earlier. This cake is traditionally baked on the Jewish New Year, or Rosh Hashanah, and symbolises a sweet start to the year.
When I made the cake, even knowing that it was from a tried and tested traditional recipe didnt stop me wondering how it would turn out. I had to use a small can of mandarin orange rather than the whole fresh orange (peel pith and all) the recipe called for (because I didnt have it), and I substituted strong instant coffee for the brewed stuff (because ditto)... and decorated the top of the cake with whole pecans, but those were the ONLY changes from the original.
The cake was surprisingly good - surprising to me, because I couldn't help considering the combination of ingredients somewhat outlandish - very moist and with deep flavours, and it stayed that way for the couple of days that it survived before being demolished.
It's too late - or maybe too early? - to offer good wishes for a happy Jewish New Year (because it occurs around September)... and it's wee bit too far into this new year 2010 as well for new year wishes, but I'll take the opportunity to wish everybody many happy cake experiences, both baking and eating, for the year and the decade to come. I can do that, can't I?
Recipe for: Honey cake
Ingredients:
1/4 cup vegetable oil
1/4 cup dark brown sugar
1/4 cup dark honey
1 egg
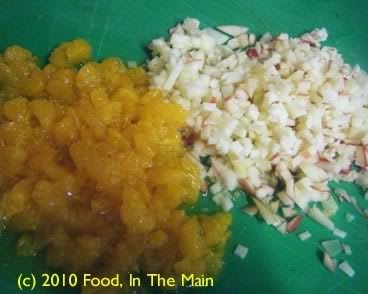
1 small orange, left unpeeled and cut up small (I used a small tin of chopped mandarins without peel)
1 small apple, cored and chopped (no need to peel)
1/2 cup strong brewed coffee (I used instant)
1-1/2 cups flour
3/4 tsp baking soda
1/2 tsp baking powder
1/4 tsp allspice
1/4 tsp cinnamon
1/8 tsp ground cloves
1/8 tsp salt
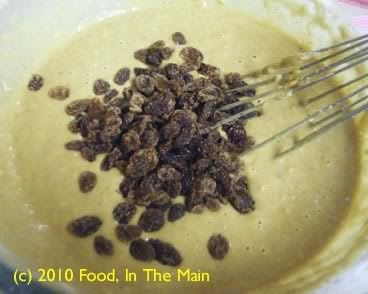
1/4 cup raisins
15-20 whole pecan nuts (optional)
Method:
1. Preheat oven to 350F/180C. Spray a nonstick 1.5 pound loaf pan with Pam.
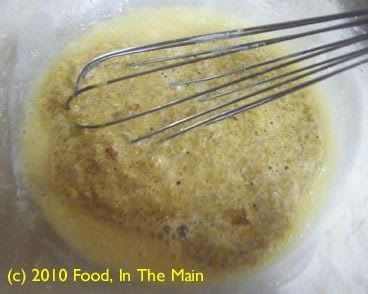
2. In a large bowl, combine the oil, sugar, honey and egg.
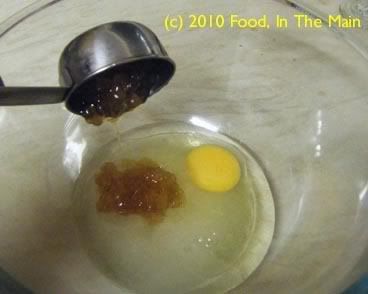
Beat till mixed. (I used a manual beater).
3. In a blender, combine the orange and apple, add the coffee
and puree the mixture. It doesn't have to be very smooth.
4. In another bowl, place the flour, baking soda, baking powder, spices and salt.
5. Add a third of the fruit and coffee mix to the oil-honey-egg mixture, stirring well.
6. Add a third of the flour mixture, stirring again.
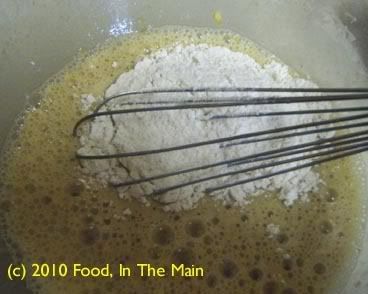
Continue adding in this manner till all the ingredients are combined.
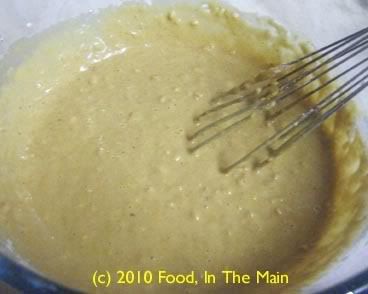
7. Add the raisins and stir them in.
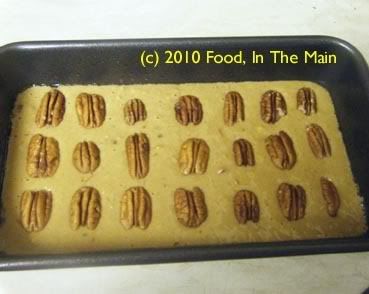
8. Pour the batter in a loaf pan. Arrange the pecan nuts on top, pressing them very gently into the batter.
Bake for 35-40 minutes, or till a cake tester or toothpick inserted in the cake comes out clean.
10. Let the cake stay in the pan for 5 minutes, then turn out onto a wire rack and cool completely.
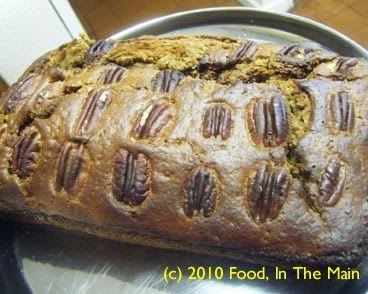
Serve at room temperature.
I wish I had something witty and clever to say about green beans (or French beans, as they are also known), but I don’t. All I can say is that I love them – the fresher they are, the better. I could never have imagined myself eating plain boiled vegetables – I always thought that would be too bland and boring. But what do you know, the yellow French beans that I’ve grown this summer have mostly been eaten exactly like that... picked from the plant, washed, boiled, sprinkled with a little salt and absentmindedly nibbled down while doing other things.
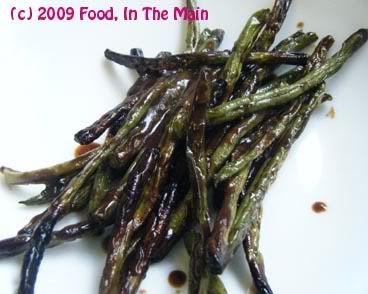
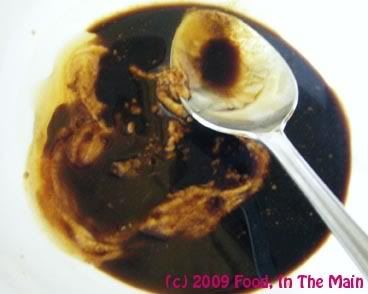
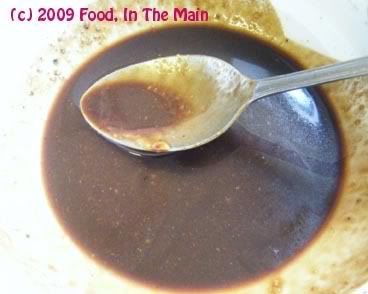
Given that I liked green beans at their plainest, I had no qualms about not liking them roasted in the oven – although, to be fair, it would NEVER have occurred to me to actually roast green beas. It was Nupur’s post on addictive green beans that set me on that particular track... and the recipe is 99% like hers, except that I used a balsamic vinegar reduction (left over from a previous recipe I’d tried).
Pete was dubious about the edibility of roasted green beans, but I made him try them anyway... and I think perhaps that the balsamic vinegar syrup tilted the balance in favour of the beans. What a lovely recipe!
Recipe for: Roasted green beans
Ingredients:
500gm green beans, topped and tailed
1 tsp olive oil
Salt and pepper to taste
For the dressing:
1 tbsp Dijon mustard
1 tsp honey
2 tbsp balsamic vinegar syrup
Method:
1. Toss the green beans with the olive oil, salt and pepper. Roast at 180C on a baking sheet till they acquire black spots.
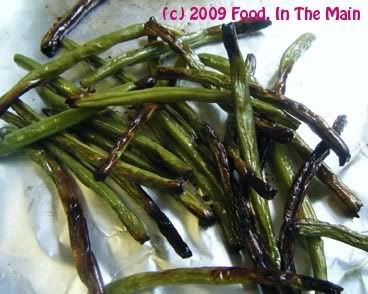
Remove from the oven and let cool for 5 minutes.
2. Place the dressing ingredients in a small bowl and whisk together.
Adjust the flavour to suit your taste, if required.
3. Place the beans on a serving plate and pour on the dressing, then serve immediately.
I got this recipe from a cookery book that I've had since I was about 14, I think. It's probably the first cookbook that I ever bought... and probably the least useful at the time to me, because it was a book on how to bake cakes. Worse, it was a foreign book and by that I mean it was not published in India - the recipes called for all sorts of ingredients that might have been common in the West but certainly werent easily available at home then, and the measurements were in ounces which certainly didnt make sense to me!
But I bought the cookery book anyway, for the princely sum of Rs 75. I didnt even have an oven, but I bought the book. How could I resist? It had such tantalising glossy photographs of exotic cakes, cookies and biscuits and the recipes sounded so exciting to make, plus they were droolably readable! (I digress as always - but I think I've missed my calling as a book reviewer! Any takers, after that very original description?)
I tried one recipe - a coffee-flavoured cake with icing - from my book when my mother got a round Bajaj oven, but I have to say it wasnt the howling success I wanted it to be. Well okay, there was some howling involved but that was from me because I was so disappointed. The cake was crusty at the bottom and not quite cooked through (the Bajaj oven's fault because the heat source was only from the bottom!) and the coffee icing was runny and wouldnt set (the summer heat's fault).
All in all, not the best start to a baking career, so it was quite a while (many years) before I tried any baking again. I dont quite know why I expected to start out being a master baker at my very first baking attempt, but in hindsight it can be put down to youthful overconfidence and unfamiliarity with life's downs!
But I still loved the cookbook. Every so often I would thumb through it, drooling at the photos and wondering at ingredients like "demerara sugar", "lemon curd", "golden syrup", "molasses" and the like - all items that I had never come across in all my life.
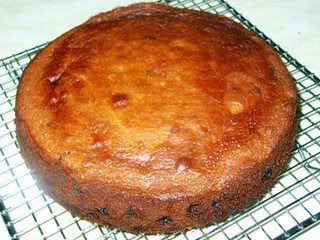
One cake that I'd wanted to make used rosewater as the main flavouring ingredient and I thought I could try it out at last, now that I had a proper oven, not to mention many cakes under my belft (not literally, folks!). However, every time I went to the Indian shops, the rosewater kept getting forgotten. Finally the right moment came along... the perfect mix of time, desire and the availability of the required ingredients in my pantry.
I'm so glad to say that the cake came out as gorgeous as I could have wanted. The honey content in it made the cake burn a little more than was ideal but luckily it was still very tasty. The delicate flavour of roses, especially in the icing, was sensational - a bit like eating Turkish delight but not so sweet or overpowering. I think this is one of the few cakes that I found delicious enough to warrant a second helping rightaway.
Recipe for: Rosewater cake
Ingredients:
1 cup plain flour
1 tbsp baking powder
2/3 cup caster sugar (or 1/2 cup if you prefer it less sweet)
1/2 cup butter, softened
4 tbsp clear honey
2 eggs, lightly beaten
4 tbsp rosewater
4 tbsp milk
1/2 cup sultanas
For the icing:
1-1/2 cups icing sugar
4 tbsp rosewater
1 tbsp lemon juice
Method:
1. Grease a 6" round cake tin and with silicone paper. Sift the flour with the baking powder into a large bowl.
2. Whisk the butter, sugar and honey together until pale and fluffy. Add the eggs, 2 tbsp at a time, beating well between additions.

3. Fold in the flour and baking powder, then add the rosewater and the milk, turning the mixture over several times. Then mix in the sultanas.
4. Pour the mixture into the prepared cake tin and bake at 180C until the cake tests done. Check the top of the cake after about 20 minutes - if it looks like turning brown too quickly, cover the top with foil or brown paper to prevent burning.
5. Cool the cake for 5 minutes, then remove from the tin and cool completely on a wire rack.
6. Sift the icing sugar into a bowl, add the rosewater and beat until smooth. If the mixture is too thick, add the lemon juice and beat again. (If it's too thin, add more icing sugar). The icing should be thick enough to coat the back of a spoon without dripping off, but should still be pourable.
7. Pour the icing over the top of the cake and let it drip down the sides.
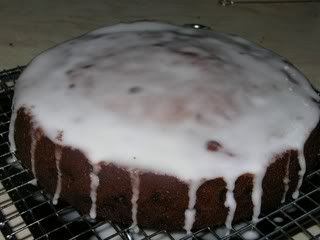
Smooth the top if necessary with a palette knife dipped in hot water. Let the icing set for a couple of hours before cutting the cake.
I owe this one entirely to Julie, of A Finger in Every Pie and her gorgeous recipe for Wallflower Loaf. There are only a few changes from her recipe, plus I didnt bake it in a loaf tin - I used a square cake pan instead. But oh my, what a wonderful end result!
As the lovely Julie says, it's NOT fruitcake - but it's so much better than that, if you ask me. I absolutely love a chewy-nutty texture and this concoction is the very embodiment of that particular combination. It IS sweet, yes, but since I cut the "cake" into small bars, they were perfect for delivering just enough sweetness to alleviate the sugar fix without going over-the-top - and of course the nuts provided a contrast to the sweet taste.
Julie used walnuts in her recipe, and Turkish apricots and medjool dates. I didnt have anything as exotic - just "Tesco's best" seedless dates and tangy dried apricots. I can only imagine how much better Julie's Wallflower Loaf must have tasted, because humble though my ingredients were, they still made for a really wonderful outcome.

Oh, and I didnt use walnuts either - I substituted pecans because I think walnuts taste rather too bitter. Julie had also mentioned that the cake tends to burn easily, so I was extra careful with it right from the start (I have an unfortunate tendency to over-bake things). I started baking the cake at about 170C and after 30 minutes or so, I lowered the temperature another 10 degrees. The end result was near perfect. I didnt add any cinnamon or nutmeg, but the spices were barely missed, the bars were so addictively good!
Gotta say it again - thanks to Julie for a gorgeous, EASY recipe!
Recipe for: Wallflower "cake" bars

Ingredients:
1-1/2 cups seedless dates, cut in half
2 cups dried apricots, cut in half
1-1/2 to 2 cups pecans, broken in half
3/4 cup flour
1/4 tsp. baking powder
1/4 tsp. baking soda
1/4 tsp. salt
1/2 cup wildflower honey (I used orange blossom honey)
2 eggs
1 tsp. vanilla
Grated zest of 1 orange
Method:
1. Line a 6" or 7" square cake pan and line with parchment paper. Spray lightly with oil.
2. Combine the dried fruits and nuts together.

3. Combine the flour, baking powder, baking soda and salt in a bowl.
4. In another large bowl, beat the honey, eggs, vanilla and orange zest together.
5. Add the flour to the beaten egg and honey mix to make a thick batter.
6. Add the chopped dried fruits and nuts to the batter and stir till they are thinly coated. It will look like there is way too little batter, but like Julia said, it rises up around the fruits and nuts JUST right.

7. Pour the mixture into a 6" square baking pan that has been lined with silicone paper and press down lightly.

8. Put the pan into the oven at 170C and let the cake bake for 30 minutes or so. Then lower the heat by 10 degrees and let it cook till a skewer inserted in the middle comes out clean.

9. Let the cake cool completely in the pan before slicing it into bars.

