skip to main |
skip to sidebar
Some time ago, we went to a little Indian takeaway restaurant to see if it was any better than the others that we had visited (short version – it wasn’t). When I say Indian, of course, I mean Bangladeshi… most of the take-aways are (over)run by Bangladeshi folks. No, I actually mean Bangladeshi men, because I’ve never seen any women working at any of these take-out/eateries (shall we just say “takeouteries”?), ever. Anywhere.
Anyway, the menu had palak paneer (translated to “spinach with cheese” for the edification of non-desi types) listed under side dishes, so we ordered it, as Pete likes paneer.
What we got, however, was as far away from paneer as… well, as cheddar cheese. Because that’s what it was – pureed spinach with over-melted (read crusty) cheddar cheese on top. It wasn’t inedible, but it also wasn’t paneer. When I questioned the server about this travesty of a North Indian dish, he actually insisted that it was what I’d ordered - spinach with cheese. Well, yeah. Technically, it was, I suppose… but it wasn’t paneer.
I wasn’t inclined to take it further with him because for one, Pete thought the dish was okay, and for two, it wasn’t like we’d paid through our noses for the meal… but of course I knew we’d never go back to that particular restaurant again.
A few weeks later, I went to our usual takeouterie for some plain naan (which they make really well). While I was waiting for my order, the restaurant guy engaged me in some idle chat, trying to get me to order some of their main dishes as well. When he recommended the palak paneer, I told him about our cheddar experience and he fell about laughing, calling his mates to hear all about it as well. They all wanted to know which restaurant we’d been to, but I decided not to fuel their gossip quite that much, so I was deliberately vague.
They had a terrific time laughing about my experience (which made me wonder why, as it wasn’t THAT funny! Or perhaps they were bored and this was their only entertainment for the week), but he recovered enough before I left to say to me: “Madam, this is why you should come only to our takeaway”.
What I thought was: “This is why I should make palak paneer at home” – but I didn’t say it to him. I went home instead, clutching my oven-hot plain naan.
And some considerable time later, I made palak-matar-paneer - which, translated into posh restaurant-speak for non-desi readers is “Lightly sautéed cubes of Indian cheese, cooked with fresh green peas and served in a mildly spiced, silky spinach gravy finished off with a swirl of fresh cream”.
Does that description make you want to lick your monitor screen, or at least your lips? :o)
Recipe for: Palak matar paneer

Ingredients:
2 medium tomatoes, chopped (reserve two tbsp)
1 medium tomato, sliced
2 medium onions, sliced
4 cups baby spinach leaves
1/2 cup cooked fresh green peas
1 cup paneer, cubed
2 cloves garlic
3 fresh green chillies (or to taste), chopped
1/2 tsp garam masala
1 tsp cumin seeds
1 tsp coriander powder
Salt to taste
2 tsp oil
1 tbsp coriander leaves, roughly chopped
A few tbsp cream for garnish (optional)
Method:
1. Heat 1 tsp oil in a pan and lightly fry the paneer pieces till they turn a pale gold. Drain and reserve.

2. Add the remaining tsp of oil to the pan and when it's hot, fry the chopped green chillies, cumin seeds and garlic for 30 seconds.
3. Add the sliced onions to the pan and fry till they turn soft and pale brown. Then add the chopped tomatoes and fry till they begin to turn mushy. Toss in a handful of spinach leaves, stir till they wilt, add another handful of leaves and continue till all the spinach is wilted.

4. Let the mixture cool for a bit, then blitz it in a food processor along with the remaining sliced tomato,

till it's a smooth puree. You wont need to add any extra water.

5. In the same pan, add the reserved 2 tbsp chopped tomatoes and fry them till they just begin to break down.

6. Add the spinach puree to the tomatoes in the pan, stir in salt to taste along with 1/4 cup water, and let the sauce simmer on medium heat for 5 minutes.

7. Toss in the paneer now and simmer the mixture for two minutes.

8. Add the cooked green peas and garam masala, stir it in.

Leave on the hob for a minute longer, then turn the heat off. Garnish with chopped coriander.

9. Just before serving, swirl some fresh cream into the gravy (if desired) and serve hot with rotis or jeera rice.
So, it turns out that “slow rising” in the refrigerator really means “no rising at all whatsoever, not a millimetre, no way no how, uh-HUH”, as far as I’m concerned.
But wait, that’s not the beginning. In the beginning there was dough, which happened when flour and a bit of yeast and some water were stirred together.
This time around, though, I thought I would let it rise in the fridge overnight, to see if a slow rising would really give rise to a better crumb. So the dough went into the fridge one Wednesday evening, and because I really don’t have the time to spare for baking bread in the morning on workdays, it remained there all the next day as well.
When I came back from work on Thursday evening, I peeked into the fridge and found the dough still sitting there in its bowl, giving an astonishingly good impression of a large unresponsive lump. Thinking that it perhaps needed more fridge time, I left it there overnight. Friday morning, it still hadn’t moved from its original position, so I took it out of the fridge and placed it in the conservatory with a towel over the top of the bowl. That Friday, of course, turned out surprisingly warm with the sun shining all day. In the closed conservatory, the temperature must have been quite high, so the dough had risen nicely, as it was meant to.
I did the smell test to make sure that the dough hadn’t turned from friendly yeasty to dangerously beasty, and found it had a nice sourdoughy sort of aroma. I tipped it out of the bowl and briefly kneaded it on a well-floured surface, greased a length of silicone paper, transferred the dough on to that and put the whole thing back in the bowl, paper and all, for the second rising. (Odd phrase, that... has the ring of something supernatural in a religious sort of way, doesn’t it?). Only, as it turned out, I’d forgotten we were going out, so I couldn’t leave the dough outside as I wouldn’t have the time to bake it later.
Back it went into the fridge.
The next day, Saturday, the dough was as I had left it the previous evening – cosy in the bowl, cocooned in its wrapping of silicone paper, and not even a hundredth of a millimetre higher. Evidently it resented being out in the cold.
So I took it out and put it back in the conservatory so that it could thaw out and begin the second uprising. (Yeah, if that sounds like a battle, at that point it was so a battle between me and the dough!) It stayed out there for 4-5 hours, but at least it had risen to the challenge. I gave it a second smell test, which it passed without much trouble. It seemed rather more sticky inside than the first time around, with the top surface being kind of dry, like a skin had formed on it.
By this time I had no idea what would happen to the dough if I baked it – would it explode in the oven? The only way to find out was to bake it.
I turned on the oven to 220C, and when it had reached the right temperature, I turned out the dough into my Pyrex casserole, pulling it off the silicone paper…
… and then realisation struck. The bowl was meant to have heated up in the oven before the dough was put into it to bake.
As Homer Simpson would say in this situation - D’oh! (oh yeah, pun intended)
Oh well. Too late to do anything about it now, so I popped the covered casserole into the heated oven and let the bread bake for 40 minutes (10 minutes extra to make up for the casserole not being pre-heated), then uncovered it and baked it for 20 minutes more – by which time the top of the bread was beginning to look close to being burnt. Hastily removed from the oven, the loaf looked allright.
Fifteen impatient minutes later, I tried to up-end the casserole to see if the bread had stuck to it or would fall out (as per the first time). It didn’t pop out. Uh-oh. That probably meant disaster.
I waited another 15 minutes, then tried to prise out the bread with a strong metal spatula… and to my surprise, I found that the bread had stuck to the bottom of the dish in only one bit. After some huffing and puffing, I managed to lever the loaf out whole, with only that little burnt bit left stuck to the casserole – which I thought was a miracle in itself.
And the best part? The bread tasted just as lovely as the first time, despite everything that had happened to the dough. So I’m here to confirm that it really IS quite difficult to ruin no-knead bread, no matter how disorganised you are as a baker. I will also add that the dough probably didn’t become beasty because of having been refrigerated off and on, rather than being outside for 3 days straight.
If any of you find yourself baking this bread in my patented method as described above, for heavens sake remember to grease the casserole dish before putting the dough in it (but ONLY if you’ve neglected to pre-heat your chosen baking dish). Otherwise be prepared to do battle with the casserole dish for possession of the baked bread because by golly it will resist you with every ounce of gluten it has.
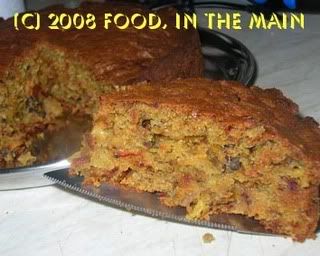
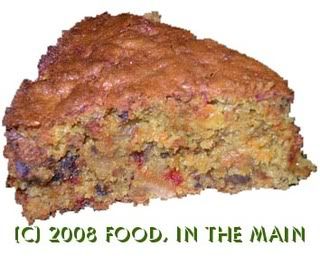
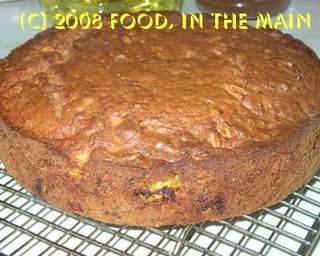
I got the basic recipe for this cake from Joy of Baking, one of my favourite blogs for cake porn. I’ve made carrot cake a few times before, but I like trying out new variations when I come across them, and the tip of adding crushed pineapple was tempting. Then, because there was a small beetroot in the fridge, I reduced the amount of carrot required and made up the deficit with the beet, grated. Well, why not? I just wanted to see if the beetroot would make its presence felt and if anybody would object to it in a cake.
As it turned out, nobody could tell there was beetroot in it. The batter turned pink thanks to the addition of the beetroot but the end result didn’t have the red colour that I imagined would show up. I could taste the beetroot, but perhaps it’s because I knew it was there.
I do like to sneakily make people eat things they profess not to like, wait for them to say “mmmm… that’s nice” and then hit them with the reality. (It gives me a certain satisfaction which probably has its roots in sheer meanness!) This formula worked perfectly with Pete and his daughter (yet again, haha).
Unfortunately for Pete, he cant play that trick on me… that sort of thing doesn’t work because my palate is very discerning and can pretty much always tell if there’s something I don’t like in my food. Nobody but NOBODY can sneak aubergine/brinjal/eggplant into anything I eat - and folks, this aint a challenge, so don’t force me to throw up a rainbow-coloured yawn. (I came across that phrase recently in a novel set in Australia – isnt that just the prettiest euphemism for a very unpretty physical reaction? I just HAD to use it myself!)
As far as beetroot in cake is concerned, I would say that a judicious use would be the best way. I don’t think I would care for a cake made entirely with beet – that would most likely be a bit too strong a flavour to mask with anything else.
Recipe for: Pineapple-beet-carrot cake
1/2 cup brazil nuts and walnuts, coarsely chopped
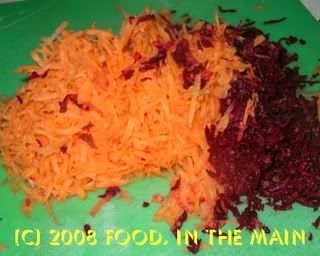
1 cup carrots, grated
1/2 cup beetroot, grated
1-1/4 cup all-purpose flour
1/2 teaspoon baking soda
1 teaspoon baking powder
1/4 teaspoon salt
1/2 tsp allspice + 1/2 tsp cardamom powder
2 large eggs
1/2 cup granulated white sugar
6 tbsp oil vegetable of sunflower oil
1 heaping tbsp ghee
1 tsp pure vanilla extract
1/2 cup crushed pineapple, well drained
Method:
1. Preheat oven to 350F (180C). Spray 8” round pan with non-stick spray and line the bottom with silicone paper.
2. Toast the chopped nuts on a skillet, stirring constantly, till the nuts are lightly browned and fragrant.
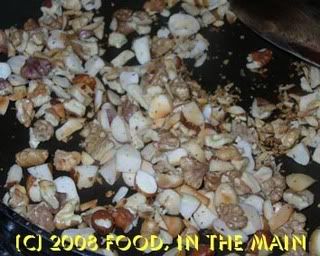
Let cool.
3. Peel and finely grate the carrots and beetroot. Set aside.
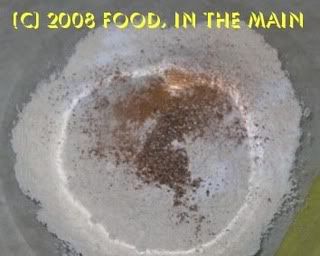
4. In a separate bowl whisk together the flour, baking soda, baking powder, salt, and allspice & cardamom. Set aside.
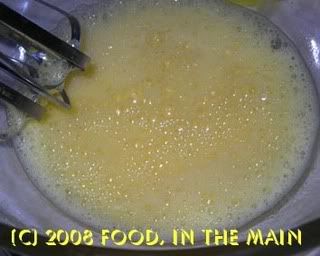
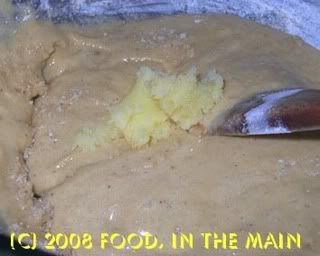
5. Beat the eggs until frothy.
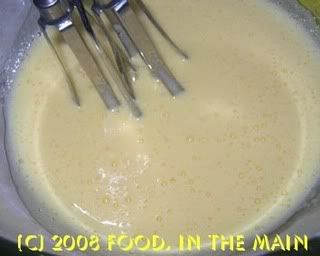
6. Gradually add the sugar and keep beating until the batter is thick and light colored.
7. Add the oil in a steady stream and then beat in the vanilla extract. Add the flour mixture and beat just until incorporated.
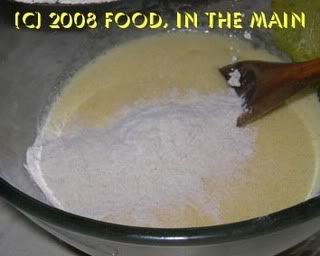
Add the ghee and mix in.
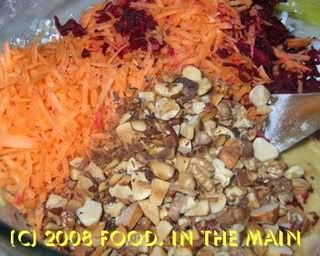
8. With a large rubber spatula fold in the grated carrots and beet and chopped nuts.
9. Stir in the crushed pineapple.
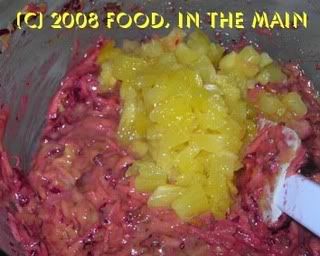
Spoon the batter into the prepared cake pan.
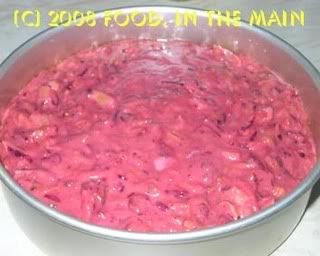
Bake 30 minutes or until a toothpick inserted in the centre comes out clean.
10. Remove from oven and let cool on a wire rack. After about 5-10 minutes invert the cake onto the wire rack, remove the pan and silicone paper, and then cool completely before cutting.