skip to main |
skip to sidebar
I love hyacinth beans (or avarakkai, in Tamil). The fresh green ones, I mean. I could probably eat a ton of them if only I could lay my hands on them. Unfortunately they're only available at South Indian (or Sri Lankan) greengrocers down South, and even then not all of the time - I think. I don't really know what the season is for these tasty beans, or I could at least try and make the trip to coincide with their availability!
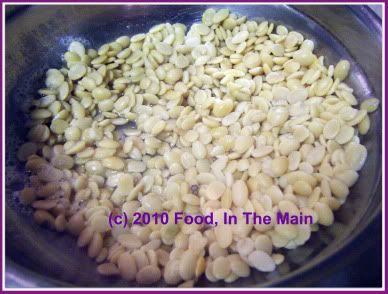
I've had a small pack of vall beans (the dried ones) for YEARS, I think. I bought them I don't know when on a whim, without knowing what they were, and then proceeded to ignore them completely. I didn't ignore them on purpose - I'd merely forgotten about their existence. Then I rediscovered them at the bottom of the box in which I store my unopened supplies, and brought them back to the surface to try out.
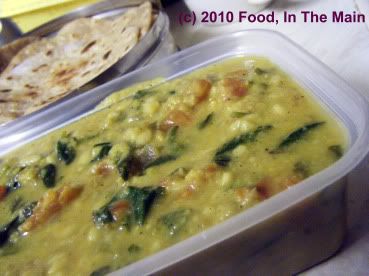
But it was when I found out that val beans are the dried seeds (? right word?) of avarakkai that I was galvanised into cooking with them. (When I say galvanised, I mean my version of it. Other people when galvanised might immediately do whatever they've been galvanised to do, but I tend to take my time. Continental drift has nothing on it.) I decided to make dal with the beans and the last of a bag of fresh spinach.
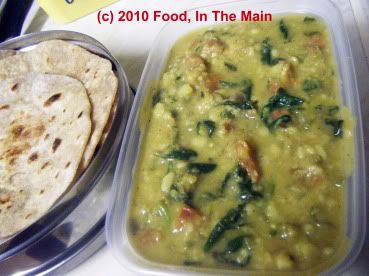
Since I didn't how long the dal would take to cook on the hob, I pressure-cooked it. When I opened the container, I got quite excited as there was a distinct aroma of avarakkai... which in retrospect need not have come as quite such a surprise because they were after all avarakkai beans! The finished dish had an underlying flavour of the hyacinth beans, which I liked very much. I couldn't help wondering, though, if whole vall dal would have a stronger flavour... so I guess I'll have to be on the lookout for those babies!
Recipe for: Dal with vall beans
Ingredients:
1 cup vall dal
2 tomatoes, chopped
2 small onions, chopped finely
2-3 green chillies, minced (to taste)
1 clove garlic, minced
1/2 tsp ginger, grated
2 cups spinach
1 tsp garam masala (I used Kitchen King)
1 tsp cumin-coriander powder
salt to taste
2 tsp oil
Method:
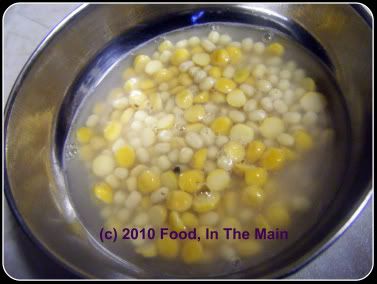
1. Pressure cook the vall dal for three whistles till done. Reserve.
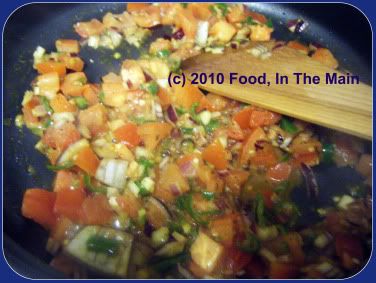
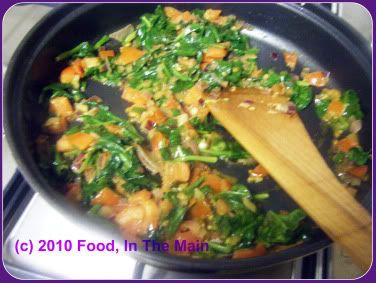
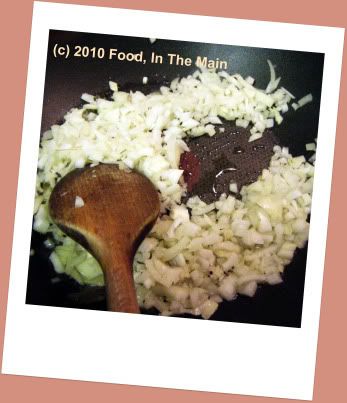
2. Heat the oil in a pan and add the onions, ginger, green chillies and garlic. Saute for 3-4 minutes, then add the tomatoes. Fry till the tomatoes are soft and mushy.
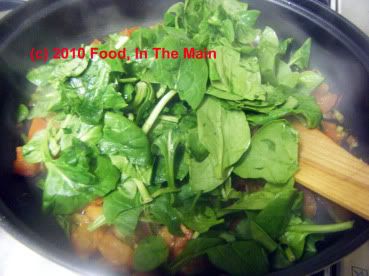
3. Add the spinach now, cover with a lid and let it wilt on med-low heat.
4. Add the garam masala, cumin-coriander powder and mix it in.
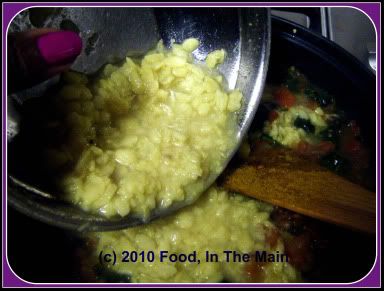
5. Finally, pour in the cooked vall dal and stir to distribute the masala evenly. Add salt to taste.
6. Serve hot with rotis or rice.
This is the third recipe using flaxseeds that I'm posting here in as many weeks... I haven't gone totally flaxseed crazy, honest. I do have other posts to write, and I have made other things (NOT using flaxseeds!) that need to be posted on my blog. But I'm still feeling an inexplicable antipathy to editing the darn photos, especially if there are lots of photos to choose from, and lots of photos to use with each recipe. Part of the problem is having to use a new photo editing tool (Picnik, free and online, which Nupur mentioned in a comment and which I latched on to quicker than quick) which seems slower than what I was using. Not that Picnik is difficult to use, it's just different... and yes, I'm just cribbing because I can... simbly only.
So yeah, before my solitary (but persistent) troll, who has cribbed before about the number and the quality of pics I use for each recipe, suggests that I use NO pix at all and thus resolve my anti-editing issues, I hasten to say that YES, that would be one solution. The other solution would be to perhaps cut down on the number of pics for each recipe... but I'm averse to doing that too. What I need is for someone to take over and kindly edit my photos. Actually what I need is someone who will take AND edit the photos, thereby hopefully making my blog a thing of beauty... but sadly that is not going to happen any time soon. *deep sigh* So until then I'm going to be posting recipes which have only a few instructions, and therefore only a few photos!
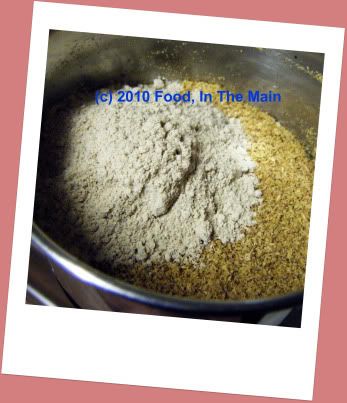
So, about today's recipe - the upma is really quite nice. But I'd probably powder the roasted flaxseeds next time, so as to release their aroma and flavour. (This is an older recipe than the previous one, and I hadn't discovered that powdered roasted flaxseeds are far superior in taste and aroma!)
PS. If you're wondering why there are no trolly comments to be seen on any of my posts, it's because I delete them. Not because they're critical of my efforts, but because the troll chooses to stay anonymous. I'll be damned if I let a coward take up any space on my blog.
Recipe for: Flaxseed aval/poha upma

Ingredients:
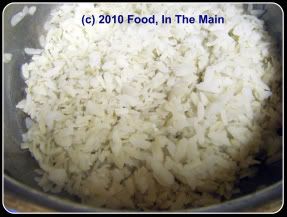
1 cup aval/poha/beaten rice
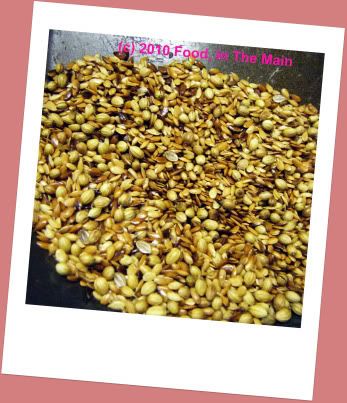
2 tbsp golden flaxseeds/linseeds
1 tsp chana dal
1 tsp urad dal (I used whole)
1 medium onion, chopped finely
3-4 green chillies (or to taste), sliced finely
3 tsp oil
2 tbsp chopped coriander leaves
Handful of red peanuts with skin
salt to taste
lemon juice to taste
Method:
1. Soak the chana dal and urad dal in hot water for 15 minutes.
2. Rinse the aval/poha in water once or twice, sprinkle with 3-4 tbsp water and set aside covered so that the aval can absorb the water and rehydrate. The soaked aval/poha should be soft but not gooey or sticky.
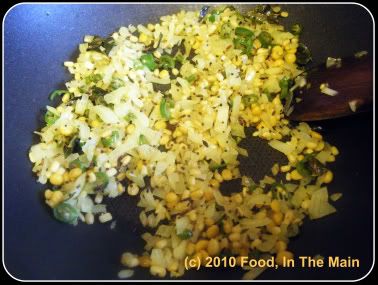
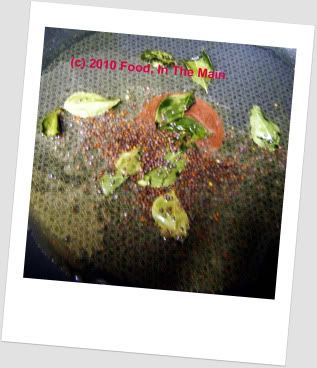
3. Heat 2 tsp oil in a pan and add the asafoetida powder, mustard seeds and green chillies. Cover the pan and let the mustard seeds pop. Add the chana and urad dals (drained), and fry them for 3-4 minutes. Then add the chopped onions and stir-fry till they are soft and cooked.
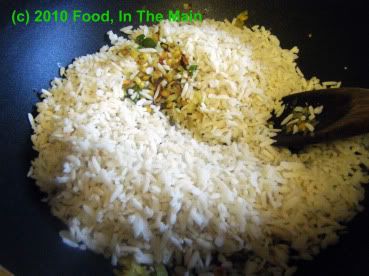
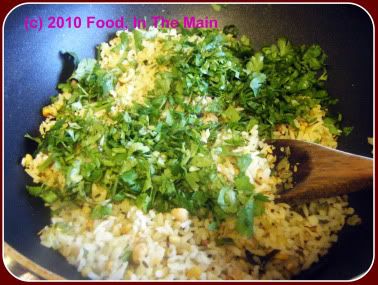
4. Add the soaked softened aval/poha to the pan and stir it in.
5. Add the dry-roasted linseeds/flaxseeds and mix that in as well, along with salt to taste.
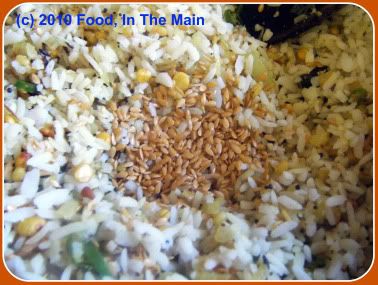
and the chopped coriander. Sprinkle lemon/lime juice to taste and mix it in.
6. Fry the peanuts separately in the remaining tsp oil till they emit a nice aroma and the skin turns a shiny dark red. Scatter them over the poha and serve the finished upma for a snack or a light meal.
This is the recipe which changed my mind about the tasteworthiness of flaxseeds/linseeds and convinced me that these seeds have a permanent place in my kitchen.
I understand these seeds are chemically stable in seed form and keep well without going rancid, but flaxseed oil goes rancid quickly. What I don't know, however, is how long they keep after being roasted and powdered. But I figure that if you make this podi (powder) in small batches, it should get around any potential problems of rancidity.
Oh, and a cautionary note on the pack of flax seeds I bought: Please ensure that you drink at least 150ml water extra per tbsp of flax seeds you consume, as they can cause constipation (especially if you don't normally drink plenty of water in the course of your day, I guess). I should think, however, that if you use a tbsp - or even two - of the paruppu podi with rice for a single portion, the flax seeds should not interfere with the digestion because of the other ingredients that also go to make up the powder.
Try this podi mixed with hot cooked rice and a dollop of ghee... ahhh, heaven!
Recipe for: Flax seed/linseed paruppu podi
Ingredients:
1/4 cup tur dal
1/8 cup urad dal
1/8 cup chana dal
1/8 cup golden flax seeds
5-6 dried red chillies
3/4 tsp black peppercorns
1/4 tsp cumin seeds
10 fresh or frozen curry leaves
1/4 tsp asafoetida powder
Salt to taste
1. Dry roast the chana dal and tuvar dal together with the dried red chillies till they turn aromatic and pale golden brown and the red chillies are a darker shade.
2. Dry roast the urad dal, golden flax seeds, black pepper corns, curry leaves and cumin seeds till the seeds are golden brown and the curry leaves are crisp
3. Let all the dals and seeds cool completely, then grind to a powder that is the texture of fine sand. Add salt to taste and mix well. Store in a clean dry jar.
Why didn’t anybody tell me that linseeds (or flaxseeds, which is their other name) were so incredibly aromatic and tasty when roasted and powdered? All this while I’d been – well, not exactly put off by flaxseeds, but sort of avoiding them because they had this label of “health food”. The product information on the packs said I could add the seeds to salads or cereals or yogurt – none of which really appealed to me.
But I went ahead and bought a pack the other week, despite not quite knowing what to really do with the seeds. The first couple of times I added a tablespoon of the linseeds to my cereal, as per the suggestions on the pack. The seeds tasted ok, but I didn’t find them particularly moreish. Then I thought that perhaps roasting them would help – they tasted better, but there was no particular change in the aroma of the finished dish.
And then, while making a batch of paruppu podi, I decided to dry-roast some flaxseeds along with the dals and powder them. I knew that at the very least they wouldn’t add a nasty taste, and at best they would be an added health boost to a protein-rich powder. Again, no particular change in the aroma of the paruppu podi, not even when the dals and seeds were being milled into powder.
But when I had the podi with rice and a bit of ghee one night, I was completely surprised by the amazing taste! Yes, paruppu podi is an aromatic, tasty preparation, especially mixed with some ghee added to hot white rice... but this was something else again. I wasn’t entirely sure what I’d done for it to have the extra oomph, until I remembered the linseeds. Surely they couldn’t have been the reason?
Of course I had to double-check this... so I roasted 3 tbsp of linseeds with 3 tbsp coriander seeds (and I would have roasted 2 tbsp urad dal with this, but I had store-bought roasted urad dal powder to use up) and cooled and powdered them.... and ohhh yeah! The linseeds finally came into their own, with a flavour reminiscent of roasted sesame seeds, but not as strong.
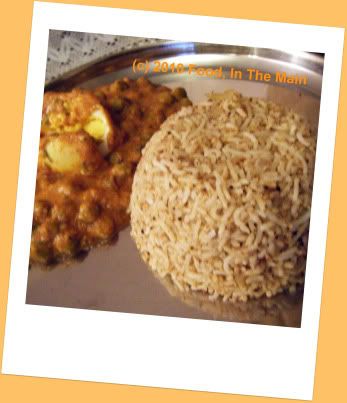
I made spiced rice with this powder for Pete and me that night to go with our special egg curry dinner, and he absolutely loved it.
A latecomer I might be to the delights of flax seeds, but now that I’m finally on board, it's going to be flaxseeds, flaxseeds all the way!
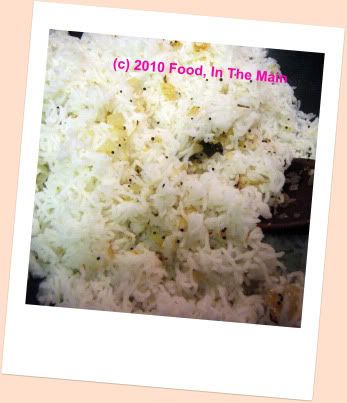
Recipe for: Flaxseed/linseed powder spiced rice
Ingredients:
3 tbsp coriander seeds
3 tbsp golden flax seeds
2 tbsp urad dal
2 dried red chillies (optional, or to taste)
1 medium onion, chopped fine
2 tsp mustard seeds
a few curry leaves (fresh or frozen)
1/4 tsp hing/asafoetida powder
Salt to taste
1 tbsp oil
4 cups cooked rice
Method:
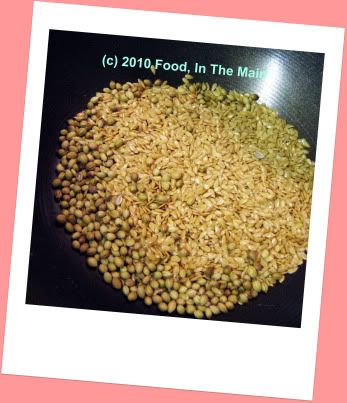
1. On medium heat, dry roast the coriander seeds, urad dal, flax seeds and red chillies till the seeds are a darker shade and the urad dal is golden.
Cool and powder finely. (If you are using ready-bought roasted urad dal powder like I did, mix 2 tbsp of this after grinding the roasted coriander-flaxseeds).
Reserve.
2. Heat the oil in a large pan and add the asafoetida powder, mustard seeds and curry leaves. Cover the let the mustard seeds pop.
3. Add the finely chopped onions and fry them on med-low heat till they are translucent and soft.
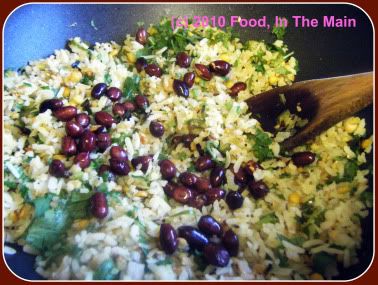
4. Add the cooked rice to the softened onions and mix it in carefully.
5. Now sprinkle 3 tbsp of the roasted flaxseed-coriander powder along with salt to taste on the rice
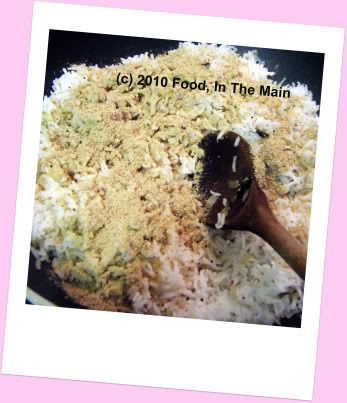
and mix till well amalgamated, taking care not to break the rice grains. Taste and check to see if more powder needs to be added.
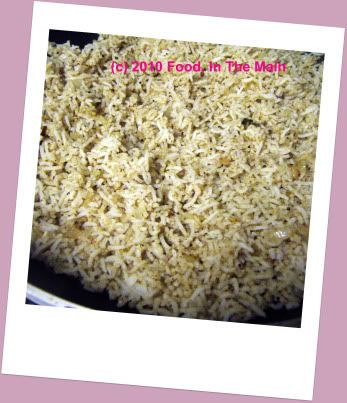
Make sure the rice is thoroughly heated, then serve hot with a gravy curry, or with a dry curry and a raita, or even by itself with something crunchy on the side.
I've been holding off on posting this for nearly a month now, at first because of lethargy and a stubborn unwillingness to accept the fact that the photos would not just edit and save themselves in the right dimensions for my blog, and wait neatly in a folder with the appropriate recipe name, ready for uploading onto my blog. And when I finally and grumpily went to load my photo editing software on my new laptop, I discovered that the CD had gone AWOL. I still haven't found it, and that's the reason I don't have photos for this recipe. Not that the photos were works of art, mind you. But the post has been hanging about long enough, so I'm publishing it sans photos. (Worse things happen at sea, I'm told.) So, call me biased, but the vengaya thogayal I made using my mother's recipe is quite literally the most addictive chutney I've ever tasted. I dont usually like onion chutney because of the possibility of the raw onion flavour lingering on the palate and - er, manifesting itself elsewhere (no, I'm not about to elaborate) as well.
But when amma suggested that I make this thogayal, I decided I would treat my two dear friends, who were visiting a couple of weeks back, as the guinea pigs very welcome guests that they were, and spoil them with the chutney as a side-dish with quinoa dosas. And because I was a bit concerned that the chutney might not turn out well, I also made sambar and tomato chutney as back-up.
I needn't have worried, because the chutney turned out delicious. At least, that was the feedback I got from my dear lab rats friends. I discovered the chutney's delights much later that day, after my friends and some unexpected visitors had all left, and I could sample what I'd made at leisure.
The trick is to slice up the onions thinly, and brown them long and slow - well, by that I mean about 15-20 minutes - on med-low heat. I used 2 tsp oil (for 3 onions) at first, then every time the onions looked like they would start to burn, I sprinkled 3-4 tbsp water to keep them moist and continue caramelising.
I've made this delectable thogayal twice in the last 5 days. It keeps well for at least three days out in the open, and would probably last longer in the fridge. (But it was pretty cold weather when I did this, I wouldn't trust it to do as well in warmer weather, without refrigeration.)I confess I have developed a tendency to dip a fingertip in the chutney and lick it off. (Relax, folks, at this level of chilli-heat, it's just me who eats the chutney so no hygiene worries there!) It's amazing how quickly you can finish up something in this way. It makes my tongue, eyes and nose all water together (I like my thogayals well hot), but it's worth it. I'm especially pleased that it's great with chapaties, rice, dosas, bread and anything else you care to use it with.
Recipe for: Vengaya thogayal (Onion chutney)
Ingredients:
3 medium white onions, sliced thin
5-6 dried red chillies (or to taste)
2 tbsp urad dal (I used whole urad because that's all I had)
1/8 tsp asafoetida powder
3-4 tsp oil
1/2 tsp tamarind paste
8-10 fresh curry leaves
Salt to taste
Method:
1. Heat 2 tsp oil in a heavy-based frying pan and add the onions. Stir-fry on high heat till they start turning colour, then lower the heat to med-low and continue caramelising the onions. Stir them once in a while, checking to see that they are not burning at the bottom. If it looks like this might happen, sprinkle 3-4 tbsp water and stir again. You can do this 3-4 times if required.
2. Once the onions are evenly browned all over, turn off the heat and let the cooked onions cool completely.
3. Meanwhile, in a small pan, heat the remaining oil and add the asafoetida pwoder, curry leaves, urad dal and red chillies. Fry them till the chillies are a deep dark red, and the urad dal is golden. Reserve about a tbsp of the fried urad dal and a few curry leaves.
4. Grind the chillies, curry leaves and urad dal with 2 tbsp of the cooked onions, using only the minimum of water (in fact you might not even require the water), till the chillies are pulverised.
5. Add the rest of the onions and grind to a reasonably smooth paste. (I didn't make it completely smooth because I wanted some texture.) Finally, add the reserved fried urad dal and curry leaves and give the mixie a last turn. Let the dal remain coarsely ground.
Serve this chutney as a spread for chapaties or bread/toast, as a side-dish, as a mix for plain rice, or as anything else you like.
You could even call it onion marmalade (if made with far fewer chillies, of course) and serve it with whatever meat - but I'm dabbling in the realms of ignorance here, as I'm a vegetarian! What I'm saying is, this chutney is versatile! :)

