skip to main |
skip to sidebar
 Here's wishing everybody happiness, prosperity and success in 2007!
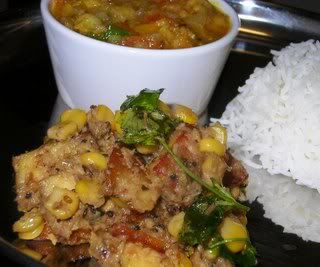
Think coconut paired with paneer and sweet corn is weird? Yep, I think so too. I thought "weird" when I saw the recipe in Neelam Batra's 1000 Indian Recipes cookbook; I thought "weird" when I decided I'd try it; I continued thinking "weird" even as I followed the recipe and made the paneer and believe you me I definitely thought "WEIRD" when I finally tasted the paneer. I guess you might have caught on to the fact that "weird" was the catchword of the day and weirdness the outcome.
I say "weird" (I know - many many times!) but I mean that not in an "ugh that's disgusting" way (not entirely) but more in a "that's strange and I dont know what to think" sort of way. In other words, folks, the jury's still out.
Pete felt pretty much the same as I did - but the thing is, we cant quite come to an agreement on what was the strange part of the taste experience with this paneer dish. (Ms Batra describes it as paneer with a south indian touch... but I guess everybody is entitled to his or her opinion whether or not I agree - cookbook authors included!)
And talking about disagreement, the part that I found weird in this dish was the coconut. (Yep, Saffron, turns out I'm not as fond of coconut as I'd thought I was! *wink*) While the coconut masala was being ground into a paste, it smelled absolutely mouth-watering... but a little while thereafter, the recipe lost its way and never managed to return to the "mouthwatering" area. But maybe I just dont like coconut in certain dishes.
Then again, there was Pete - he normally doesnt like coconut (unless it's as coconut milk used in Thai dishes) but this time it was not the coconut he was doubtful about, it was the sweetcorn! He felt it was too sweet overall for the dish. (I must say I didnt find the sweetcorn a problem once I'd brushed off the coconut masala. Yes, it was a painstaking job but worthwhile to me.)
Anyway... the end result of this rather strange recipe was edible enough in its own way. I might make it again just to see if I like it any better or worse the second time around... but I think I'll probably skip the part where the coconut masala had to be stir-fried for 10 minutes till brown. I'm also going to use less coconut and grind it as fine as possible - perhaps that might make a difference. And oh yeah, I'll substitute green peas for the sweetcorn so that Pete can also be persuaded to give it a second chance. (I suppose at this rate it's not going to qualify as the same recipe, though, is it?)
Not for the first time I wonder if cookbook authors (or the reviewers/publishers) actually honestly try out the recipes before the book goes into print. I have to say that sometimes it doesnt seem that way.
Recipe for: Paneer with sweetcorn in coconut masala
Ingredients:
1/4 cup coconut milk
1/2 cup paneer, sliced into thin 1-inch pieces
1/2 cup sweet corn
2" piece ginger, peeled and sliced
3" piece fresh coconut, coarsely chopped
1-2 jalapeno peppers, coarsely chopped
1 large onion, coarsely chopped
10 fresh curry leaves
2 tbsp oil
1 tsp cumin seeds
1 tsp mustard seeds
1/4 tsp asafoetida powder (optional)
1 tsp ground coriander seeds
1/2 tsp freshly ground black pepper
Salt to taste
Coriander leaves for garnish
Method:
1. Stir-fry the paneer in a tsp of hot oil till the pieces begin to turn golden. Remove from pan and reserve.
2. Using a blender, mince the ginger, coconut and jalapeno peppers.
Add the onion and curry leaves and blend again until the onion is minced, but not ground into a paste.
3. Heat the oil in a pan and add the cumin and mustard seeds. Cover and let pop.
4. Then add the ginger-onion mixture.
Stir-fry for about 5-8 minutes or till the moisture evaporates.

5. Add the asafoetida powder if using, coriander powder and salt, then add the paneer and coconut milk. Cook over medium heat for 5 minutes.

6. Now add the corn, cover the pan and cook, stirring carefully, over medium heat until any remaining moisture is absorbed.

7. Sprinkle the pepper powder and coriander leaves over and serve hot.
When I say "murukku", I dont mean "thenkuzhal" or "ribbon pakoda" or "muLlu thenkuzhal" or any of the other crunchy, deep-fried snacks that plenty of people have written about on their blogs.
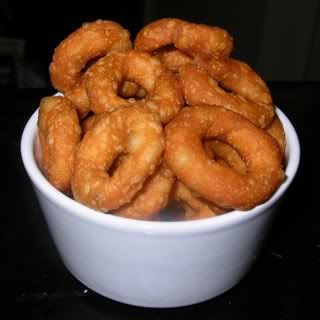
Murukku to me always and forever denotes the lovely twisty circles you get at weddings. (You can also buy really yummy ones at Saravana Bhavan or Grand Sweets - in Chennai, but of course). The thing about murukku is that they dont contain any chilli whatsoever - the only flavouring comes from cumin seeds (something Pete is thankful for. He likes murukku!) I've never made it myself, because it takes a heck of a lot of skill to make the things by hand. I've seen my mother making it (very rarely, for probably the same reason as me) with indifferent success as to aesthetics, although always rating very high in the taste factor. Apparently both my grandmothers were dab hands at it, but that particular talent doest seem to have been passed on to us, unfortunately.
Still, after looking at the perfect, beautifully-twisted murukku made by Menu Today, I thought I would try my hand at it too. I should have known better. On the whole, I neednt have bothered, and I think I will refrain (for a change?) from detailing the failure of my efforts! Thank goodness I made the dough in a small quantity, on a trial basis.
Of course I took the easy way as regards the rice flour - I used ready-made rice flour instead of soaking rice, drying it and then grinding it into flour. Too much trouble, too little time. Anyway, that could be part of the reason why the dough didnt turn out better than it did. So I decided to make murukku rings instead. I can do rings, me - no problem. Break off a bit of dough, roll it between the palms to a sort of cigar-shaped 2-inch piece and join the ends. Tadaaa... murukku rings! Yep, that's pretty much the limit of my skills.
Recipe for: Murukku rings
Ingredients:
10 tbsp rice flour
1 tbsp urad dal flour
1 tbsp cumin seeds
1 tsp butter
Salt to taste
Water as required
Oil for deep frying
Method:
1. Put the flours, cumin seeds, butter and salt in a bowl. Make a fairly stiff dough, adding water little by little.
2. Pinch off small pieces and roll between the palms into oblongs about 2" in length. Join the ends, pressing them together lightly to form a circle, so that the ends dont come apart in the oil.
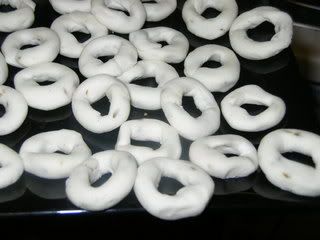
3. Let the rings dry for 15 minutes, uncovered. Then fry them in hot oil until brown. Drain on absorbent paper and store in an airtight tin when cool.
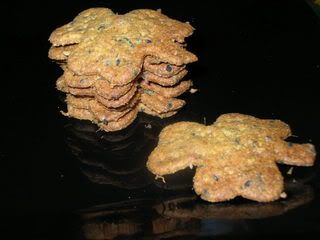
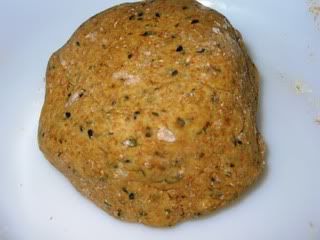
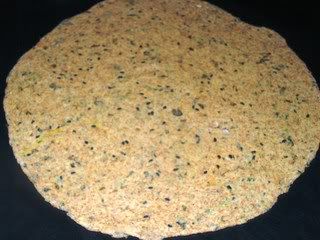
In the interests of authenticity, I refrained from calling these crisp baked savoury biscuits "mathri" - "mathri", apart from being deep-fried, contain very few ingredients, the main flavouring coming from ajwain or carom seeds. These biscuits have a lot of things added, but carom seeds isnt one of them things. I used black sesame seeds as a substitute instead and kasuri methi instead of fresh (didnt have any fresh, natch). Not because the sesame seeds are similar in taste to ajwain, because they certainly are not, but because I had a pack of black sesame seeds I hadnt got around to opening till then. I like black sesame seeds - they have a stronger flavour than the white ones. They're used a lot in oriental cuisine. These cookies - or okay, biscuits - are just the thing when you get the munchies because they're low-fat. (Next time I'll follow the original recipe which specified fresh methi leaves and ajwain.)
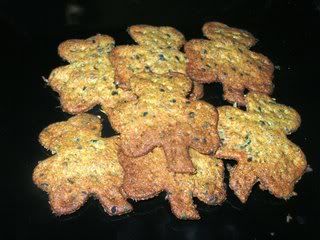
The dough for this, by the way, should be made with as little water as possible. The less water you use, the quicker the biscuits will bake and the crunchier they'll be. (Why do I get the feeling that I sound like Yoda?)
Recipe for: Crunchy baked methi biscuits
Ingredients:
2 cups whole wheat flour (or plain if you prefer)
Salt to taste
1 tsp red chilli powder (or to taste)
2 tbsp kasuri methi (dried crushed fenugreek leaves)
1/2 tsp cumin powder
1/2 tsp coriander powder
1 tbsp black sesame seeds (you can use white or natural too)
2 tbsp oil
Water as required
Method:
1. Preheat the oven to 180C. Line a baking tray with silicone paper. Put all the ingredients except the water, in a bowl.
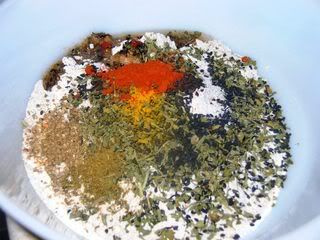
2. Add water little by little to make a stiff dough.
3. Divide the dough in half and roll one half out into a thin circle (1/4cm). Keep the other half covered.
4. Cut out shapes with a cookie cutter (or just use a pizza cutter to cut the circle into 2" squares). Re-roll the scraps and finish up the rest of the dough in the same way. Prick the cut-out dough all over with a fork.

5. Place the cookies carefully on the baking sheet and bake for 10 minutes or till they are brown and crisp. Keep an eye on them so they dont burn - take it from me, burnt kasuri methi tastes awful!
6. Cool completely and store in an airtight jar.

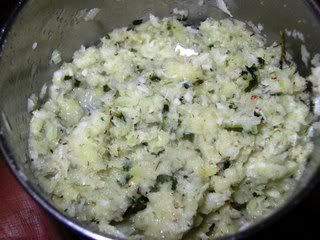
I havent seen or eaten kothavarakkai (cluster beans, I believe they're called) in a very long time. Thoran, as I understand it, is a Malayalam word that usually describes a dry vegetable preparation with coconut... and if I'm wrong, please my Mallu friends, correct me!
This recipe is dead simple and is the perfect way to eat this thin, slightly angular green bean that tastes ever so slightly bitter. I even like the fact that they make little squares when they're chopped, because they beans are flat rather than round.

I cooked the kothavarakkai with a little water, for 7 minutes in the microwave. It can also be made into usili but I decided to go with the coconut this time - both because I had a little bit of the latter left and because I wanted a change from the usual. And one final because: I've never made it before.
This thoran is perfect with rice and sambar/rasam.
Recipe for: Kothavarakkai thoran

Ingredients:
250gm (1/4 kg) kothavarakkai, chopped
3 tbsp grated coconut
3-4 fresh green chillies
1-1/2 tsp cumin seeds
For tempering:
1 tsp oil
2 tsp urad dal
1 tsp mustard seeds
a few curry leaves
Pinch of asafoetida powder (optional)
Method:
1. Cook the kothavarakkai in the microwave with a little water for 7-8 minutes. Drain off any remaining water when cool. Reserve.
2. Grind the coconut, green chillies and cumin seeds without adding water,

making a coarse paste.

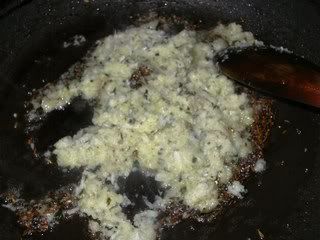
3. In a pan, heat the oil and add the tempering items. Once the urad dal is a light golden brown, add the ground coconut paste and stir fry for a minute or two to get rid of excess moisture.

4. Then add the cooked kothavarakkai and mix well, adding salt to taste.

Stir-fry for a minute until well mixed. Serve hot with rice and sambar/rasam.
I got this recipe from a cookery book that I've had since I was about 14, I think. It's probably the first cookbook that I ever bought... and probably the least useful at the time to me, because it was a book on how to bake cakes. Worse, it was a foreign book and by that I mean it was not published in India - the recipes called for all sorts of ingredients that might have been common in the West but certainly werent easily available at home then, and the measurements were in ounces which certainly didnt make sense to me!
But I bought the cookery book anyway, for the princely sum of Rs 75. I didnt even have an oven, but I bought the book. How could I resist? It had such tantalising glossy photographs of exotic cakes, cookies and biscuits and the recipes sounded so exciting to make, plus they were droolably readable! (I digress as always - but I think I've missed my calling as a book reviewer! Any takers, after that very original description?)
I tried one recipe - a coffee-flavoured cake with icing - from my book when my mother got a round Bajaj oven, but I have to say it wasnt the howling success I wanted it to be. Well okay, there was some howling involved but that was from me because I was so disappointed. The cake was crusty at the bottom and not quite cooked through (the Bajaj oven's fault because the heat source was only from the bottom!) and the coffee icing was runny and wouldnt set (the summer heat's fault).
All in all, not the best start to a baking career, so it was quite a while (many years) before I tried any baking again. I dont quite know why I expected to start out being a master baker at my very first baking attempt, but in hindsight it can be put down to youthful overconfidence and unfamiliarity with life's downs!
But I still loved the cookbook. Every so often I would thumb through it, drooling at the photos and wondering at ingredients like "demerara sugar", "lemon curd", "golden syrup", "molasses" and the like - all items that I had never come across in all my life.
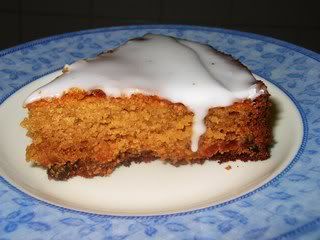
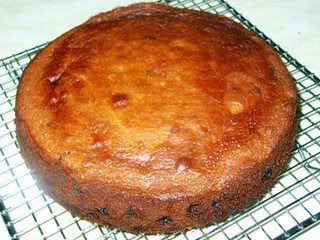
One cake that I'd wanted to make used rosewater as the main flavouring ingredient and I thought I could try it out at last, now that I had a proper oven, not to mention many cakes under my belft (not literally, folks!). However, every time I went to the Indian shops, the rosewater kept getting forgotten. Finally the right moment came along... the perfect mix of time, desire and the availability of the required ingredients in my pantry.
I'm so glad to say that the cake came out as gorgeous as I could have wanted. The honey content in it made the cake burn a little more than was ideal but luckily it was still very tasty. The delicate flavour of roses, especially in the icing, was sensational - a bit like eating Turkish delight but not so sweet or overpowering. I think this is one of the few cakes that I found delicious enough to warrant a second helping rightaway.
Recipe for: Rosewater cake
Ingredients:
1 cup plain flour
1 tbsp baking powder
2/3 cup caster sugar (or 1/2 cup if you prefer it less sweet)
1/2 cup butter, softened
4 tbsp clear honey
2 eggs, lightly beaten
4 tbsp rosewater
4 tbsp milk
1/2 cup sultanas
For the icing:
1-1/2 cups icing sugar
4 tbsp rosewater
1 tbsp lemon juice
Method:
1. Grease a 6" round cake tin and with silicone paper. Sift the flour with the baking powder into a large bowl.
2. Whisk the butter, sugar and honey together until pale and fluffy. Add the eggs, 2 tbsp at a time, beating well between additions.

3. Fold in the flour and baking powder, then add the rosewater and the milk, turning the mixture over several times. Then mix in the sultanas.
4. Pour the mixture into the prepared cake tin and bake at 180C until the cake tests done. Check the top of the cake after about 20 minutes - if it looks like turning brown too quickly, cover the top with foil or brown paper to prevent burning.
5. Cool the cake for 5 minutes, then remove from the tin and cool completely on a wire rack.
6. Sift the icing sugar into a bowl, add the rosewater and beat until smooth. If the mixture is too thick, add the lemon juice and beat again. (If it's too thin, add more icing sugar). The icing should be thick enough to coat the back of a spoon without dripping off, but should still be pourable.
7. Pour the icing over the top of the cake and let it drip down the sides.
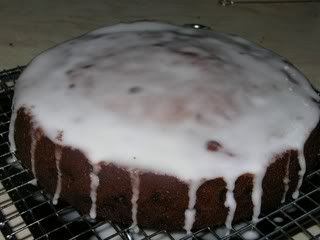
Smooth the top if necessary with a palette knife dipped in hot water. Let the icing set for a couple of hours before cutting the cake.
 There's nothing special about this banana pepper - other than the fact that I grew it from a seed, all by myself and unaided. Normally this would not be much to boast about, but coming from someone who has consistently serial-killed various types of flowers and plants all through summer (and all through life, to be frank) it is an achievement of quite large proportions. Quite large = Enormous. Colossal. Monumental. Humongous. Gargantuan. In fact, Brobdingnagian. That's how big.
Alas, the pepper had to come off the plant eventually, but it ripened from a fresh greeny-yellow to this glorious orange before I finally gave in and removed it. No more peppers until next summer... that is, if I dont manage to kill the plant itself over the winter! In which case, definitely no more Shammi-grown peppers. How I envy those for whom plants flourish!
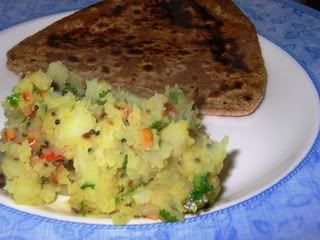
Anyway, one pepper wasnt enough to make anything substantial, so I just added it to the potato podimas that I made. Which brings me to the recipe I should have been writing about from the start instead of waxing eloquent about a banana pepper.
Podimas (mashed or scrambled describes this word most closely, although it certainly isn’t an exact translation) is a low-fat recipe using the ubiquitous well-loved potato. It is a simple, gravy-less dish that doesn’t require much oil. When my sister made potato podimas to take to her friend’s place for Thanksgiving dinner, she described it to them as “Indian-style mashed potatoes” – which is as good a description as any, I guess, although this avatar doesn’t use butter or cheese and isn’t mashed to fluffy smoothness…
Podimas is, in my opinion, best eaten fresh and hot with the tangy flavour of lime juice as a top note. Some people add chopped ginger too, although I haven’t - I don’t like biting into ginger, although it’s integral to gravies, grated or ground to a paste).
Podimas can be re-heated in the microwave or on the stove, but I like to serve it as soon as possible after it’s made. Just a personal quirk, really.
Recipe for: Potato podimas
Ingredients:
4 medium potatoes, boiled and mashed roughly (don’t make it smooth)
2-4 fresh green chillies, chopped into ½ cm chunks or sliced thin (as per taste)
1 banana pepper, sliced into thin circles (optional)
1 tsp urad dal
1 tbsp chana dal
1 tsp mustard seeds
½ tsp turmeric powder
½ tsp cumin seeds
Pinch of asafoetida powder (optional)
1 tbsp oil
Salt to taste
2 tbsp fresh lime juice (optional)
Chopped coriander leaves for garnish
Method:
1. Boil (or pressure cook) the potatoes till done and peel when cool enough to handle.
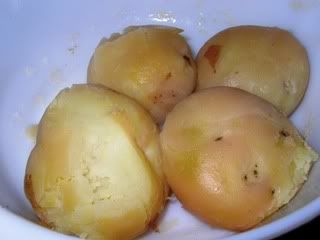

Mash roughly into small lumps, making sure there aren’t any large lumps lurking anywhere.
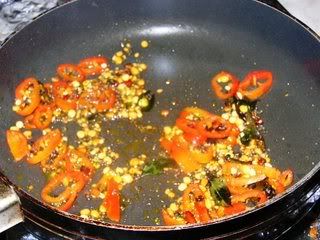
2. Heat the oil in a pan. Add the dals, seeds, powders and green chillies, cover and let the mustard seeds pop.
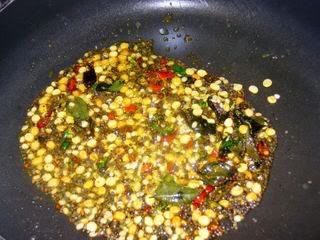
Add the banana peppers now if using, and stir fry for 3-4 minutes.
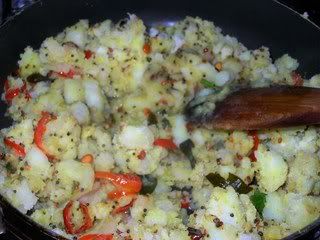
3. When the dals are pale golden (should be about the time the seeds are done popping), add the mashed potatoes and salt to taste.
4. Mix well and heat the potatoes through.
5. Just before serving, sprinkle over the lime juice.
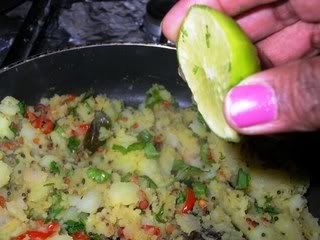
Add the coriander as garnish.
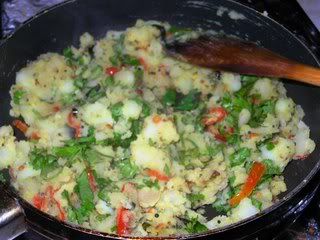
Goes well with chapaties.
I've named this recipe after the friend who kindly provided me with it! It's actually her mother-in-law's recipe but since I dont know her name, Sona Karela it will remain!
Actually she emailed this recipe a few months ago - or around the last time I put up a bittergourd recipe on this blog. That's how long it's been waiting in the wings to be tried out. The problem is bittergourds arent available in the regular supermarkets or greengrocers. And it's a long way to Tipperary - I mean Wolverhampton - just to get karela and although I ended up there a couple of times, the bittergourds I found were old and tough, looking very much like the goondas (thugs) of the vegetable market, or else soft and oozy, reminding me of - well, never mind what they reminded me of (I leave that to your imagination). Certainly they didnt deserve to be treated as food, so I left them well alone.
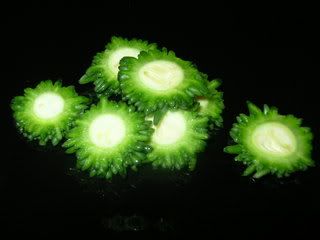
Last time I got luckier and managed to pick out 3-4 small, reasonably tender karela. My friend's recipe said to cut them in pieces, but because the gourds were small, I just sliced them into rounds. The seeds were soft enough not to need removal, so the slices looked really pretty, like little green suns.
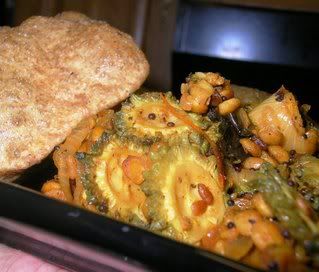
The recipe is laughably simple using a pressure cooker, and the end result very yummy with puri, chapati or rice. Yup, I ate it over 3 days because that was how much I ended up making! It would probably be plenty for 2-3 people for one meal. I really enjoyed my Sona Karela - it had just the right amount of bitterness, not so much as to coat the back of the tongue and make everything bitter. Still, on the whole this recipe is for people who like bittergourd. Of late, their numbers include me! I guess I'm getting more used to the bitterness of this vegetable... although I dont think I'm quite up to drinking karela juice yet!
Recipe for: Sona karela
Ingredients:
1 heaping cup tender bittergourd, sliced into 1/4cm rounds
3/4 cup chana dal, washed and drained
2 tomatoes, chopped
1 large onion, sliced thin
1/2 tsp turmeric powder
1 tsp red chilli powder (or to taste)
Salt to taste
For tempering:
1 tsp mustard seeds
1/2 tsp coriander powder
pinch of asafoetida
2 tbsp oil
Method:
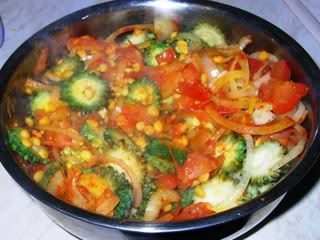
1. Put the chana dal, sliced onion, chopped tomatoes, sliced karela, red chilli powder and turmeric in a vessel along with 1/2 cup water.

Pressure cook for two whistles. Let the pressure reduce naturally before opening the cooker.
2. In a pan, heat 1 tbsp oil and add the tempering ingredients. Cover and let the mustard seeds pop.
3. Add the pressure-cooked vegetables to the pan and mix well. There shouldnt be too much water left at the bottom. The dal should be al dente - cooked but firm and retaining its shape. Overcooking will make the dal soggy and spoil this dish, in my opinion.
But if you think the dal and/or the karela could do with a little more cooking, add some water (depending on how much was left originally), cover the pan and cook for 5-7 minutes on low heat.
Once the dal and karela are cooked to your satisfaction, add salt to taste and mix well. Turn the heat up to high, pour the remaining tbsp oil over and cook for another 5 minutes or so, till the vegetable-dal is dry.
Serve hot with chapaties or as an accompaniment with rice and mor-kuzhambu or vattha-kuzhambu.