Monday, May 25, 2009

Eggless moist apple cake

After a long time, I'm really excited about an eggless cake. This was originally called "apple pound cake", and arrived in my inbox a few months back. It called for horrendous amounts of eggs and sugar and butter, and although I saved the recipe because I wanted to play around with the ingredients and quantities, I didn't feel like making the effort to turn idle thoughts into action.

However, there were a few Granny Smith apples that had been in the refrigerator for weeks. They needed using up, but they didn't quite look appetising enough to eat (plus there were fresh eating apples which I'd bought, having forgotten about the Grannies!) So I hauled out my file book of "cakes to try" and chanced upon the apple pound cake recipe again... and my mother's presence here encouraged me to omit the eggs, so that she could eat the cake too. I used oil instead of butter, and substituted the eggs with mashed banana, and because I had run out of regular flour, I used self-raising flour. Then of course I wasnt sure how much baking powder/soda I should add to the flour to make up for the lack of eggs... all in all, let's say that I wasnt very certain of the cake's outcome.

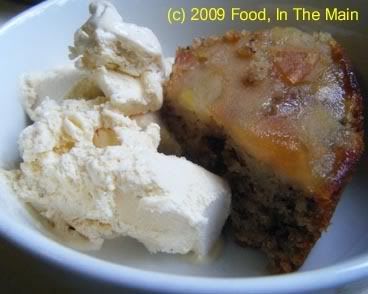
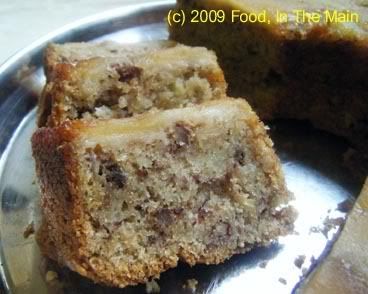
Surprisingly, and very pleasingly, it was super moist and wonderfully flavourful - the moistness from the grated apple and the flavour because I'd used cinnamon and cardamom rather than vanilla extract. The layer of apples at the bottom (which became the top when the cake was inverted - oh, did I forget to mention that I made it an upside-down apple cake?) had caramelised just the tiniest bit from the sprinking of demerara sugar I'd added to the cake pan at the first. About 98% of the apples unmoulded cleanly from the pan, but the bits that were left in the pan tasted unbelievably gorgeous - which I scarfed down as cook's perk, naturally...


All in all, the cake was great on its own with a cup of tea, and just as gorgeous warmed slightly and served with vanilla icecream. All in all, one of the nicest eggless cakes I've made despite my meddling with the instructions and ingredients!

Recipe for:
Moist apple cake

Photobucket

Ingredients:

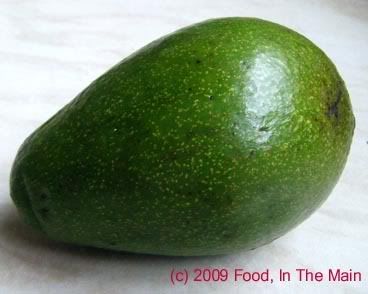
3 Granny Smith apples
1-1/2 cups self-raising flour
1/2 tsp baking soda
1/4 tsp salt
1/2 tsp cinnamon powder
1/4 tsp cardamom powder
3/4 cup vegetable/sunflower oil
3/4 cup white sugar
3 tbsp demerara sugar
1 small ripe banana (to make 1/4 cup mashed)
1/4 cup chopped walnuts
2-3 tbsp milk

Method:

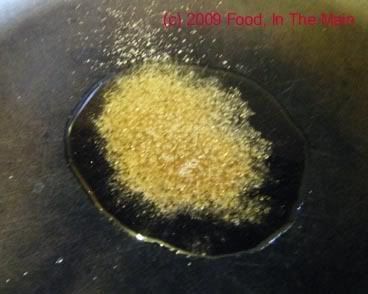
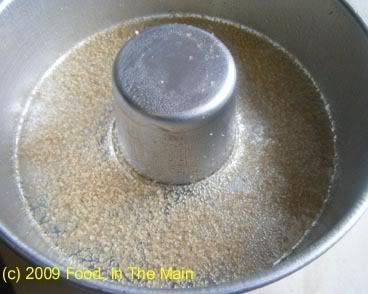
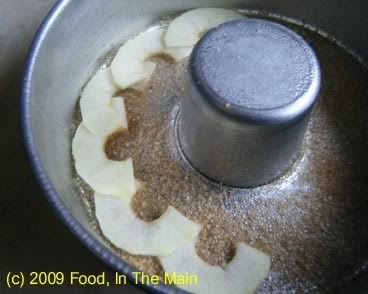
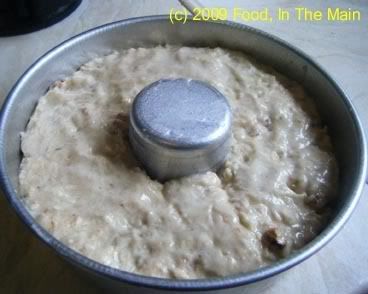
1. Grease an 8” tube pan. Sprinkle demerara sugar evenly over the bottom.

Photobucket

Preheat oven to 180C.

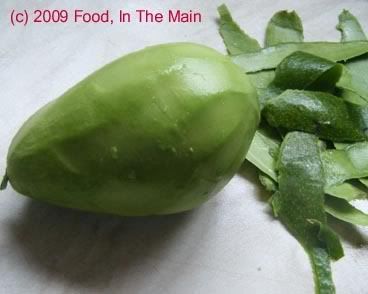
2. Peel and core apples.

Photobucket

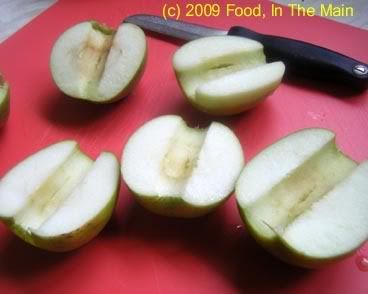
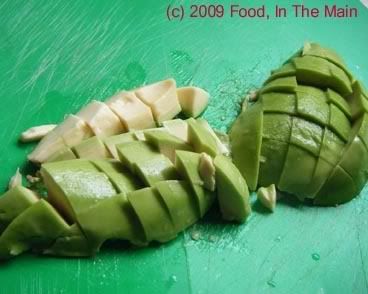
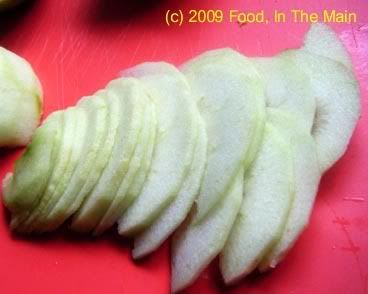
Slice one apple in half vertically, turn it a quarter circle and slice again into ¼ cm thick slices.

Photobucket

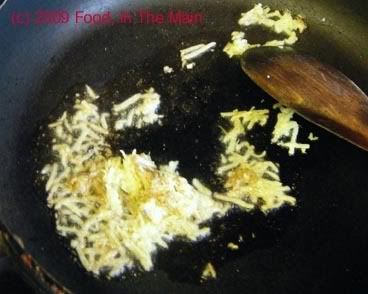
3. Grate the remaining apples and set aside, covered.

Photobucket

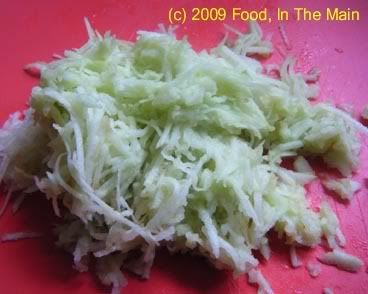
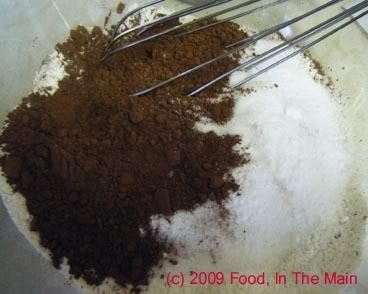
4. Combine flour, baking soda, cinnamon and cardamom powder and salt in a medium bowl.

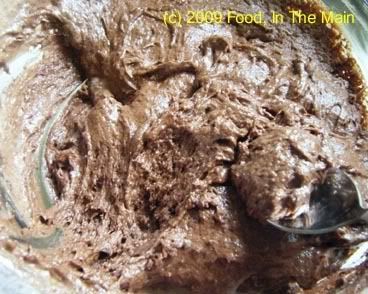
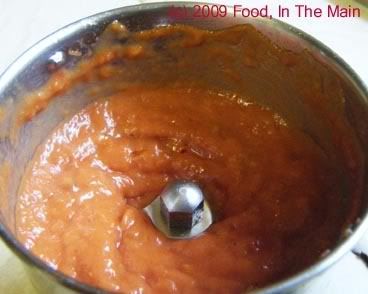
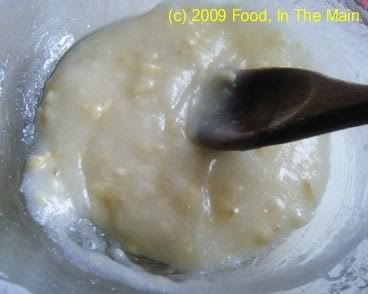
5. In a large bowl, add the mashed banana, white sugar and vegetable oil.

Photobucket

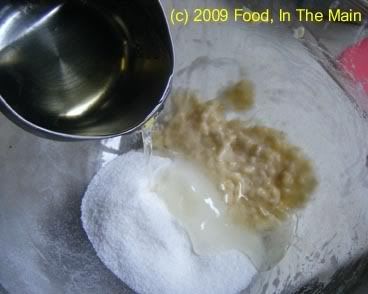
Beat till well blended.

Photobucket

6. Add the flour in three or four stages, mixing well after each addition.

Photobucket

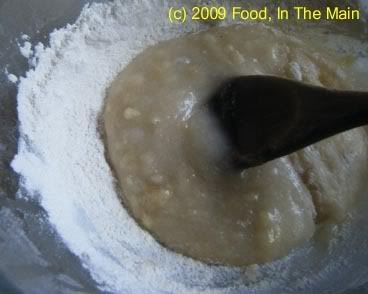
If the batter gets very thick, add a couple of tbsp milk to make it easier to mix. Don’t add too much milk, though - the grated apples will add enough moisture to the batter later.

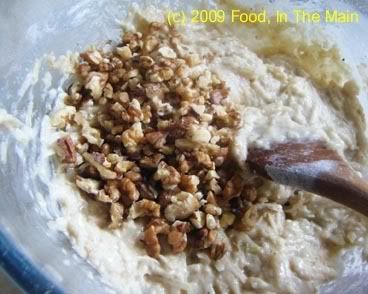
7. Fold in the shredded apples

Photobucket

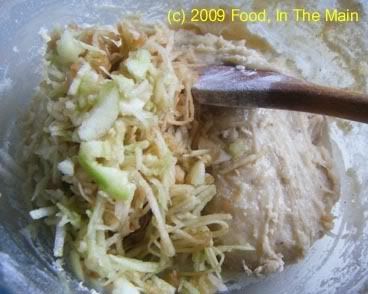
and chopped walnuts into the batter.

Photobucket

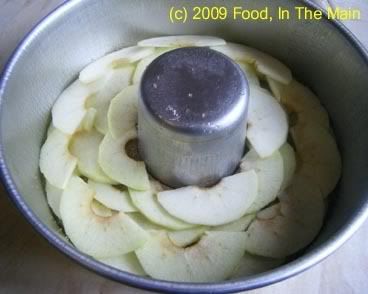
8. Arrange the sliced apples on the demerara sugar at the bottom of the pan, overlapping the slices slightly.

Photobucket

Photobucket

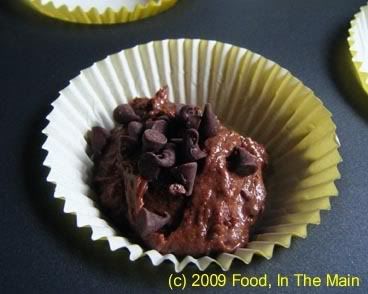
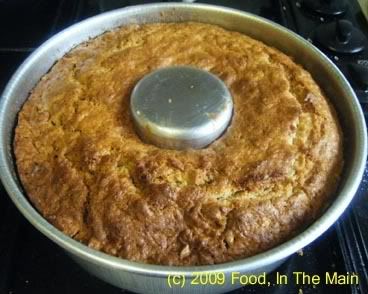
9. Spoon the batter evenly over the sliced apples and bake at 180C for 30 minutes.

Photobucket

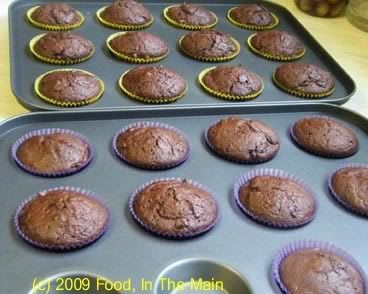
Check to see if the cake is done; if not, give it another five minutes (and a further 5 if required) and check again. The cake should have pulled away slightly at the edges.

Photobucket

10. Cool the cake in the pan for 15 minutes, then carefully turn out onto a serving plate.

Photobucket

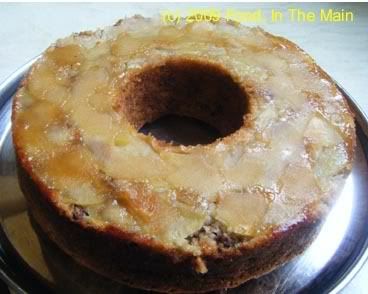
Let cool completely before slicing carefully.

Photobucket

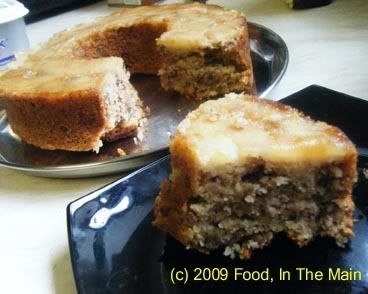
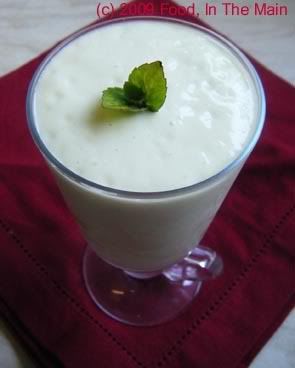
Serve with vanilla icecream or thick cream, if desired.

Photobucket

Saturday, May 23, 2009

Eggless triple chocolate buttermilk cupcakes

Not the snappiest of titles for a post - or a recipe - but on the plus side, there's no room for misunderstanding as to what it is, I guess. Perhaps I should have called it "Eggless triple chocolate butterfree buttermilk vanilla scented cupcakes" and done away with the ingredient list altogether...

Never mind, I'll save that ingredients-as-title idea for another post. Never let a good idea go waste. Recycle, recycle, recycle, isn't that the mantra?

The reason I made these cupcakes was because I stopped Pete from buying cupcakes from the supermarket with the promise that I'd make some at home. (Honestly, the list on the back of the package had E-ngredients rather than ingredients! I'm all for Pete having a long, long life - no-one could pray for that more - but I'd rather he retained his human qualities through all of it rather than become an artificial life form through ingesting manufactured chemicals.)

Anyway, since my mother's a chocolate fiend but not one that devours any chocolate derivations with egg in it, I made the cupcakes eggless. The recipe is more or less from
Nic at Baking Bites, with a few changes.

Photobucket

Here's a cupcake before the ganache went on. I took a bite out of it just to see what it was like - and because I'm not terribly fond of icing or frosting. Glad to say that the cupcake was just as delicious in its double-chocolate version as with the final chocolate addition.

Recipe for:
Eggless triple choc buttermilk cupcakes

Photobucket

Ingredients:

1-3/4 cups self-rising flour
¼ cup cocoa powder
¾ cup sugar
1 tsp baking soda
½ tsp salt
1-1/4 cup buttermilk, room temp
¼ cup oil
1 tsp cider vinegar
1 tsp vanilla extract
¼ cup semi-sweet mini chocolate morsels

For the ganache:

4 ounces (110 gms) dark chocolate, cut into small pieces
1/3 cup heavy whipping cream
1 tbsp unsalted butter


Bring the cream to a boil in a heavy-bottom saucepan. Take it off the heat and add the butter and chocolate, stirring till it's all melted and thickened and shiny. Place in the fridge for the ganache to get to a spreading consistency, if preferred.
Photobucket

Method for cupcakes:

1. Preheat oven to 180C. Line two 12-cup cupcake pans with paper cups.

2. In a large bowl, whisk together flour, sugar, baking soda and salt.

Photobucket

3. Pour in the buttermilk, oil, vinegar, vanilla and stir till just combined.

Photobucket

The batter will be quite thick.

4. Put 1 tsp batter in a cup, add about 10 mini morsels,

Photobucket

then cover with another tsp batter. It’s ok if the morsels don’t stay in the centre. Finish up the rest of the batter the same way.

Photobucket

5. Bake for 15 minutes or till done when tested with a thin skewer.

Photobucket

Photobucket

6. Cool, then dip the tops into ganache (or spread the ganache with a small spatula)

Photobucket

and set the cupcakes aside in a cool place till the ganache hardens.

Tuesday, May 19, 2009

Gram flour chapaties with red onion and nigella seeds

This recipe is from Sunil Vijaykar's "Fresh Indian" cookery book. There are over 80 recipes, mixing both South and North Indian, but they're slightly more non-vegetarian oriented than not. This chapati seemed an interesting prospect from the breads section, but I have to admit that the picture of the finished dish in the book was a LOT more appetising looking than mine turned out. Maybe the chapatis in the book were cooked with a lot more oil than I did.

That's my objective, unbiased, balanced explanation for it, anyway!

Recipe for: Gram-flour chapaties with red onion and nigella seeds

Photobucket

Ingredients:

1-1/2 cups wholewheat chapati flour
1-1/2 cups gram flour
1 medium red onion, minced fine
2 green chillies, de-seeded if liked, minced fine
1 tsp nigella (kalonji) seeds
1 tsp cumin seeds
3 tbsp chopped coriander leaves
Salt to taste
Warm water for dough as required

Method:

1. Take equal measures of gram flour and whole wheat flour (I used 1-1/2 cups of each) in a big bowl.

Photobucket

2. Add the minced red onion, minced green chilli, 1 tsp nigella (kalonji) seeds, 1 tsp cumin seeds, chopped coriander leaves and salt to taste.

Photobucket

3. Use enough warm water to make a soft dough. It shouldnt be sticky.

Photobucket

4. Knead for 5 minutes and let the dough rest for 10 minutes.

5. Pinch off a small lemon sized piece of dough and, using extra flour for dusting, roll it into a thin chapati.

Photobucket

6. Place on a heated tawa and cook for 30 seconds, then flip the chapati over and brush on some oil or melted ghee (I used a mixture of both).

Photobucket

7. Turn the chapati over again and brush some oil on this side as well.

8. Use a flat spatula to press down gently on the oiled chapati so that it becomes evenly golden,

Photobucket

then do the same to the other side.

Photobucket

9. Keep the cooked chapaties warm in a clean tea towel while you make the rest of the chapaties.

These chapaties are best eaten warm and fresh. They get somewhat hard when cold. To re-heat, place the cloth-enfolded chapaties on a microwave safe plate and heat on high for 1 minute.

Monday, May 18, 2009

Bhindi (okra) in mustard sauce

I guess it’s possible at any age to discover something you dislike at first taste – and just as possible to discover that you absolutely love something the existence of which you didn’t know till that first bite. And so it proved with a bhindi (okra) dish that a friend recommended at a Bengali restaurant called “Bay Leaf” that we went to when I was in Chennai earlier this year. (The restaurant, for those who are not in the know, is on a little street adjacent to Gangothree, the wurrrrld-phamous chaat place that’s been around since nearly forever on Cathedral Road - or since I’ve known it. But isnt that the same thing?)

I thought that everything that I tried at Bay Leaf was absolutely delicious, but the bhindi-in-mustard-sauce (shorshe bhindi, on the menu)was nothing short of a lip-smacking revelation. And yet, for many reasons, one being the fact that good, cheap okra is not easy to come by in Shrewsbury, and another being the blue funk that I was sunk in for weeks after my return, missing the three Fs (family, friends, food), it didn’t cross my mind to replicate the dish at home. Actually I didn’t even remember the existence of this beautiful Bengali dish... a bit strange, considering that the food I’d had was among the things I missed so much!

Then I came across the recipe on
Sunita's World and instantly it took me back to how incredibly much I’d enjoyed shorshe bhindi at Bay Leaf. Luckily, I had the opportunity to indulge this memory because I’d just had a delivery of provisions and fresh (ish) vegetables in the post from an online store. Okra was one of the vegetables I’d ordered.

The problem with buying vegetables sight unseen is, of course, that you cannot trust to the quality or freshness. Most times, though, the vegetables turned out in pretty good shape, and the okra didn’t seem bad this time. Until my mother pointed out a fat green worm that was humping its way out of the paper bag. Uuuuuuuuugggggggghhh! The recipe might have ended right there in the dustbin, worm, bhindi, bag and all... and this post would probably not have seen the light of publication this side of 2009.

But luckily, my mother being less squeamish than me and far less tolerant of waste, she volunteered to sort the occupied/pre-nibbled vegetables from those that were edible. And thus did she save the day, the bhindi, the recipe and our vegetarian sensibilities all in one fell swoop.

Good thing, too, because oh boy, the okra-in-mustard-sauce was very nearly as yummy as I remembered it from the Bay Leaf. Well, close enough that I was pleased with it, and even Pete, who isn't a fan of mustard as a condiment, enjoyed the taste.

Another version of this recipe can be found at
BongMom's Cookbook

Recipe for:
Bhindi (okra) in mustard sauce

Photobucket

1/2 kg tender okra, washed, dried, topped and cut into 3" long pieces
2 tbsp mustard seeds (brown or black)
1" piece ginger root
2 dried red chillies
3-4 green chillies (or to taste), slit halfway from the tail end
1 bay leaf
2 tsp oil

1/2 tsp panch phoran or garam masala powder
1/2 tsp turmeric powder
Salt to taste
About 1 cup water, to be used as required

Method:

1. Soak the mustard seeds in water for 15 minutes.

Photobucket

2. Grind it to a smooth paste with the ginger, adding a few tbsp water to help it along. I didn't make mine really smooth, it stayed a bit grainy.

Photobucket

Mix the paste with 1/4 cup water. Add 1/4 tsp turmeric powder and reserve.

Photobucket

3. In a pan, heat the oil and add the bay leaf, red chillies and garam masala powder/panch phoran.

Photobucket

If the bay leaf is green, it will splutter in the hot oil, so watch out.

4. Add 1/4 tsp turmeric powder along with the okra and stir it well. Cover the pan and let the okra cook for 8-10 minutes on medium heat, stirring it every couple of minutes.

Photobucket

5. When the okra is three-fourths cooked (it will feel soft when pressed with a spoon), add the mustard paste, the slit green chillies and the remaining turmeric powder along with salt to taste.

6. Stir the paste into the okra carefully, making sure they're coated thoroughly. Let the okra cook till done. If the paste looks dry, sprinkle a couple of tbsp water on the vegetable and mix it in.

Photobucket

7. Serve hot with rotis or rice as a side dish.

Sunday, May 17, 2009

Avocado milkshake

Did you know that when an avocado is really ripe, the skin peels off almost by itself? You only have to start it off with a peeler - after that you can just strip it off. This is the sort of discovery you can make if you leave an avocado in the fruit bowl for day after day after day after day... until you get perilously close to having it die of non-use and old age. My avocado nearly met with that fate - this despite my mother's gentle daily reminder in one form or another ("what were you going to do with the avocado?" "did you find a recipe for the avocado?" "the avocado seems quite ripe now" "Will you be using the avocado today?" and so on) of its existence.

Photobucket

Well, today turned out to be the last day of the rest of the avocado's life (to re-coin a phrase). Although I've known about and liked avocados since my first hill station holiday in Tamil Nadu (except that I knew them as "butterfruit" - the name very likely to do with their rich creamy taste), by and large, I'm not terribly fond of guacamole. And since I dont do sandwiches enthusiastically either, I was pretty much at a loss about what else to do with avocados other than eat them raw.

And then I came across a recipe for avocado milkshake in a blog called "The Traveler's Lunchbox", which seemed promising. Of course, at that point the avocado I had was not ripe enough to try out the recipe, so both had to hang fire until the circumstances turned auspicious... which was today.

Pete thought the milkshake tasted "green", kind of grassy - really, his way of saying "You may now drink the rest, thanks". Honestly, though, the shake was creamy and lovely and a pale green, but only in colour. Taste-wise, it was lovely. I'm glad I know what to do with avocados that end up in my less-than-ideal care.

Recipe for:
Avocado milkshake

Photobucket

1 large ripe avocado
1/2 tsp vanilla extract
5 tbsp light condensed milk (or to taste)
3 cups cold semi-skimmed or skimmed milk (more as required)
1/2 cup crushed ice

Method:

1. Peel the avocado and de-seed it.

Photobucket

2. Cut into pieces.

Photobucket

3. Place in a blender with the crushed ice, vanilla extract and condensed milk.

Photobucket

Add a cupful of cold milk

Photobucket

and whip till well blended. Thin with more cold milk depending on how thick you like your shake. Taste for sweetness and add more condensed milk if required.

4. Pour into a tall glass over some crushed ice if liked, and serve cold, garnished with a sprig of mint.

Photobucket

Monday, May 11, 2009

Green lentil dal

Photobucket

Yep, just as I thought... oven-roasted tomatoes, apart from making lip-smacking tomato thokku, are amazing in other dishes too. The concentration of flavour is what does the trick, I guess. I’ve made alu-matar with roasted tomato paste as the base, and a simple dal as well – and both were distinctly tastier than usual.

I used green lentils for the dal this time, as they don’t require soaking beforehand, much like whole green gram dal. We had rotis and some leftover potato curry from the morning, and a bit of rice, and my mother suggested that a simple dal would round off our meal. And so it did... but the roasted tomato paste turned it from simple to simply delicious.

I pressure-cooked the green lentils with a chopped tomato and two slit green chillies, to save on time (and fuel). While the dal was cooking, I sliced and stir-fried some onions and the tomato paste, and by the time the cooker had released the pressure and could be opened, the masala was ready for the dal. I can’t recommend too highly the flavour of roasted tomatoes. Roasting seems to make the tomato tangier, and I was glad that I didn’t give in to the impulse to add a bit of tamarind paste, because that would definitely have been overkill.

The best part is that you could easily roast a good load of tomatoes, make a puree of them when cooled, freeze the paste in ice trays, and add a cube or two to whatever you are making if you want a flavour explosion.

Recipe for:
Green lentil dal

Photobucket

Ingredients:

1 cup green lentils

Photobucket

1/4 cup oven-roasted tomatoes, pureed
1 medium tomato, chopped

Photobucket

2 small red or white onions, sliced thin
1 tbsp ginger, grated
3 fresh green chillies
1 tsp oil
1/2 tsp cinnamon powder
Water as required
Salt to taste

For tempering:
1 tsp ghee
2 garlic cloves, sliced very thin
1 tsp cumin seeds

For garnish:
2 tbsp fresh coriander leaves, chopped

Method:

1. Wash and rinse the dal, then pressure-cook along with 2 cups water, the chopped tomato and two green chillies (slit), for three whistles.

Photobucket

Let the pressure come down by itself. Stir the dal gently and remove the whole green chillies, if you wish.

Photobucket

2. Heat the oil, add the cinnamon powder.

Photobucket

After 10 seconds, add the grated ginger and fry for 30 seconds,

Photobucket

then add one green chilli, sliced thinly.

Photobucket

3. Fry for 30 seconds, then add the sliced onions.

Photobucket

Fry for 2-3 minutes on high heat, till the onions begin to turn soft.

Photobucket

4. Add the pureed roasted tomato along with 2-3 tbsp water and stir well, cooking on a medium-high flame for 3-4 minutes.

Photobucket

5. Now add the pressure-cooked dal (discard the green chillies if you like) and mix well.

Photobucket

Add 1/2 cup water if the dal is too thick.

6. Add salt to taste and simmer the dal for 5 minutes.

7. For the temperig, heat the tsp of ghee in a small pan, toss in the cumin seeds and let them change colour, about 10 seconds.

Photobucket

8. Then add the sliced garlic and fry till it just starts turning a light brown around the edges.

Photobucket

9. Pour this tempering on the dal.

Photobucket

Garnish with coriander leaves and serve hot with rotis or rice.