
I can't seem to get enough of karela or bittergourd nowadays - I really love these ugly knobbly vegetables that look like a bit like rats with a long tail. A couple of days back, I went to my favourite "Indian" shop in Wellington for vegetables, and was beyond thrilled to find small baby karela for sale. I picked out the freshest 10 and came home joyfully, having decided how I was going to cook them. Stuffed, basically. I didn't want the stuffing to be the usual onion masala or potato masala or peanut-based masala - mainly because I didn't want to spend time cooking the stuffing. Bad enough that I would have to wait for the karela itself to cook.
So I just put together a random mixture of flours and spices, toasted the mix in a dry pan until fragrant, then used some oil and water to bind the powdery mix and make it amenable to stuffing, basically.
I admit that this recipe uses more oil than usual, but it's worth it if you love karela and only make it once in a while. It was SO delicious. I had the stuffed karela with lemon masoor dal and rice and a little ghee, and felt like I had gone to heaven without having to die first. Yes, THAT good.
So good that I forgot to take a photo before diving into the karela. Oops...
Recipe for: Stuffed karela
Ingredients:
6-8 small (about 4-5 inches length) tender karela
For the masala paste
1/4 cup soya flour or jowar flour
1/2 cup chickpea flour (besan/kadalai maavu)
1/8 cup rice flour
4 tbsp coriander powder
1 tsp cumin powder
1/2 tsp aniseed powder
1/2 tsp fennel powder
1 tsp garam masala/rasam powder/any other masala you prefer
2 tsp red chilli powder (or to taste)
1/4 tsp asafoetida powder
Salt to taste
4 tbsp oil
Method:
1. Lightly peel the karela so that the ridges no longer stick out. Make a slit in each karela from end to end, being careful not to cut right through to the other side.
2. Use the handle of a small spoon to gouge out the inner seeds and membrane.
3. At this point you can rub salt on the inside and outside of the karela and let it sit for a few hours so that some of the bitter juices are drawn out. If you do this, be sure to squeeze the juices out, then wash the karela well to remove the excess salt. Pat dry with kitchen paper and reserve.
4. Mix together all the ingredients for the masala paste, bar the oil. Heat a pan and dry toast the mixed masala powder, stirring constantly, until the flours start to smell fragrant and savoury. Be careful not to burn it.
5. Once the masala mix is toasted, transfer it to a container. This might be more than you require, but you can always store the excess for another day in an airtight container. I prefer to make extra, because I don't like it when I find out halfway through stuffing that there isn't enough masala paste to fill all the karela. so you can use all of the toasted mix, or just half, depending on how many karela you have and their size.
6. Now add 2 tbsp of the oil to the masala powder and stir it in. The paste needs to come together enough that if you pinch some together, it shouldn't fall apart. You can add a bit more oil to get the powder to that stage, or you can add a little water. Either way, don't make it into a gooey paste.
7. Once the masala mix is ready, use your fingers to stuff it into the karela. Once they are all stuffed, you can use kitchen string to tie the karela so the stuffing doesn't come out (it tends to expand a bit as it cooks), but it's not strictly necessary especially if the karela is small.
8. Heat the remaining 2 tbsp oil in a pan and add 1/4 tsp asafoetida to it. As soon as it sizzles, put the stuffed karela in the pan and stir them gently so they are coated in the oil. Sprinkle 2-3 tbsp water over the karela and close the pan. Cook the karela covered over medium-low heat for 15 minutes or until they soften and turn a paler green. After that take the lid off and turn up the heat a bit more, occasionally turning them over, until they turn brown and crisp on all sides.
Serve hot with dal and rice.
Showing posts with label rice flour. Show all posts
Showing posts with label rice flour. Show all posts
Tuesday, January 26, 2016
Sunday, April 15, 2012
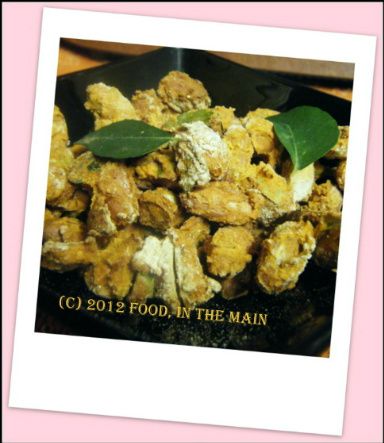
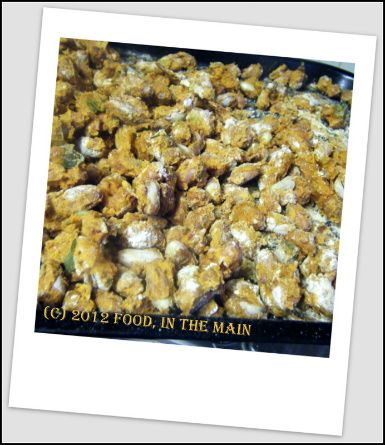
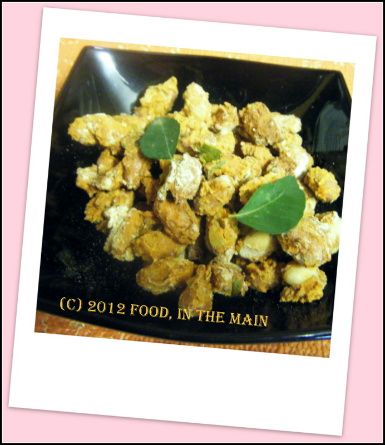
Baked masala peanuts
It's been years since I first saw this recipe on Bee & Jai's amazing food blog, Jugalbandi, and every so often since then I've thought to myself "I really should try making those peanuts" but never got around to it.
Finally, last week I broke through the "must make it" barrier to burst triumphantly into the "WILL make it today" arena... only to find that I was out of raw peanuts. Cue frantic trips to Tesco, Sainsbury's and Morrisons on a desperate hunt for peanuts - whole, skinned, broken, unskinned, whatever I could get - but all I found were monkey nuts or the ready-to-eat salted/roasted kind.
You can have no idea just how thwarted I felt, because I'm certain that most of you wonderful people are the kind that don't thwart easily (especially if you live close to any ethnic food-stores). But me, I had to go back home empty-handed and log on to an Internet site that sells all manner of ethnic goodies... and peanuts. Raw, whole, broken, unskinned, pink, red, jumbo - pretty much every kind of peanut I could think of.
Reader, I bought them.
For my first batch of these addictively good masala peanuts, I changed the quantity of the spices used, not the spices themselves, and added fresh curry leaves. But the procedure was otherwise exactly as set out by Bee and Jai. (I made another batch for Pete with no chilli powder at all, and he scarfed the peanuts down like they'd been made for him. Oh. Wait...)
A note of warning - I used an enamelled metal tray to bake these peanuts, and I must say that it took some serious elbow grease to get it cleaned of the rock-hard baked-on chickpea flour mixture. Did I mind the effort? Not in the least - all I had to do was think of the container of uber crunchy spicy peanuts, and the hard work was totally worth it. Just - whatever you do, don't use a non-stick tray. You have been warned.
Recipe for: Baked masala peanuts
Ingredients:
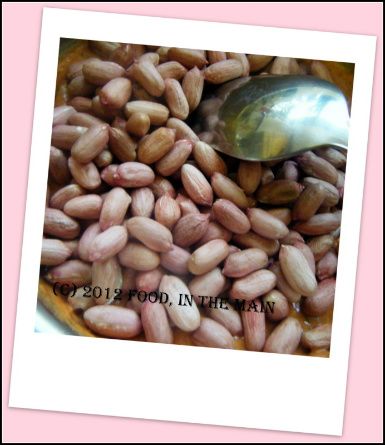
1.5 cups raw peanuts (skinned or unskinned)
1.5 cups chickpea flour (kadala maavu/besan)
2 htsp red chilli powder (or to taste)
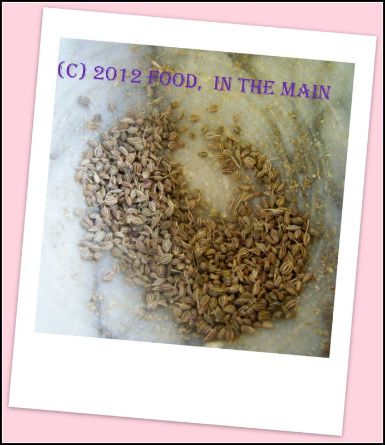
1/2 tsp ground ajwain (bishop’s weed)
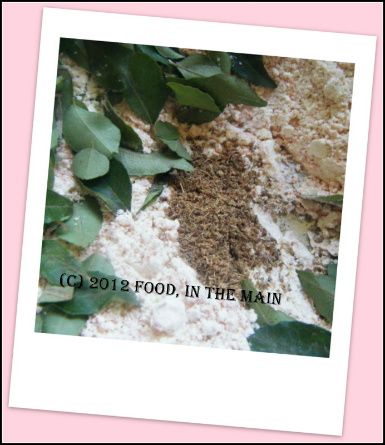
1 tbsp dried fenugreek leaves (kasoori methi)
1.5 tbsp rice flour
Handful of fresh curry leaves, roughly torn up
Salt to taste
Water as required
Method:
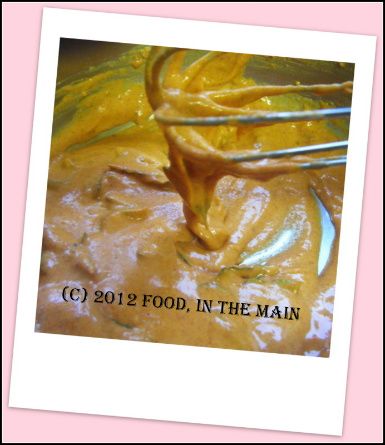
1. Mix together the chickpea flour, red chilli powder, ground ajwain, fenugreek leaves, curry leaves, rice flour and salt to taste.
2. Take half the spiced flour in a bowl and carefully add just enough water
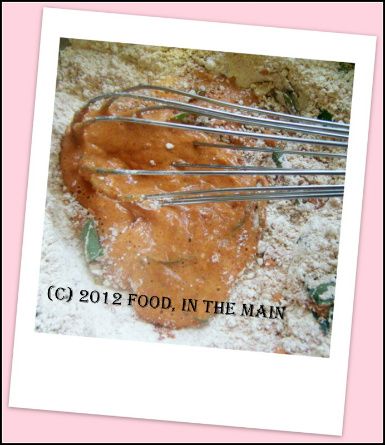
to make a thick paste that drips slowly off a spoon.
3. Add the peanuts to this and mix well.
4. Now add the remaining spiced flour and mix it gently. Be warned, this is an exasperatingly sticky job.
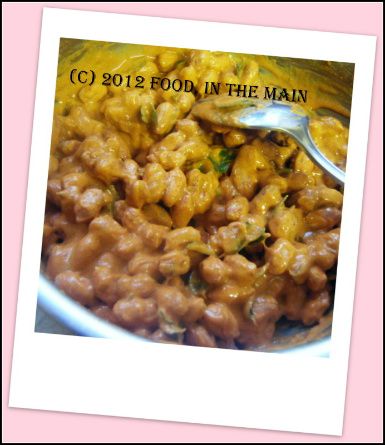
5. Spread the peanuts onto a metal baking tray. (See warning above of exasperating stickiness. Persevere.)
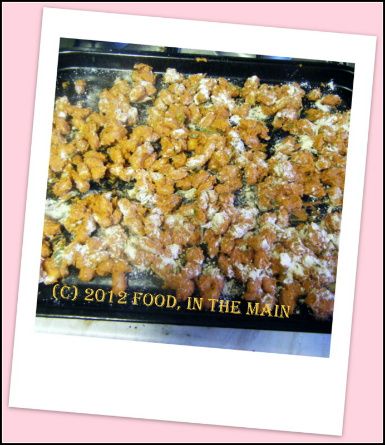
6. Bake at 180C/350F for 15 minutes, then stir the peanuts around, using a metal spatula to scrape and loosen the worst bits.
7. Bake for another 8-10 minutes, until the peanuts turn a darker colour in spots. They will crisp up as they cool down.
Stir them around once or twice as they cool.
Store in an airtight container.
RECIPE: BAKED MASALA PEANUTS
Ingredients:
1.5 cups raw peanuts (skinned or unskinned)
1.5 cups chickpea flour (kadala mavu/besan)
2 htsp red chilli powder (or to taste)
1/2 tsp ground ajwain (bishop’s weed)
1 tbsp dried fenugreek leaves (kasoori methi)
1.5 tbsp rice flour
Handful of fresh curry leaves, roughly torn up
Salt to taste
Water as required
Method:
1. Mix together the chickpea flour, red chilli powder, ground ajwain, fenugreek leaves, curry leaves, rice flour and salt to taste.
2. Take half the spiced flour in a bowl and add enough water to make a thick paste that drips slowly off a spoon.
3. Add the peanuts to this and mix well.
4. Now add the remaining spiced flour and mix it gently. Be warned, this is an exasperatingly sticky job.
5. Spread the peanuts onto a metal baking tray. (See warning above of exasperating stickiness. Persevere.)
6. Bake at 180C/350F for 15 minutes, then stir the peanuts around, using a metal spatula to scrape and loosen the worst bits.
7. Bake for another 8-10 minutes, until the peanuts turn a darker colour in spots. They will crisp up as they cool down. Stir them around once or twice as they cool. Store in an airtight container.
Finally, last week I broke through the "must make it" barrier to burst triumphantly into the "WILL make it today" arena... only to find that I was out of raw peanuts. Cue frantic trips to Tesco, Sainsbury's and Morrisons on a desperate hunt for peanuts - whole, skinned, broken, unskinned, whatever I could get - but all I found were monkey nuts or the ready-to-eat salted/roasted kind.
You can have no idea just how thwarted I felt, because I'm certain that most of you wonderful people are the kind that don't thwart easily (especially if you live close to any ethnic food-stores). But me, I had to go back home empty-handed and log on to an Internet site that sells all manner of ethnic goodies... and peanuts. Raw, whole, broken, unskinned, pink, red, jumbo - pretty much every kind of peanut I could think of.
Reader, I bought them.
For my first batch of these addictively good masala peanuts, I changed the quantity of the spices used, not the spices themselves, and added fresh curry leaves. But the procedure was otherwise exactly as set out by Bee and Jai. (I made another batch for Pete with no chilli powder at all, and he scarfed the peanuts down like they'd been made for him. Oh. Wait...)
A note of warning - I used an enamelled metal tray to bake these peanuts, and I must say that it took some serious elbow grease to get it cleaned of the rock-hard baked-on chickpea flour mixture. Did I mind the effort? Not in the least - all I had to do was think of the container of uber crunchy spicy peanuts, and the hard work was totally worth it. Just - whatever you do, don't use a non-stick tray. You have been warned.
Recipe for: Baked masala peanuts
Ingredients:
1.5 cups raw peanuts (skinned or unskinned)
1.5 cups chickpea flour (kadala maavu/besan)
2 htsp red chilli powder (or to taste)
1/2 tsp ground ajwain (bishop’s weed)
1 tbsp dried fenugreek leaves (kasoori methi)
1.5 tbsp rice flour
Handful of fresh curry leaves, roughly torn up
Salt to taste
Water as required
Method:
1. Mix together the chickpea flour, red chilli powder, ground ajwain, fenugreek leaves, curry leaves, rice flour and salt to taste.
2. Take half the spiced flour in a bowl and carefully add just enough water
to make a thick paste that drips slowly off a spoon.
3. Add the peanuts to this and mix well.
4. Now add the remaining spiced flour and mix it gently. Be warned, this is an exasperatingly sticky job.
5. Spread the peanuts onto a metal baking tray. (See warning above of exasperating stickiness. Persevere.)
6. Bake at 180C/350F for 15 minutes, then stir the peanuts around, using a metal spatula to scrape and loosen the worst bits.
7. Bake for another 8-10 minutes, until the peanuts turn a darker colour in spots. They will crisp up as they cool down.
Stir them around once or twice as they cool.
Store in an airtight container.
RECIPE: BAKED MASALA PEANUTS
Ingredients:
1.5 cups raw peanuts (skinned or unskinned)
1.5 cups chickpea flour (kadala mavu/besan)
2 htsp red chilli powder (or to taste)
1/2 tsp ground ajwain (bishop’s weed)
1 tbsp dried fenugreek leaves (kasoori methi)
1.5 tbsp rice flour
Handful of fresh curry leaves, roughly torn up
Salt to taste
Water as required
Method:
1. Mix together the chickpea flour, red chilli powder, ground ajwain, fenugreek leaves, curry leaves, rice flour and salt to taste.
2. Take half the spiced flour in a bowl and add enough water to make a thick paste that drips slowly off a spoon.
3. Add the peanuts to this and mix well.
4. Now add the remaining spiced flour and mix it gently. Be warned, this is an exasperatingly sticky job.
5. Spread the peanuts onto a metal baking tray. (See warning above of exasperating stickiness. Persevere.)
6. Bake at 180C/350F for 15 minutes, then stir the peanuts around, using a metal spatula to scrape and loosen the worst bits.
7. Bake for another 8-10 minutes, until the peanuts turn a darker colour in spots. They will crisp up as they cool down. Stir them around once or twice as they cool. Store in an airtight container.
Thursday, September 29, 2011
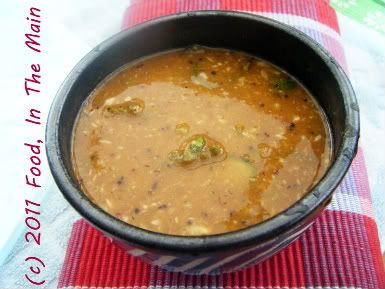
Bittergourd pitla
Over the last few years, I’ve been testing my limits with that most unattractive of vegetables, the bittergourd (or karela, bitter melon, pavakkai or whatever name you call it – my husband terms them “rats”), to see just HOW much I love it.
I used to hate it completely, in any form, as a kid. In my late teens or thereabouts, I would as a concession eat them deep fried (yes, I know, very broad-minded of me) mainly because the ones from Hot Chips in Abhiramapuram were sensational.
Eventually, after a couple of decades, I got around to eating them pan-fried crisp, as a dry curry. After that things moved a lot more rapidly in the experimentation department, and I moved on to karela-without-frying-too-much, karela as a semi-dry curry cooked with onions and tomatoes, karela with mustard paste (a double-whammy in the strong flavour department).
While karela pitla (South Indian style) is probably not as scary as it used to be, or even as full-on as karela-with-mustard-paste, I still had to see if I'd like it - just to drive away the last of the childhood fear and hatred of the karela's bitter flavour. And, of course, I passed the test with flying colours, practically inhaling the pitla which my mother made a day or two before she left Shrewsbury.
The only karela-based item that I know I won't like is karela juice. Where that is concerned, I think I'm as blinkered as I ever was, with just one standard reaction: "No way Felipe." (Jose wasn't available.)
Recipe for: Bittergourd/karela/pavakkai pitla
Ingredients:
2 medium karela/bittergourd/pavakkai, sliced into rounds
1 cup masoor dal, cooked
1 tbsp tamarind paste
3 tsp gingelly oil (or any neutral cooking oil)
1 tsp mustard seeds
2 tbsp sambar powder
2 tbsp finely grated coconut
1/2 tsp asafoetida powder
1 tbsp rice flour
Salt to taste
a few fresh curry leaves, torn up
3-4 cups water
Method:
1. Heat the oil in a small pan and add the asafoetida powder, mustard seeds and curry leaves.
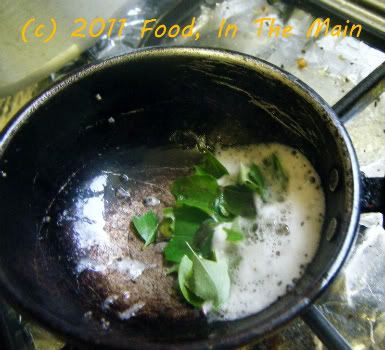
Cover and let the seeds pop, then add the grated coconut.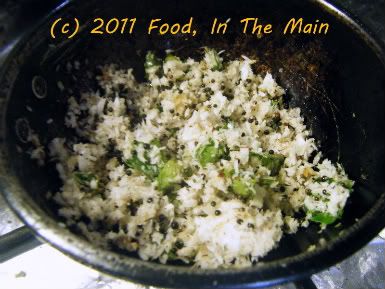
Fry on medium heat till the coconut is light brown and aromatic.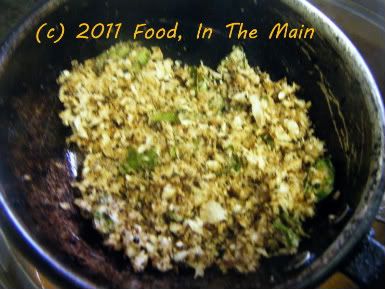
Remove from heat and set aside till required.
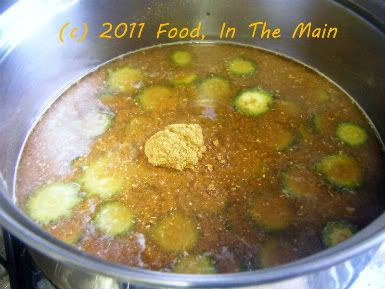
2. Put about a cupful of water in a pan along with the karela/bittergourd/pavakkai and turmeric powder.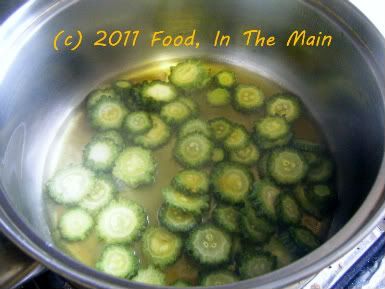
Let it cook till it becomes soft.
3. Dissolve the tamarind paste in 2 cup water and add it to the cooked karela/bittergourd/pavakkai.
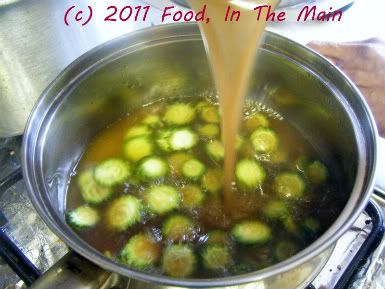
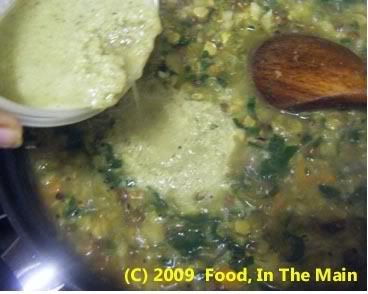
4. Bring this to a boil, then add the sambar powder and rice powder and stir till well mixed.
5. Stir in the cooked masoor dal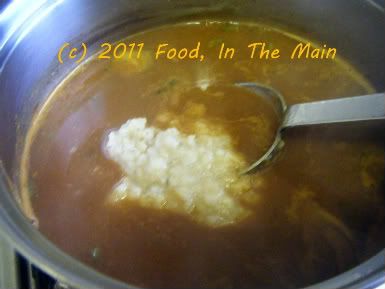
6. Add salt to taste along with the roasted coconut and mix in.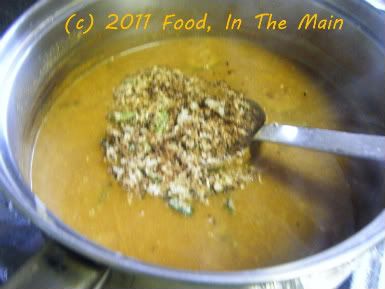
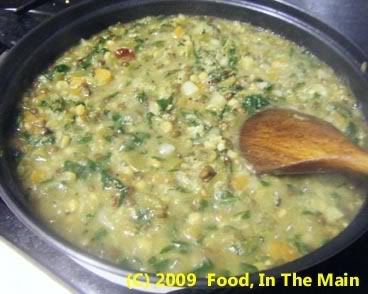
7. Boil the pitla for a few minutes longer till it thickens.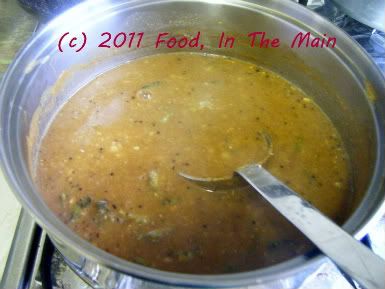
Serve hot with rice.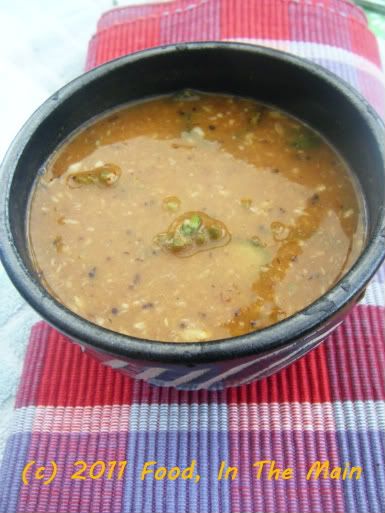
RECIPE: BITTERGOURD/KARELA/PAVAKKAI PITLA
Ingredients:
2 medium karela/bittergourd/pavakkai, sliced into rounds
1 tbsp tamarind paste
3 tsp gingelly oil (or any neutral cooking oil)
1 tsp mustard seeds
2 tbsp sambar powder
2 tbsp finely grated coconut
1/2 tsp asafoetida powder
1 tbsp rice flour
Salt to taste
a few fresh curry leaves, torn up
3-4 cups water
Method:
1. Heat the oil in a small pan and add the asafoetida powder, mustard seeds and curry leaves. Cover and let the seeds pop, then add the grated coconut. Fry on medium heat till the coconut is light brown and aromatic. Remove from heat and set aside till required.
2. Put about a cupful of water in a pan along with the karela/bittergourd/pavakkai and turmeric powder. Let it cook till it becomes soft.
3. Dissolve the tamarind paste in 2 cup water and add it to the cooked karela/bittergourd/pavakkai.
4. Bring this to a boil, then add the sambar powder and rice powder and stir till well mixed.
5. Stir in the cooked masoor dal.
6. Add salt to taste along with the roasted coconut and mix in.
7. Boil the pitla for a couple of minutes longer. Serve hot with rice.
I used to hate it completely, in any form, as a kid. In my late teens or thereabouts, I would as a concession eat them deep fried (yes, I know, very broad-minded of me) mainly because the ones from Hot Chips in Abhiramapuram were sensational.
Eventually, after a couple of decades, I got around to eating them pan-fried crisp, as a dry curry. After that things moved a lot more rapidly in the experimentation department, and I moved on to karela-without-frying-too-much, karela as a semi-dry curry cooked with onions and tomatoes, karela with mustard paste (a double-whammy in the strong flavour department).
While karela pitla (South Indian style) is probably not as scary as it used to be, or even as full-on as karela-with-mustard-paste, I still had to see if I'd like it - just to drive away the last of the childhood fear and hatred of the karela's bitter flavour. And, of course, I passed the test with flying colours, practically inhaling the pitla which my mother made a day or two before she left Shrewsbury.
The only karela-based item that I know I won't like is karela juice. Where that is concerned, I think I'm as blinkered as I ever was, with just one standard reaction: "No way Felipe." (Jose wasn't available.)
Recipe for: Bittergourd/karela/pavakkai pitla
Ingredients:
2 medium karela/bittergourd/pavakkai, sliced into rounds
1 cup masoor dal, cooked
1 tbsp tamarind paste
3 tsp gingelly oil (or any neutral cooking oil)
1 tsp mustard seeds
2 tbsp sambar powder
2 tbsp finely grated coconut
1/2 tsp asafoetida powder
1 tbsp rice flour
Salt to taste
a few fresh curry leaves, torn up
3-4 cups water
Method:
1. Heat the oil in a small pan and add the asafoetida powder, mustard seeds and curry leaves.
Cover and let the seeds pop, then add the grated coconut.
Fry on medium heat till the coconut is light brown and aromatic.
Remove from heat and set aside till required.
2. Put about a cupful of water in a pan along with the karela/bittergourd/pavakkai and turmeric powder.
Let it cook till it becomes soft.
3. Dissolve the tamarind paste in 2 cup water and add it to the cooked karela/bittergourd/pavakkai.
4. Bring this to a boil, then add the sambar powder and rice powder and stir till well mixed.
5. Stir in the cooked masoor dal
6. Add salt to taste along with the roasted coconut and mix in.
7. Boil the pitla for a few minutes longer till it thickens.
Serve hot with rice.
RECIPE: BITTERGOURD/KARELA/PAVAKKAI PITLA
Ingredients:
2 medium karela/bittergourd/pavakkai, sliced into rounds
1 tbsp tamarind paste
3 tsp gingelly oil (or any neutral cooking oil)
1 tsp mustard seeds
2 tbsp sambar powder
2 tbsp finely grated coconut
1/2 tsp asafoetida powder
1 tbsp rice flour
Salt to taste
a few fresh curry leaves, torn up
3-4 cups water
Method:
1. Heat the oil in a small pan and add the asafoetida powder, mustard seeds and curry leaves. Cover and let the seeds pop, then add the grated coconut. Fry on medium heat till the coconut is light brown and aromatic. Remove from heat and set aside till required.
2. Put about a cupful of water in a pan along with the karela/bittergourd/pavakkai and turmeric powder. Let it cook till it becomes soft.
3. Dissolve the tamarind paste in 2 cup water and add it to the cooked karela/bittergourd/pavakkai.
4. Bring this to a boil, then add the sambar powder and rice powder and stir till well mixed.
5. Stir in the cooked masoor dal.
6. Add salt to taste along with the roasted coconut and mix in.
7. Boil the pitla for a couple of minutes longer. Serve hot with rice.
Wednesday, August 17, 2011
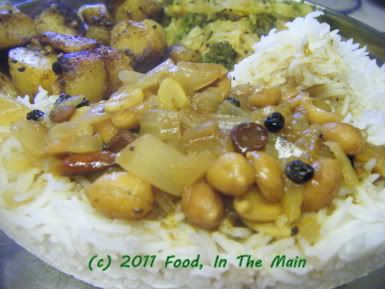
Vengaya vattha kuzhambu (Onion-tamarind gravy)
Every day in every way I’m getting lazier and lazier.
This is not what I want to be confessing, dear reader. Believe me, I’d much rather be declaring the more conventional - and infinitely more impressive – version that goes “Every day in every way I’m getting better and better”.
The truth is that I have, at the very least, half a dozen recent recipes to post about and over a dozen older ones which have been ageing gracefully without seeing the light of publication. It’s so easy to take photos while cooking – that’s become second nature now – but it’s a lot less fun to have to edit them (even the simplest, most basic edit that I do which is basically adding my blog name to the photo). It’s infinitely less appealing still to write up the recipes step by step and match the correct photos every step of the way.
I know, nobody’s forcing me to do the whole step-by-step thing, and there wasn’t a gun held to my head when I began to write up the instructions this way. Call me short-sighted but I didn’t envisage a point where I would find it boring to continue doing it in such a painstakingly detailed way. More fool me, because it’s been ever thus with every single one of my enthusiasms over the years.
Don’t get me wrong, I’m not bored with cooking. I’m not even bored of taking photographs while cooking. (And I’m certainly not bored with eating – no fear.) I enjoy writing the posts too, 98% of the time - probably because I feel no urge to stick to the point and no pressure to be topical or even informative. So it’s just the recipe itself, with the ingredients and instructions.
I guess I could stop the step-by-step routine… but after so many years of my blog, I can’t bring myself to do that. (Apparently I can bring myself to ignore my blog and the recipes that are clamouring for release… apparently that isn’t wrong. But simplifying things so that I can bring myself to post more often – oh golly gee gosh, that would feel so wrong.) Look, I can’t explain why this is so – but that is how it is.
Anyway, I decided to post this fairly standard, easy, everyday recipe that I make often - I haven’t posted about it thus far because, you know, it’s fairly standard, easy… etc etc. However, it struck me recently that it might not be standard to everybody, and not everybody might make it this way. So in the interests of posterity, and so on.
I feel quite noble to be dragging myself out of mylethargy comfort zone just for the sake of posterity. How nice of me to do this.
If you’ve finished acknowledging my nobility and niceness, you may go on to the recipe. Which is actually a fairly standard, easy…
Oh. I’ve said this before.
Recipe for: Vengaya vattha kuzhambu
Ingredients:
2 tsp tamarind paste
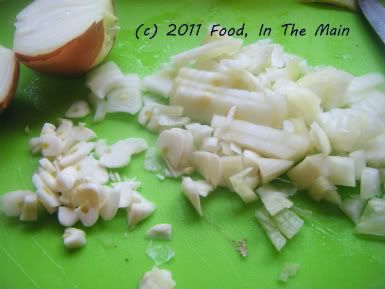
4-5 cloves garlic, chopped
2 medium onions, chopped
1/4 tsp vendhayam/fenugreek seeds
1 tbsp toor/tuvar dal
1 tbsp manathakkali vatthal
1 tbsp gingelly oil/nallennai
3-4 dried red chillies, broken in half (or to taste)
1 tsp mustard seeds
a few fresh/frozen curry leaves (optional)
1/2 tsp turmeric powder
1/4 tsp asafoetida powder
2-3 tsp sambar powder or vattha kuzhambu powder (if available)
2 tbsp rice flour
1/2 tsp black pepper powder
handful of roasted peanuts (optional)
Method:
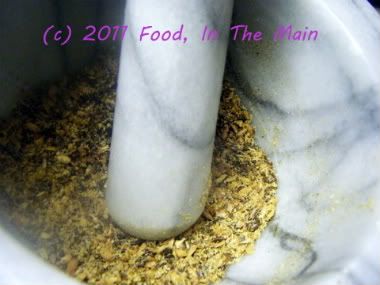
1. Dissolve the tamarind paste in 5 cups water. Reserve.
2. Heat the oil and add the manathakkali vatthal, the tur dal, dried red chillies, mustard seeds, fenugreek seeds, curry leaves, asafoetida powder and turmeric powder.
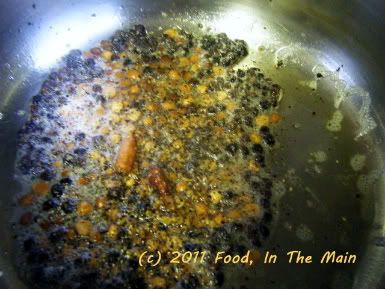
Fry all these for a couple of minutes on high heat, stirring to prevent burning.
3. Next, add the chopped onions and garlic and stir.
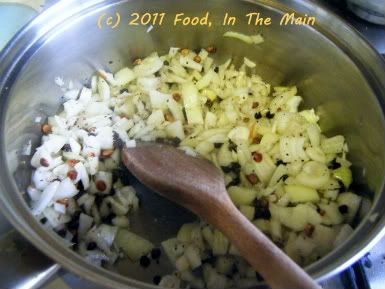
4. When the onions start to soften, add the sambar/vattha kuzhambu powder and stir it in, along with the black pepper powder.

5. Now pour in the tamarind water.

Bring to a boil on high heat, then turn it down to medium-low and let it simmer gently for 10 minutes or so.
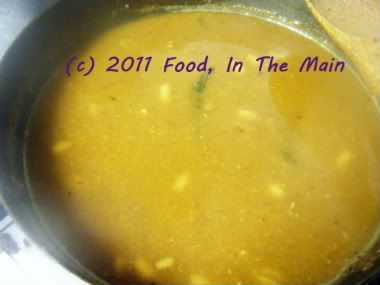
6. Whisk together 2 tbsp rice flour with some water to make a thick, pourable paste and stir it into the kuzhambu. Let it boil for another 4-5 minutes until the kuzhambu thickens and becomes less watery.
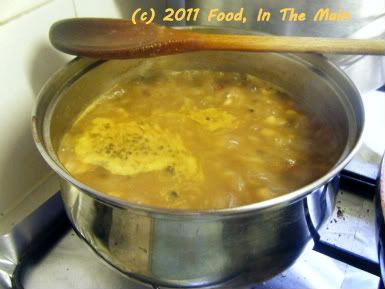
Add salt to taste and throw in the peanuts now, if using. Serve hot with steamed white rice and a dry vegetable curry.
RECIPE: VENGAYA VATTHA KUZHAMBU
Ingredients:
2 tsp tamarind paste
4-5 cloves garlic, chopped
2 medium onions, chopped
1/4 tsp vendhayam/fenugreek seeds
1 tbsp toor/tuvar dal
1 tbsp manathakkali vatthal
1 tbsp gingelly oil/nallennai
3-4 dried red chillies, broken in half (or to taste)
1 tsp mustard seeds
a few fresh/frozen curry leaves (optional)
1/2 tsp turmeric powder
1/4 tsp asafoetida powder
2-3 tsp sambar powder or vattha kuzhambu powder (if available)
2 tbsp rice flour
1/2 tsp black pepper powder
handful of roasted peanuts (optional)
Method:
1. Dissolve the tamarind paste in 5 cups water. Reserve.
2. Heat the oil and add the manathakkali vatthal, the tur dal, dried red chillies, mustard seeds, fenugreek seeds, curry leaves, asafoetida powder and turmeric powder. Fry all these for a couple of minutes on high heat, stirring to prevent burning.
3. Next, add the chopped onions and garlic and stir.
4. When the onions start to soften, add the sambar/vattha kuzhambu powder and stir it in, along with the black pepper powder.
5. Now pour in the tamarind water. Bring to a boil on high heat, then turn it down to medium-low and let it simmer gently for 10 minutes or so.
6. Whisk together 2 tbsp rice flour with some water to make a thick, pourable paste and stir it into the kuzhambu. Let it boil for another 4-5 minutes until the kuzhambu thickens and become less watery. Add salt to taste and throw in the peanuts now, if using. Serve hot with steamed white rice and a dry vegetable curry.
This is not what I want to be confessing, dear reader. Believe me, I’d much rather be declaring the more conventional - and infinitely more impressive – version that goes “Every day in every way I’m getting better and better”.
The truth is that I have, at the very least, half a dozen recent recipes to post about and over a dozen older ones which have been ageing gracefully without seeing the light of publication. It’s so easy to take photos while cooking – that’s become second nature now – but it’s a lot less fun to have to edit them (even the simplest, most basic edit that I do which is basically adding my blog name to the photo). It’s infinitely less appealing still to write up the recipes step by step and match the correct photos every step of the way.
I know, nobody’s forcing me to do the whole step-by-step thing, and there wasn’t a gun held to my head when I began to write up the instructions this way. Call me short-sighted but I didn’t envisage a point where I would find it boring to continue doing it in such a painstakingly detailed way. More fool me, because it’s been ever thus with every single one of my enthusiasms over the years.
Don’t get me wrong, I’m not bored with cooking. I’m not even bored of taking photographs while cooking. (And I’m certainly not bored with eating – no fear.) I enjoy writing the posts too, 98% of the time - probably because I feel no urge to stick to the point and no pressure to be topical or even informative. So it’s just the recipe itself, with the ingredients and instructions.
I guess I could stop the step-by-step routine… but after so many years of my blog, I can’t bring myself to do that. (Apparently I can bring myself to ignore my blog and the recipes that are clamouring for release… apparently that isn’t wrong. But simplifying things so that I can bring myself to post more often – oh golly gee gosh, that would feel so wrong.) Look, I can’t explain why this is so – but that is how it is.
Anyway, I decided to post this fairly standard, easy, everyday recipe that I make often - I haven’t posted about it thus far because, you know, it’s fairly standard, easy… etc etc. However, it struck me recently that it might not be standard to everybody, and not everybody might make it this way. So in the interests of posterity, and so on.
I feel quite noble to be dragging myself out of my
If you’ve finished acknowledging my nobility and niceness, you may go on to the recipe. Which is actually a fairly standard, easy…
Oh. I’ve said this before.
Recipe for: Vengaya vattha kuzhambu
Ingredients:
2 tsp tamarind paste
4-5 cloves garlic, chopped
2 medium onions, chopped
1/4 tsp vendhayam/fenugreek seeds
1 tbsp toor/tuvar dal
1 tbsp manathakkali vatthal
1 tbsp gingelly oil/nallennai
3-4 dried red chillies, broken in half (or to taste)
1 tsp mustard seeds
a few fresh/frozen curry leaves (optional)
1/2 tsp turmeric powder
1/4 tsp asafoetida powder
2-3 tsp sambar powder or vattha kuzhambu powder (if available)
2 tbsp rice flour
1/2 tsp black pepper powder
handful of roasted peanuts (optional)
Method:
1. Dissolve the tamarind paste in 5 cups water. Reserve.
2. Heat the oil and add the manathakkali vatthal, the tur dal, dried red chillies, mustard seeds, fenugreek seeds, curry leaves, asafoetida powder and turmeric powder.
Fry all these for a couple of minutes on high heat, stirring to prevent burning.
3. Next, add the chopped onions and garlic and stir.
4. When the onions start to soften, add the sambar/vattha kuzhambu powder and stir it in, along with the black pepper powder.
5. Now pour in the tamarind water.
Bring to a boil on high heat, then turn it down to medium-low and let it simmer gently for 10 minutes or so.
6. Whisk together 2 tbsp rice flour with some water to make a thick, pourable paste and stir it into the kuzhambu. Let it boil for another 4-5 minutes until the kuzhambu thickens and becomes less watery.
Add salt to taste and throw in the peanuts now, if using. Serve hot with steamed white rice and a dry vegetable curry.
RECIPE: VENGAYA VATTHA KUZHAMBU
Ingredients:
2 tsp tamarind paste
4-5 cloves garlic, chopped
2 medium onions, chopped
1/4 tsp vendhayam/fenugreek seeds
1 tbsp toor/tuvar dal
1 tbsp manathakkali vatthal
1 tbsp gingelly oil/nallennai
3-4 dried red chillies, broken in half (or to taste)
1 tsp mustard seeds
a few fresh/frozen curry leaves (optional)
1/2 tsp turmeric powder
1/4 tsp asafoetida powder
2-3 tsp sambar powder or vattha kuzhambu powder (if available)
2 tbsp rice flour
1/2 tsp black pepper powder
handful of roasted peanuts (optional)
Method:
1. Dissolve the tamarind paste in 5 cups water. Reserve.
2. Heat the oil and add the manathakkali vatthal, the tur dal, dried red chillies, mustard seeds, fenugreek seeds, curry leaves, asafoetida powder and turmeric powder. Fry all these for a couple of minutes on high heat, stirring to prevent burning.
3. Next, add the chopped onions and garlic and stir.
4. When the onions start to soften, add the sambar/vattha kuzhambu powder and stir it in, along with the black pepper powder.
5. Now pour in the tamarind water. Bring to a boil on high heat, then turn it down to medium-low and let it simmer gently for 10 minutes or so.
6. Whisk together 2 tbsp rice flour with some water to make a thick, pourable paste and stir it into the kuzhambu. Let it boil for another 4-5 minutes until the kuzhambu thickens and become less watery. Add salt to taste and throw in the peanuts now, if using. Serve hot with steamed white rice and a dry vegetable curry.
Friday, January 21, 2011
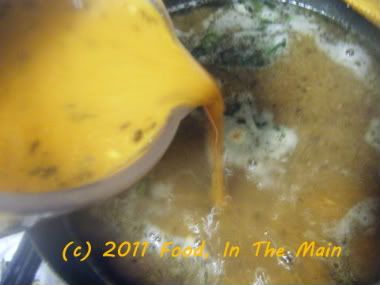
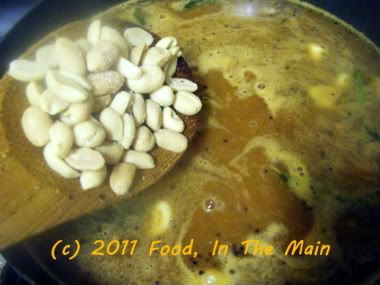
Flaxseed peanut puli kuzhambu (tamarind gravy)
I guess I could have called this a vattha kuzhambu except for the fact that I carefully refrained from using manthakkali or chundakkai vatthal (dried berries). This puli kuzhambu tastes very nice, if you ask me. If, however, you DON'T want to ask me, I guess you'll have to make it and discover this fact for yourself, won't you?
Recipe for: Flaxseed puli kuzhambu (tamarind gravy)
Ingredients:
2 tbsp dry-roasted flaxseeds
1 htbsp sambar powder
2 tsp rice flour
1/4 cup roasted peanuts
Lime-sized amount of tamarind/2 tsp tamarind paste
2 tsp tuvar dal
1 tsp mustard seeds
1/2 tsp vendhayam/fenugreek seeds
5-6 fresh/frozen curry leaves
1 tbsp gingelly oil/nallennai
Salt to taste
4-5 cups water
Method:
1. Pound or grind the flaxseeds to a fine powder.
2. Dissolve the tamarind in 4 cups water (or extract the pulp from the dry tamarind). Reserve.
3. Heat the oil in a pan, add the asafoetida powder, tuvar dal, fenugreek seeds, curry leaves, and mustard seeds. Cover and let the seeds pop, let the dal turn golden brown,
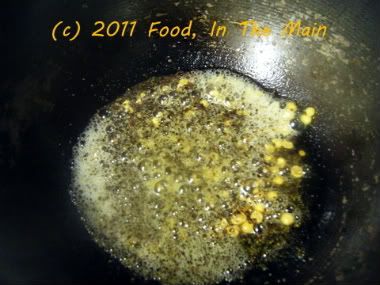
then pour in the tamarind water.
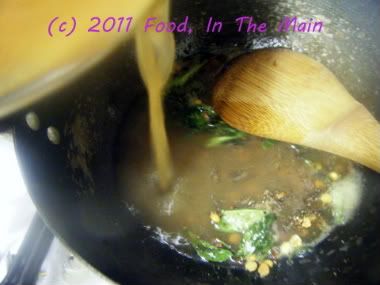
Let this come to a brisk boil.
4. While it is coming up to the boil, mix together the flaxseed powder, sambar powder and rice flour,
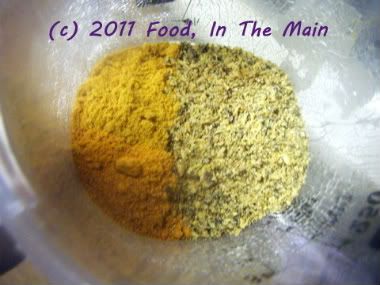
add 1/4 cup water and whisk to a pourable mixture without lumps.
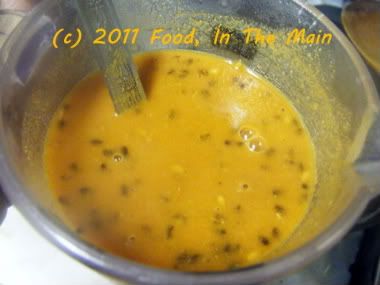
5. Now pour this into the tamarind water and stir it in, along with salt to taste.
6. Keep the heat on medium and let the kuzhambu simmer for 10 minutes to let the flavours come together, and for it to thicken. Then add the peanuts and allow the kuzhambu to boil for 5 minutes more.
7. The longer the kuzhambu sits, the better it will taste. Reheat before serving, along with steamed rice and any kootu or vegetable curry.
RECIPE: FLAXSEED PEANUT PULI KUZHAMBU (TAMARIND GRAVY)
Ingredients:
2 tbsp dry-roasted flaxseeds
1 htbsp sambar powder
2 tsp rice flour
1/4 cup roasted peanuts
Lime-sized amount of tamarind/2 tsp tamarind paste
2 tsp tuvar dal
1 tsp mustard seeds
1/2 tsp vendhayam/fenugreek seeds
5-6 fresh/frozen curry leaves
1 tbsp gingelly oil/nallennai
Salt to taste
4-5 cups water
Method:
1. Pound or grind the flaxseeds to a fine powder.
2. Dissolve the tamarind in 4 cups water (or extract the pulp from the dry tamarind). Reserve.
3. Heat the oil in a pan, add the asafoetida powder, tuvar dal, fenugreek seeds, curry leaves, and mustard seeds. Cover and let the seeds pop, let the dal turn golden brown, then pour in the tamarind water. Let this come to a brisk boil.
4. While it is coming up to the boil, mix together the flaxseed powder, sambar powder and rice flour, add 1/4 cup water and whisk to a pourable mixture without lumps.
5. Now pour this into the tamarind water and stir it in, along with salt to taste.
6. Keep the heat on medium and let the kuzhambu simmer for 10 minutes to let the flavours come together, and for it to thicken. Then add the peanuts and allow the kuzhambu to boil for 5 minutes more.
7. The longer the kuzhambu sits, the better it will taste. Reheat before serving, along with steamed rice and any kootu or vegetable curry.
Recipe for: Flaxseed puli kuzhambu (tamarind gravy)
Ingredients:
2 tbsp dry-roasted flaxseeds
1 htbsp sambar powder
2 tsp rice flour
1/4 cup roasted peanuts
Lime-sized amount of tamarind/2 tsp tamarind paste
2 tsp tuvar dal
1 tsp mustard seeds
1/2 tsp vendhayam/fenugreek seeds
5-6 fresh/frozen curry leaves
1 tbsp gingelly oil/nallennai
Salt to taste
4-5 cups water
Method:
1. Pound or grind the flaxseeds to a fine powder.
2. Dissolve the tamarind in 4 cups water (or extract the pulp from the dry tamarind). Reserve.
3. Heat the oil in a pan, add the asafoetida powder, tuvar dal, fenugreek seeds, curry leaves, and mustard seeds. Cover and let the seeds pop, let the dal turn golden brown,
then pour in the tamarind water.
Let this come to a brisk boil.
4. While it is coming up to the boil, mix together the flaxseed powder, sambar powder and rice flour,
add 1/4 cup water and whisk to a pourable mixture without lumps.
5. Now pour this into the tamarind water and stir it in, along with salt to taste.
6. Keep the heat on medium and let the kuzhambu simmer for 10 minutes to let the flavours come together, and for it to thicken. Then add the peanuts and allow the kuzhambu to boil for 5 minutes more.
7. The longer the kuzhambu sits, the better it will taste. Reheat before serving, along with steamed rice and any kootu or vegetable curry.
RECIPE: FLAXSEED PEANUT PULI KUZHAMBU (TAMARIND GRAVY)
Ingredients:
2 tbsp dry-roasted flaxseeds
1 htbsp sambar powder
2 tsp rice flour
1/4 cup roasted peanuts
Lime-sized amount of tamarind/2 tsp tamarind paste
2 tsp tuvar dal
1 tsp mustard seeds
1/2 tsp vendhayam/fenugreek seeds
5-6 fresh/frozen curry leaves
1 tbsp gingelly oil/nallennai
Salt to taste
4-5 cups water
Method:
1. Pound or grind the flaxseeds to a fine powder.
2. Dissolve the tamarind in 4 cups water (or extract the pulp from the dry tamarind). Reserve.
3. Heat the oil in a pan, add the asafoetida powder, tuvar dal, fenugreek seeds, curry leaves, and mustard seeds. Cover and let the seeds pop, let the dal turn golden brown, then pour in the tamarind water. Let this come to a brisk boil.
4. While it is coming up to the boil, mix together the flaxseed powder, sambar powder and rice flour, add 1/4 cup water and whisk to a pourable mixture without lumps.
5. Now pour this into the tamarind water and stir it in, along with salt to taste.
6. Keep the heat on medium and let the kuzhambu simmer for 10 minutes to let the flavours come together, and for it to thicken. Then add the peanuts and allow the kuzhambu to boil for 5 minutes more.
7. The longer the kuzhambu sits, the better it will taste. Reheat before serving, along with steamed rice and any kootu or vegetable curry.
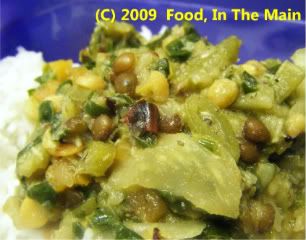
Friday, January 15, 2010
Two-dal vegetable kootu (stew)
I’ve always liked kootu with lots of dal in it, even when some of the kootus have plenty of cooked and mashed dal in them to start with. If any time my mother made vazhakkai kootu, for instance, which has cooked mashed tur dal to thicken it, I would still want lots of cooked-but-firm chana dal in it, as well as plenty of crunchy fried urad dal in the tempering. Nothing less would do.
I like lots of urad dal tempering in dry vegetable dishes too, and always have. And because I do my own cooking, I’m at perfect liberty to use vast quantities of any dal I like without anybody questioning the authenticity of what are meant to be traditional recipes.
Still, I’m not so wrapped up in my own quirks that I don’t realise that other people might not share my preferences, so I usually tone down the quantities of dals in the recipes I publish on this blog, in the hope that I (and my recipes) will come across as normal to readers. (I’m not entirely sure that the ploy works, though. Does it?)
This kootu is pretty simple, and you can use pretty much whatever vegetables you have at hand (but I wouldn’t recommend okra, fresh or frozen). I use a pressure-cooker to cook the vegetables and dal together, but if you don't have one, or don't like to use it, the dals can be cooked separately, the vegetables steamed or boiled separately, and then brought together from Step 7. I'd recommend the pressure-cooker, though - it makes things much simpler.
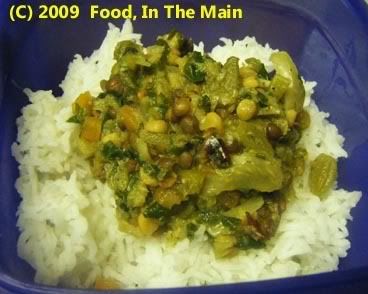
I personally feel that the dals make it not only nutritious but also very tasty. Have the kootu over rice, with a couple of microwaved appalam/poppadums and any pickle (I recommend mango thokku) and a cup of yogurt on the side, and you will discover one of the many ways to gain entry into my personal foodie heaven.
Recipe for: Two-dal vegetable kootu
Ingredients:
2.5 cups vegetables cut up small (I used cabbage, carrots, runner beans, potatoes and spinach)
1/4 cup chana dal
1/4 cup whole masoor dal
1/2 tsp turmeric powder
2 dried red chillies, chopped up fine
1 tsp oil
2 tbsp urad dal
2 tsp brown mustard seeds
1 tsp cumin seeds
1/4 tsp asafoetida powder (optional)
Salt to taste
About 2.5 cups water, or as required
Grind to a smooth paste:
3 tbsp grated fresh or frozen coconut (thawed)
4-5 green chillies (or to taste)
1/2 tsp cumin seeds
1 tbsp rice flour
Method:
1. If using cabbage, shred finely. Chop up any other vegetables you're using into small even-sized pieces.

2. Wash the two dals in cold water.
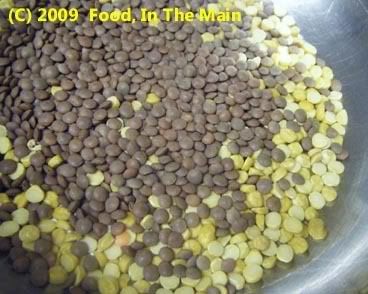
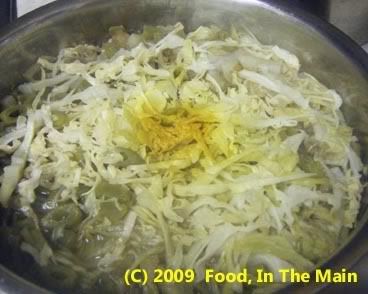
3. In an appropriately sized vessel that can go in your pressure cooker, place the dals at the bottom, then add the "hard" vegetables (like potatoes, carrots, etc), and finally the easy-cook vegetables like cabbage and frozen peas. If using spinach, DO NOT add to the vessel at this point.
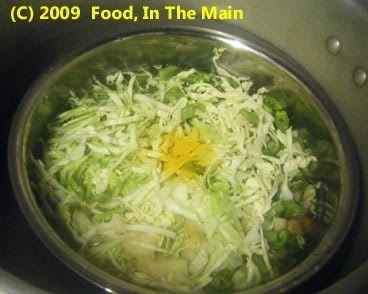
Top with the turmeric powder and add enough water to just about cover the vegetables.
4. Pressure-cook for three whistles, and let the pressure drop naturally before opening the cooker.
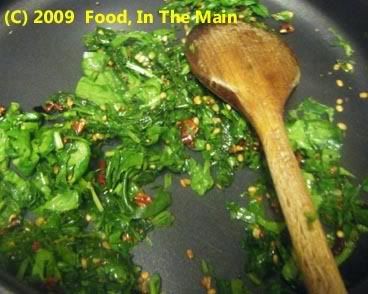
5. In a pan, heat the oil. Add the mustard seeds, chopped dried red chillies, cumin seeds, urad dal and asafoetida powder. Cover and let the mustard seeds pop (about 30 seconds). The urad dal should have turned a golden brown.

6. Add the spinach leaves now (if using)

and stir fry till it is wilted but still green.
7. Lower the heat and add the cooked dal + vegetables to the pan (the liquid will sputter, so be careful).
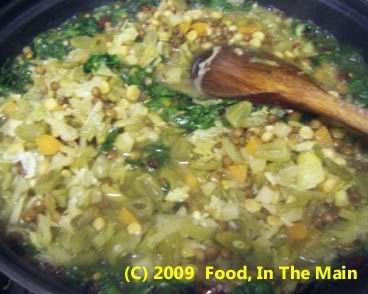
8. Pour in the ground coconut masala.
Add salt to taste and mix well. Add more water if required (the kootu can be thick or a bit runny, depending on your taste. I keep it thick if it's a side dish for rotis or chapatis, and a bit runnier if it's to be served over rice.)
9. Serve hot over plain steamed white rice, or with chapaties.
I like lots of urad dal tempering in dry vegetable dishes too, and always have. And because I do my own cooking, I’m at perfect liberty to use vast quantities of any dal I like without anybody questioning the authenticity of what are meant to be traditional recipes.
Still, I’m not so wrapped up in my own quirks that I don’t realise that other people might not share my preferences, so I usually tone down the quantities of dals in the recipes I publish on this blog, in the hope that I (and my recipes) will come across as normal to readers. (I’m not entirely sure that the ploy works, though. Does it?)
This kootu is pretty simple, and you can use pretty much whatever vegetables you have at hand (but I wouldn’t recommend okra, fresh or frozen). I use a pressure-cooker to cook the vegetables and dal together, but if you don't have one, or don't like to use it, the dals can be cooked separately, the vegetables steamed or boiled separately, and then brought together from Step 7. I'd recommend the pressure-cooker, though - it makes things much simpler.
I personally feel that the dals make it not only nutritious but also very tasty. Have the kootu over rice, with a couple of microwaved appalam/poppadums and any pickle (I recommend mango thokku) and a cup of yogurt on the side, and you will discover one of the many ways to gain entry into my personal foodie heaven.
Recipe for: Two-dal vegetable kootu
Ingredients:
2.5 cups vegetables cut up small (I used cabbage, carrots, runner beans, potatoes and spinach)
1/4 cup chana dal
1/4 cup whole masoor dal
1/2 tsp turmeric powder
2 dried red chillies, chopped up fine
1 tsp oil
2 tbsp urad dal
2 tsp brown mustard seeds
1 tsp cumin seeds
1/4 tsp asafoetida powder (optional)
Salt to taste
About 2.5 cups water, or as required
Grind to a smooth paste:
3 tbsp grated fresh or frozen coconut (thawed)
4-5 green chillies (or to taste)
1/2 tsp cumin seeds
1 tbsp rice flour
Method:
1. If using cabbage, shred finely. Chop up any other vegetables you're using into small even-sized pieces.
2. Wash the two dals in cold water.
3. In an appropriately sized vessel that can go in your pressure cooker, place the dals at the bottom, then add the "hard" vegetables (like potatoes, carrots, etc), and finally the easy-cook vegetables like cabbage and frozen peas. If using spinach, DO NOT add to the vessel at this point.
Top with the turmeric powder and add enough water to just about cover the vegetables.
4. Pressure-cook for three whistles, and let the pressure drop naturally before opening the cooker.
5. In a pan, heat the oil. Add the mustard seeds, chopped dried red chillies, cumin seeds, urad dal and asafoetida powder. Cover and let the mustard seeds pop (about 30 seconds). The urad dal should have turned a golden brown.
6. Add the spinach leaves now (if using)
and stir fry till it is wilted but still green.
7. Lower the heat and add the cooked dal + vegetables to the pan (the liquid will sputter, so be careful).
8. Pour in the ground coconut masala.
Add salt to taste and mix well. Add more water if required (the kootu can be thick or a bit runny, depending on your taste. I keep it thick if it's a side dish for rotis or chapatis, and a bit runnier if it's to be served over rice.)
9. Serve hot over plain steamed white rice, or with chapaties.
Thursday, January 14, 2010
Mustardy karela
This is the karela recipe I was being so mysterious about, about a month ago or so. Those of you who do NOT remember what I was being mysterious about, please click on the link for a memory refresh. (Oh, the things I do for the convenience of my readers...! Might I have made a new follower, perhaps, or even two, by being thoughtful and ironic? One does so hope so.)
So yes, this is yet another karela recipe - and what’s more, I have another one up my sleeve (a post, not a karela), although that is not as radical as this one. This, though... this is THE most radical recipe I’ve ever made featuring this bitter vegetable, and I have to say that it really tested my karela-love. I would definitely consider this to be the penultimate conclusive test of karela-love, no question. The ultimate conclusive test, of course, being the willing consumption of fresh-squeezed karela juice. (You’d have to strap me down for that one, I reckon, and force-feed me it through a tube.)
This is an Oriya recipe, which I got from here and I consider myself very brave to have used Indian karela, which is way more bitter than the Chinese karela used in the original. Okay, the truth is that I would probably have used Chinese karela too, if only I’d had it handy. But I didn’t. Chinese karela is much less knobblier on the outside and much less bitter on the inside than the Indian variety.
Anyway, the reason I tried this recipe is because it uses mustard paste – and I love the sharp tangy taste of mustard paste and mustard oil. It’s a fairly recently discovered love, just short of a year old, actually.
Perhaps the end result would have been less bitter if I’d done the salting-waiting-squeezing routine that removes some of the bitterness from this vegetable, but I didn’t. Call it foolhardiness. However, I still liked the end result – I know, I know, shocking! The mustardiness was as yummy and nose-clearingly sharp as ever, underlaid by the bitterness of the karela. I just couldn’t eat the mustardy karela on its own, though. It needed toning down with cold curd rice... which turned out to be the perfect combination, in the end.
(Total "karela" usage count in one post: 13, including this one. Do I get an award?)
Recipe for: Mustardy karela
Ingredients:
2 cups bittergourd, sliced into rounds
Oil for pan frying (about 3-4 tbsp)
2 tbsp rice flour
1/2 tsp turmeric powder
salt to taste
3 tbsp mustard seeds
3-4 fresh green chillies (or to taste)
3 cloves garlic
Method:
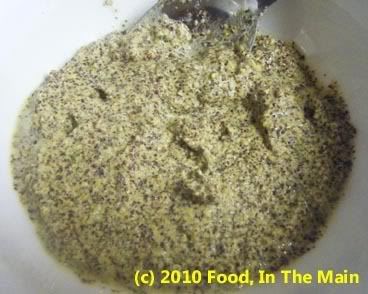
1. Dry grind the mustard seeds and then add chillies, garlic and water.
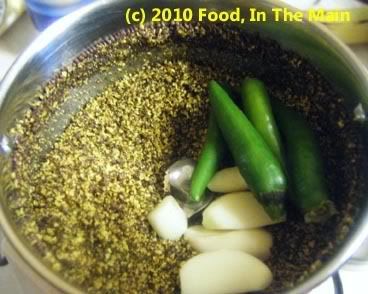
Make a thick paste with a little water so that it can coat the bitter gourd completely.
2. Steam-cook the sliced bittergourd with a few tbsp water
till done, but not mushy.
3. Mix the mustard paste with the cooked bitter gourd.
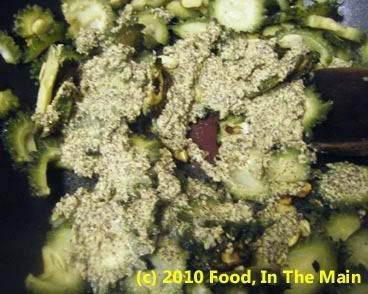
4. Then add the turmeric, rice flour and salt to taste.
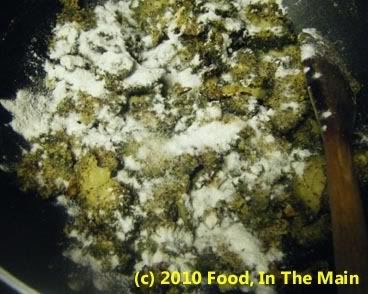
Mix in till evenly distributed.
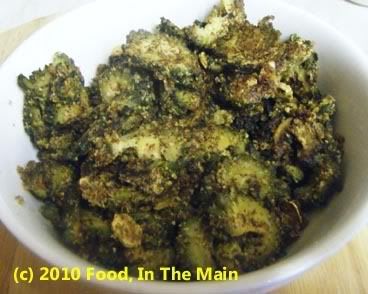
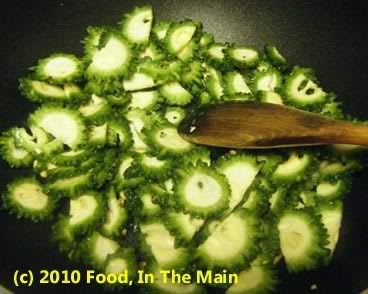
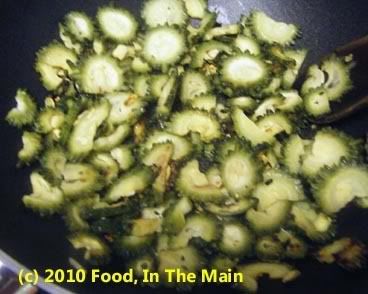
5. Heat 3-4 tbsp oil in a shallow frying pan. Add the bitter gourd, spread them out gently,
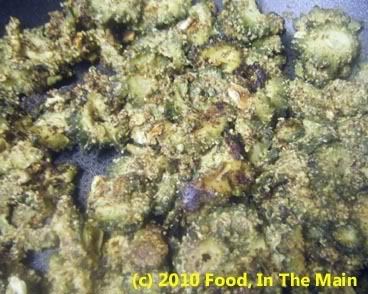
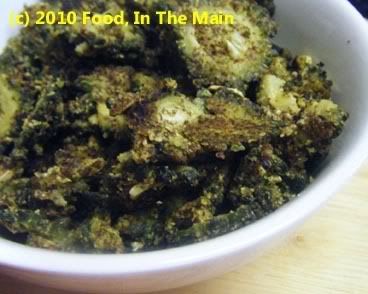
and fry the pieces on both sides till crisp and well done.
6. Serve as a side dish with rice and dal.
So yes, this is yet another karela recipe - and what’s more, I have another one up my sleeve (a post, not a karela), although that is not as radical as this one. This, though... this is THE most radical recipe I’ve ever made featuring this bitter vegetable, and I have to say that it really tested my karela-love. I would definitely consider this to be the penultimate conclusive test of karela-love, no question. The ultimate conclusive test, of course, being the willing consumption of fresh-squeezed karela juice. (You’d have to strap me down for that one, I reckon, and force-feed me it through a tube.)
This is an Oriya recipe, which I got from here and I consider myself very brave to have used Indian karela, which is way more bitter than the Chinese karela used in the original. Okay, the truth is that I would probably have used Chinese karela too, if only I’d had it handy. But I didn’t. Chinese karela is much less knobblier on the outside and much less bitter on the inside than the Indian variety.
Anyway, the reason I tried this recipe is because it uses mustard paste – and I love the sharp tangy taste of mustard paste and mustard oil. It’s a fairly recently discovered love, just short of a year old, actually.
Perhaps the end result would have been less bitter if I’d done the salting-waiting-squeezing routine that removes some of the bitterness from this vegetable, but I didn’t. Call it foolhardiness. However, I still liked the end result – I know, I know, shocking! The mustardiness was as yummy and nose-clearingly sharp as ever, underlaid by the bitterness of the karela. I just couldn’t eat the mustardy karela on its own, though. It needed toning down with cold curd rice... which turned out to be the perfect combination, in the end.
(Total "karela" usage count in one post: 13, including this one. Do I get an award?)
Recipe for: Mustardy karela
Ingredients:
2 cups bittergourd, sliced into rounds
Oil for pan frying (about 3-4 tbsp)
2 tbsp rice flour
1/2 tsp turmeric powder
salt to taste
3 tbsp mustard seeds
3-4 fresh green chillies (or to taste)
3 cloves garlic
Method:
1. Dry grind the mustard seeds and then add chillies, garlic and water.
Make a thick paste with a little water so that it can coat the bitter gourd completely.
2. Steam-cook the sliced bittergourd with a few tbsp water
till done, but not mushy.
3. Mix the mustard paste with the cooked bitter gourd.
4. Then add the turmeric, rice flour and salt to taste.
Mix in till evenly distributed.
5. Heat 3-4 tbsp oil in a shallow frying pan. Add the bitter gourd, spread them out gently,
and fry the pieces on both sides till crisp and well done.
6. Serve as a side dish with rice and dal.
Subscribe to:
Posts (Atom)
