
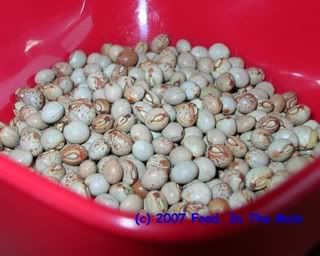
What are gungo peas? These are.
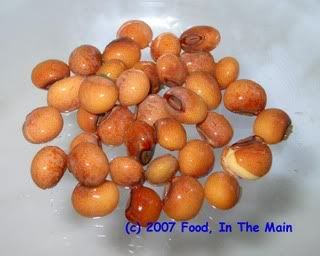
And when they're soaked overnight in water, they become this lovely warm golden brown.
After a quick google for these peas on the Net, I discovered that gungo peas are also known as pigeon peas. Ugh. Pigeon peas. Difficult to be gung-ho about pigeon anything, believe me, much less peas. Pigeons are merely flying rats - and noisy ones at that - as far as I'm concerned, and naming these prettily speckled peas after a verminous bird hardly seems fair to the legume family in general, with most of whom I have a close, personal, in fact daily relationship.
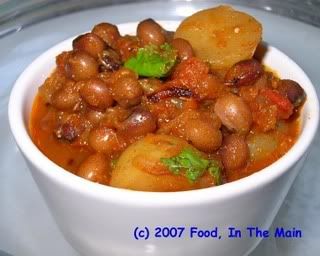
I'm all for gungo peas. (Also all gung-ho about peace.) And now that I have flogged that particular pun to shreds, allow me to present the actual recipe.
Recipe for: Gungo peas masala
Ingredients:
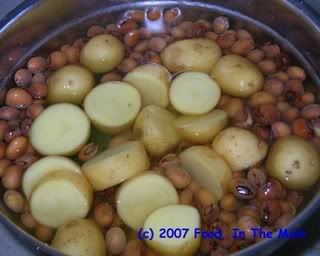
1/2 cup gungo peas, soaked overnight
3-4 baby potatoes, sliced 1/2-inch thick
1 fresh bay leaf
2 tbsp oil
1 onion - sliced and shallow fried golden brown. Reserve half for the tempering.
1 tomato, chopped
1 tsp pav bhaji masala
½ tsp coriander powder
½ tsp cumin powder
½ tsp dried garlic powder
Salt to taste
To grind to a smooth paste:
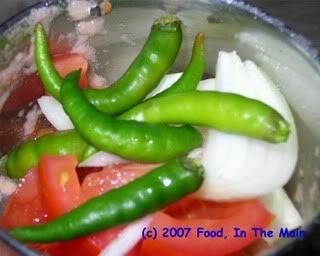
1 onion
1 tomato
4-5 fresh green chillies
handful coriander leaves
For tempering:
1 tbsp ghee
1 tsp cumin seeds
½ tsp garam masala
Reserved fried onions
Fresh coriander leaves for garnish
Method:
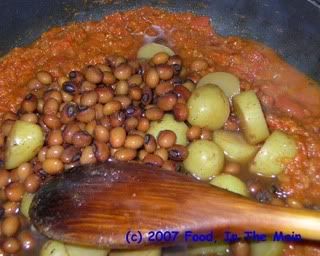
1. Put the peas in a pressure cooker vessel and add enough water to just cover the peas. Add the potatoes and pressure-cook till done. Reserve about a cupful of the water in which the peas were cooked.
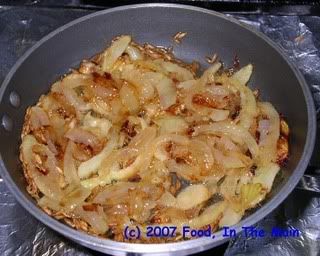
2. In a small frying pan, add 1 tbsp oil and fry the sliced onion till it is golden brown.
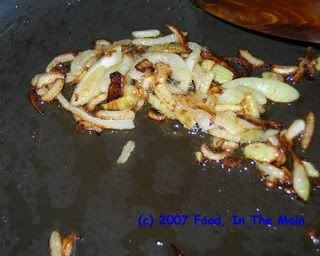
Remove half of the fried onions and reserve.
3. Add the remaining tbsp oil to the fried onions in the pan and pour in the ground tomato-onion-chilly paste.
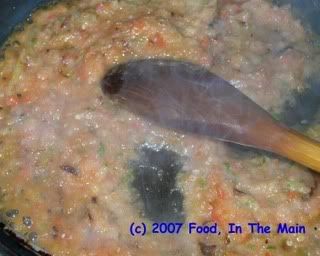
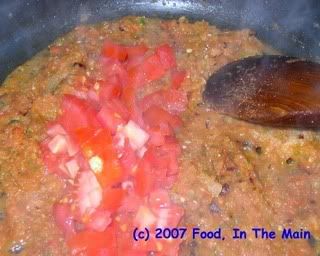
4. Fry till the masala begins to thicken. Then add the chopped tomato to the masala and let it cook down a bit. They should not become totally mushy.
5. Now add the cooked gungo peas and potatoes. Add the coriander powder, cumin powder and garlic powder and stir it all. Add the reserved cupful of water along with salt to taste, and stir again. Let the masala simmer for about 5 minutes on medium-heat.
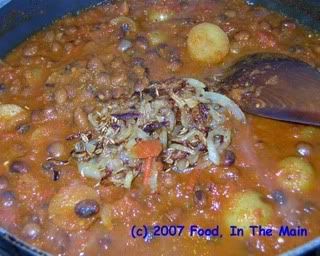
6. In a small pan, heat 1 tbsp ghee. Fry the cumin seeds (they should splatter and turn brown almost immediately), then add the reserved fried onions and garam masala. Fry for about 30 seconds on high heat.
7. Pour this tempering immediately over the peas masala.
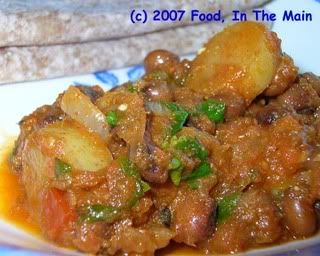
8. Stir it in, sprinkle with chopped coriander and serve hot over plain rice or with chapaties.

6 comments:
I wonder how much patience you have to take step-by-step photos. Gung-ho to gungo :D
Suganya: Taking pictures isnt a big deal - my camera lives in the kitchen! :) But the thing is, I take lots of photos, and you take one or two - but those one or two are BEAUTIFUL! You're quality over quantity... and I'm the oppisite :)
hey, the masala looks awesome! pav bhaji masala is such a good idea for the gravy :) btw the toor/tuvar dal pkt I get here says pigeon peas.
thanks
Hi Shammi,
Adding pav bhaji masala gives nice taste to this curry. I will try this next time. Thanks for sharing.
Liked your version of idli upma and eggless loaf.
Richa: Oh, so I was cooking with whole tuvar dal??? Sure tasted different :) Thanks for the info!
Menu Today: Yep, adding pav bhaji masala was a good idea... gives a super flavour!
just discovered your blog. gungo over the beautiful step by step details. final result looks very tempting.
Post a Comment