skip to main |
skip to sidebar
It’s nice to be baking bread, because now I feel a bit emboldened to try recipes I’ve had since forever but never bothered making because – well, because I didn’t bake bread. It’s only recently that I’ve ventured into this area of baking, with so far – touch wood! – a reasonable rate of success. Who knows, I might yet get to be a Daring Baker and build whole edifices of cake (although I wouldn’t advise anyone to hold their breath waiting…).
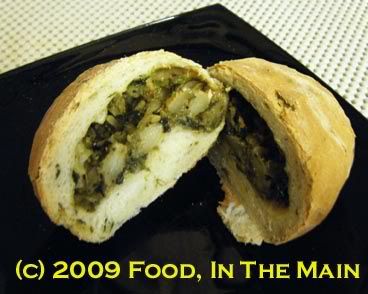
Anyway, last weekend I made up my mind to bake curried vegetable-stuffed buns. And, in a breathtaking bit of daring derring-do (I felt like Errol Flynn at his most swashbuckling, to tell you the truth), I added fresh methi (fenugreek) leaves and omam (ajwain/carom) to the bread dough.

It all worked perfectly.
PS. I’m not going to gush any more than that this time, in case I alienate the few readers I have who expect me to be matter-of-fact, restrained and factual in writing about my recipes and their outcome… do I even have any such readers?
*sigh*
Recipe for: Curried vegetable-stuffed methi buns
Ingredients - For the stuffing:
1 medium potato, boiled, peeled and roughly mashed/crumbled
½ cup finely chopped green beans, cooked
1 cup sliced spinach
¾ cup finely sliced shallots (or onion)
½ tsp sambar powder
½ tsp garam masala
½ tsp red chilli powder
¼ tsp asafetida powder (optional)
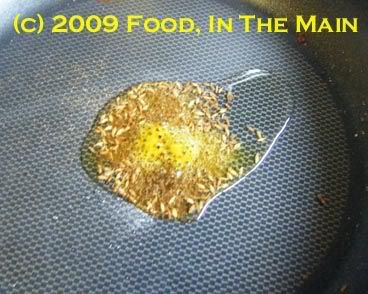
1 tsp cumin seeds
¼ tsp turmeric powder
Salt to taste
2 tsp oil
Method – the stuffing:
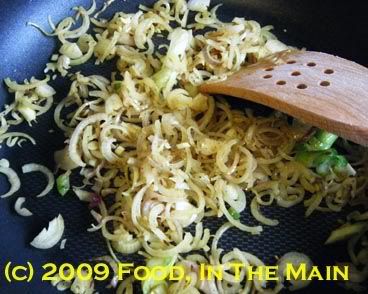
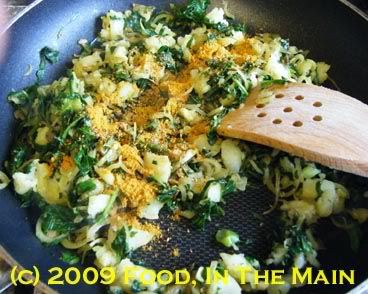
1. Heat the oil in a skillet and add the asafetida, the cumin seeds, turmeric powder and garam masala and fry for 30 seconds.
2. Add the sliced shallots
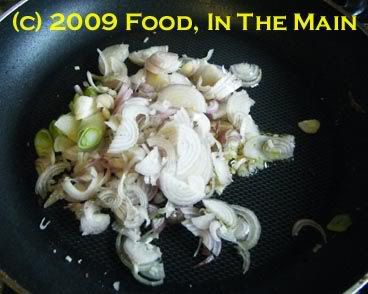
and fry for 3-4 minutes or till they start turning soft.
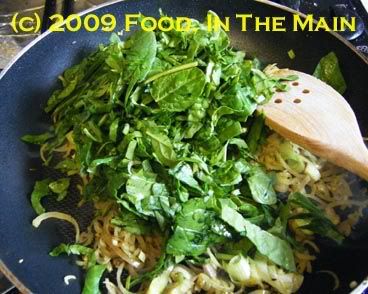
3. Then add the spinach leaves and sauté till they wilt.
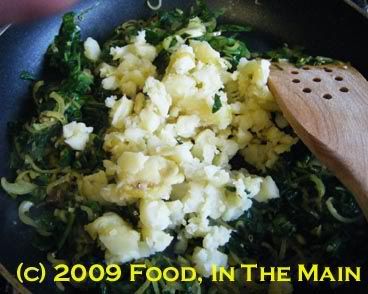
4. Next, add the mashed potato and mix in,
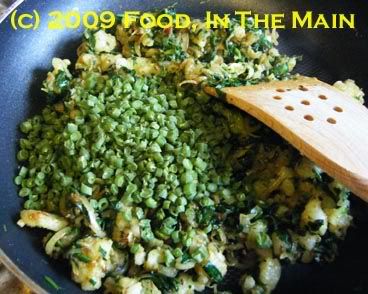
then the cooked green beans.
5. Sprinkle the sambar powder, chilli powder and salt in to distribute it evenly.
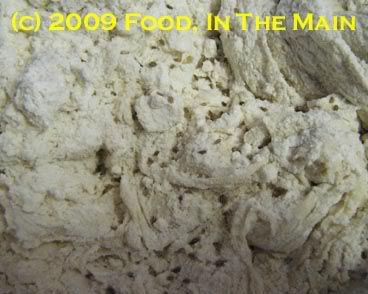
6. Let cool completely. The stuffing should be as dry as possible, so let it cool uncovered, so that condensation does not drip back in.
Ingredients - for the buns:
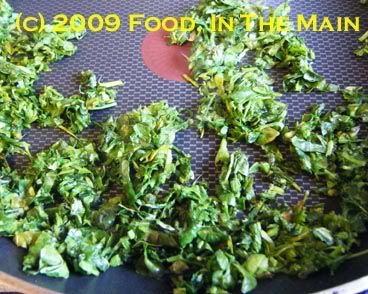
1 cup methi leaves, washed, dried and chopped, sautéed in ½ tsp oil till wilted, then cooled
3-1/2 cups strong white bread flour
2-1/2 tsp instant dry yeast
½ tsp carom/ajwain/omam seeds (increase to 1 tsp if you really, really love the taste!)
1 cup water
½ cup buttermilk
2 tbsp melted butter
Salt to taste
Method – the buns:
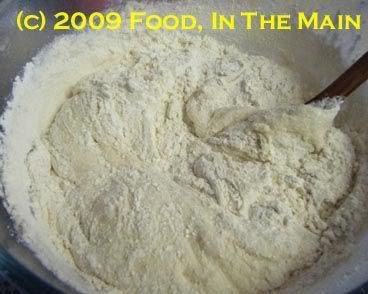
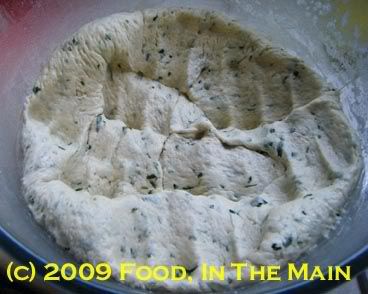
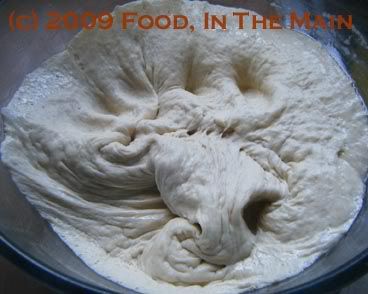
1. Mix 1 cup bread flour, 1 cup water and the yeast in a large bowl so that there are no lumps. Let this stand, covered with plastic wrap, for 1-3 hours in a warm place, till it becomes bubbly.
2. Now stir 2 cups of the remaining flour,
the buttermilk and sautéed methi leaves, melted butter,
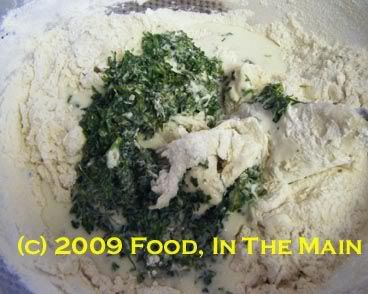
ajwain/carom/omam and salt into the starter.
Mix with a wooden spoon till the dough pulls away from the side of the bowl.
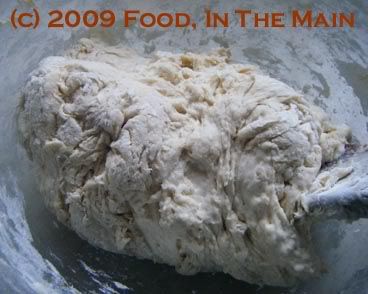
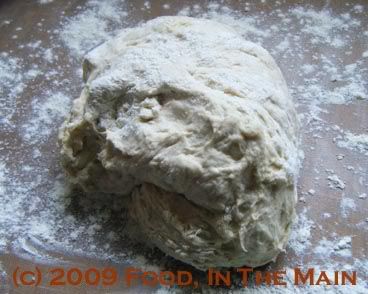
3. Turn the dough out onto a clean, lightly floured surface and knead, adding the remaining flour a tbsp at a time, if required.
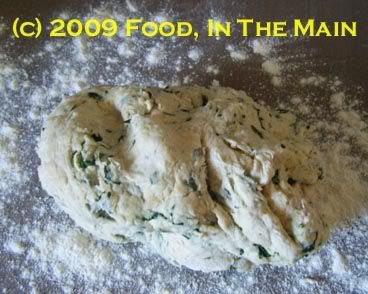
The dough should be springy, smooth and elastic when done (takes 6-8 minutes of kneading by hand).
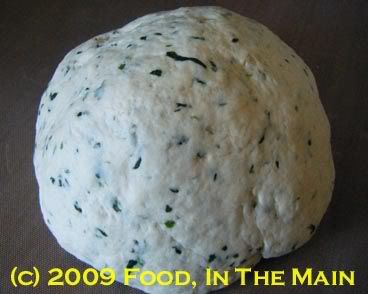
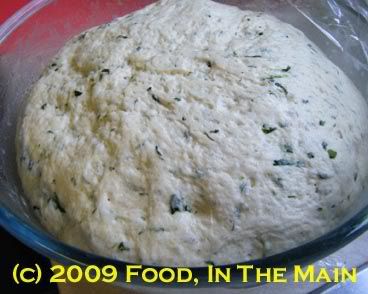
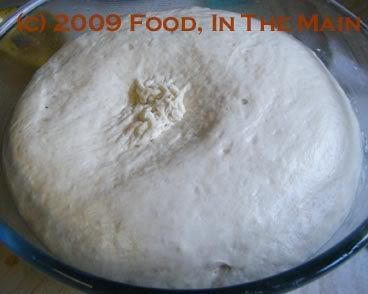
4. Now grease the bowl lightly with butter or oil, and put the dough in, turning it around once or twice so that it is coated. Cover with plastic wrap and pop back into your warm place. (Mine was again the oven.) Leave it for 1-1/2 hours or so till the dough is doubled in volume.
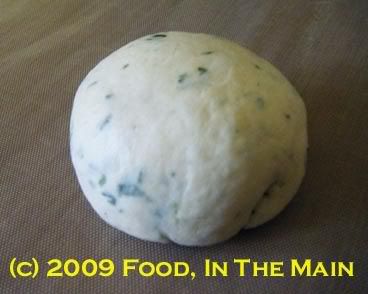
5. Punch the dough down lightly,
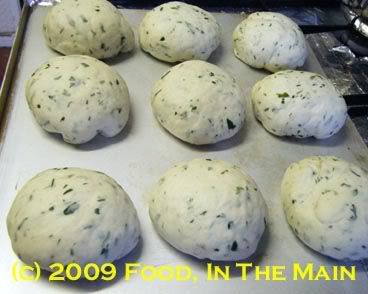
turn it out onto the kneading surface, knead very briefly, and divide into tennis-ball sized rounds. (This makes about 9 large buns.)
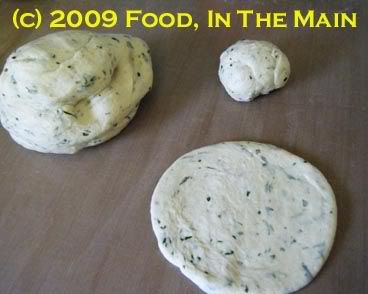
Roll each round into a circle of about 5” diameter.
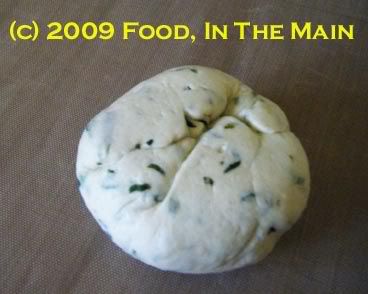
6. Place 2 tbsp of the filling in the centre of the circle,
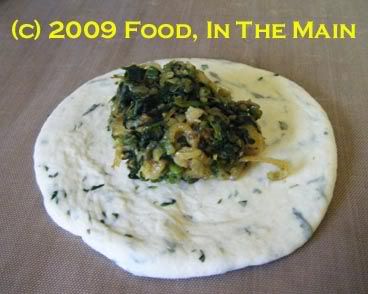
then fold the circle closed.
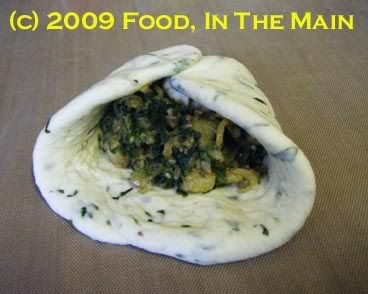
Pinch the folds to seal the stuffing in,
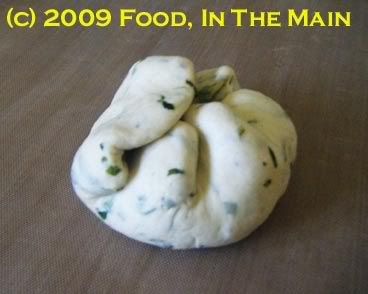
then place the ball seam side down and sort of roll it in place to make sure the seams are fully closed.
Underside of filled dough ball after rolling in place to close the seams.
Repeat with remaining balls of dough and filling.
8. Place the filled dough balls on a baking sheet covered with non-stick silicone paper (or lightly grease the sheet if, like me, you’re out of non-stick paper)
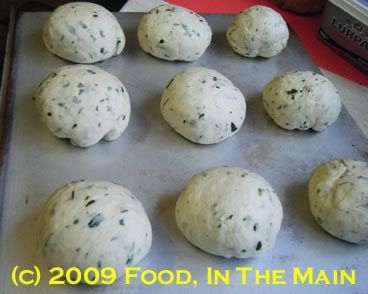
and let rise for 20 minutes.
9. Put the tray in a cold oven and turn it on to 200C. (The rolls will rise further as the oven heats to the required temperature.)
Bake the filled rolls for 30 minutes or so, till golden brown on top. If they sound hollow when tapped on the bottom, they’re done.
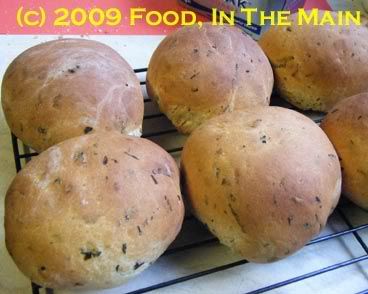
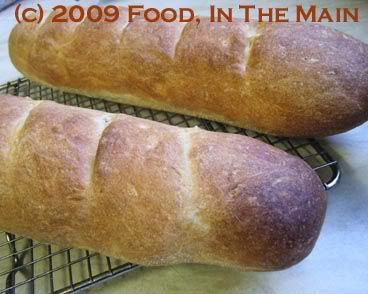
10. Wrap the rolls in a clean tea towel if you like the crust to be soft. If not, let cool on a rack till just warm. Serve the buns as a snack by themselves or with soup.
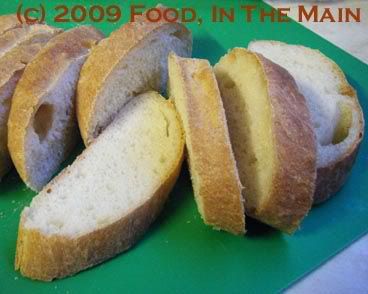
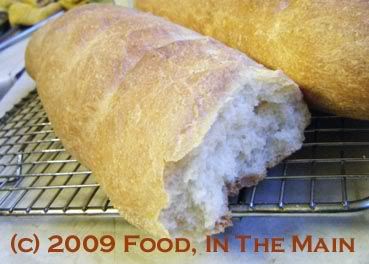
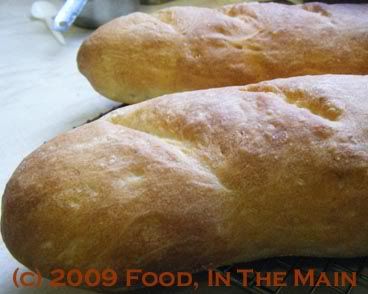
My version of it, anyway. I wonder how the bakeries manage to get that lovely baton shape... perhaps they have special baton-shaped bread tins? My French bread flattened itself almost like a ciabatta loaf, so perhaps the dough was looser than it ought to have been, making it lose its baton(ish) shape once the final proofing was finished with. I don't know. Perhaps I never WILL know (although I'm hoping that won't be the case... after all, there are thousands of bakers out there, and perhaps one of them will kindly enlighten me. I live in hope).
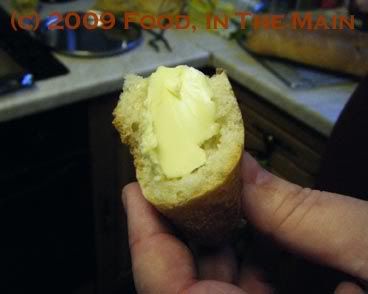
But the thing is - even if no kindly baker happens along to throw light on the subject, I won't mind. The truth is I don't really care that my batons could more accurately have been called 'flat'ons. Because, people, my flat French bread tasted FABUTASTIC! I've no idea if I can repeat the feat. I honestly don't know how it managed to be so good. I'm half afraid to try again, in case it doesn't turn out as well as this, my first attempt - the crust so crackly to the bite yet not rock hard, the inside so soft and white, and the whole loaf smelling of yeasty warmth... slathered with butter for the first bite - mmmm!
I do not exaggerate when I say that this bread disappeared quicker than anything I've ever made. While the loaves were cooling (and while I fended the ravening hordes off to take a couple of photographs), Pete heated up some soup, and by the time the bread had cooled down enough to be sliced, the soup had been served up in bowls and the kids (the big one included) were standing there holding out the bowls like three Oliver Twists, waiting for the bread.
Oh, the French bread was such a success, and I felt so very, very thrilled... (the original recipe was from here)
Recipe for: French bread
Ingredients:
2-1/2 tsp dried yeast, for hand baking (the kind that has to be reconstituted in water before use, not instant yeast)
1-1/4 cups warm water (slightly more than hand-warm, about 40C)
1/2 tsp. sugar
3 cups strong bread flour
1-1/2 tsp salt
Ingredients:
1. Place water in a large bowl and sprinkle with yeast and sugar. Swirl to help dissolve yeast.
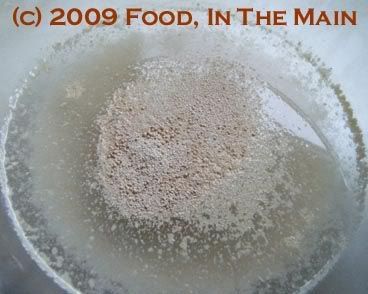
Let it stand for 5-10 minutes, or until the yeast dissolves and starts to bubble.
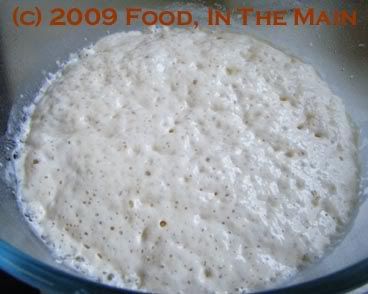
2. Stir in 1 cup flour. Cover and let rise for 1/2 hour till bubbly.
3. Then gradually stir in the remaining flour and salt
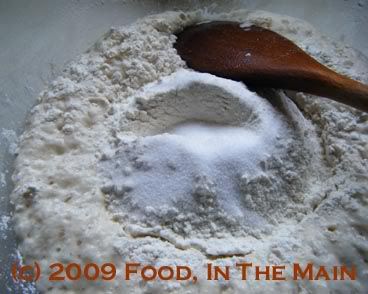
to make a soft dough.
5. Turn the dough out onto a floured surface and knead for 10 minutes.
6. Grease a large mixing bowl with 1 tsp oil, and place the dough in the bowl. Turn it in the bowl so the dough is greased.
7. Cover the dough and let rise in a warm place for about 2-1/2 hours, until double in volume.
8. Now punch down the dough,
divide in half and place one half on a lightly floured surface.
9. Form it into a cylinder shape and roll it back and forth until it becomes about a foot long or so, tapered a bit at the ends to make French bread shape.
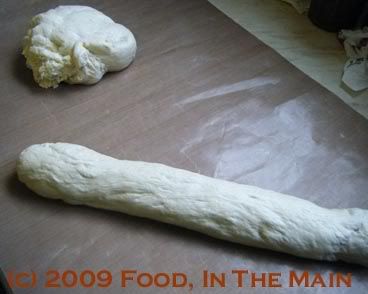
Do the same with the other half of the dough.
10. Grease a baking tray and sprinkle with cornmeal.
11. Quickly transfer the dough on to the prepared sheet.
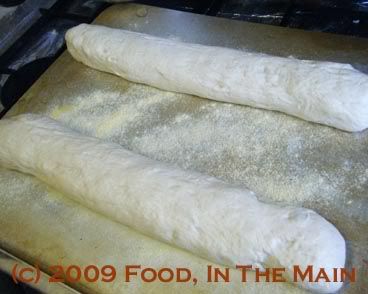
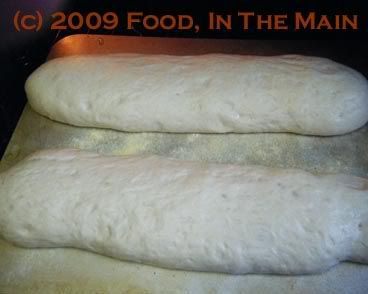
Cover with greased cling film and let rise at room temperature until doubled, up to about 1-1/2 hours.
12. Preheat the oven to 220C. Make 3-4 slashes across the top of each loaf.
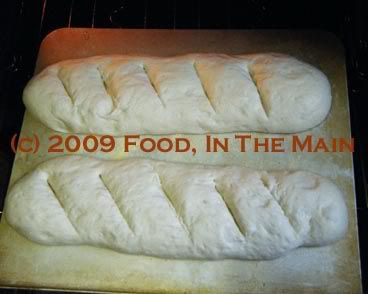
Bake the loaves for 20-25 minutes or until they are golden brown. (Tap the bottom - if the loaves sound hollow, they're done.)
13. Remove from tray and let cool on wire rack.
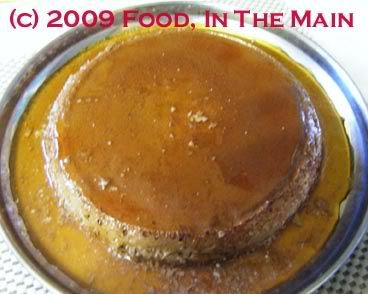
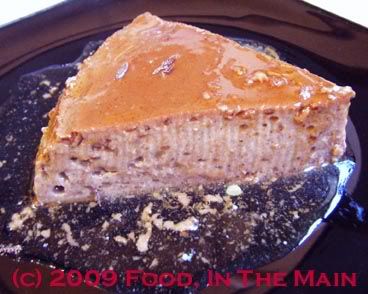
Crème caramel is one of my favourite desserts. Yes, it's basically a moulded egg custard, but calling it crème caramel seems to elevate it to a much more posh level of existence, doesn't it? Custard just doesn’t sound as smooth and velvety as cream or even crème, unfortunately.
I’ve made plain crème caramel a couple of times at home, but since Pete turns green at the mere mention of custard (not even calling it crème caramel can bring back the healthy pink that’s his normal colour!), I don’t get the chance to make it often - not unless I want to be eating it all week by myself.
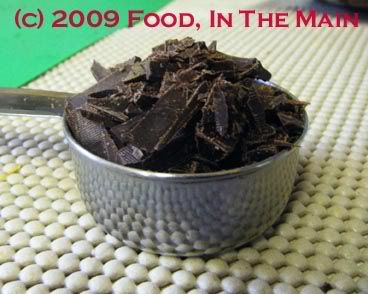
Last weekend, with two teenagers at home who confirmed that they loved custard, I thought I would try making crème caramel infused with dark chocolate (original recipe here), to see if the chocolate could disguise the “custard” part of the pudding sufficiently for Pete to try it. Even if he didn’t like it, at least I could enjoy it along with the kids - and I wouldn’t have to eat it over the whole week, an added bonus! I did entertain a few initial doubts about whether the chocolate would pair well with caramel... which was a waste of good brain cells, really, because of COURSE chocolate and caramel go together - Cadbury’s and Nestle have proved that over and over with their éclairs and toffees!
As it turned out, the chocolate crème caramel came out just beautiful – unfortunately (or fortunately) not beautiful enough for Pete... although to his credit, he did try a spoonful. I can only say that he missed out on a good thing, because it was really a dark, rich, smoothly gorgeous chocolate experience.
The crème caramel didn’t last the day, much less the week... which is really the best sort of outcome for everybody, especially the cook.
Recipe for: Dark chocolate crème caramel
Ingredients:
3 medium eggs
1/2 cup + 1/4 cup sugar
2 tbsp water
2 cups whole milk at room temperature
1 tsp vanilla extract
1/3 cup chopped good quality dark chocolate
Method:
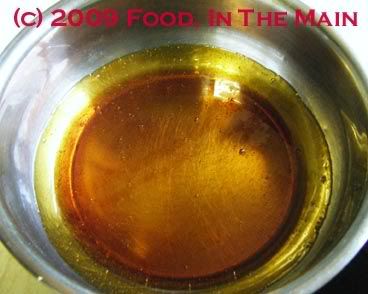
1. Put 1/2 cup sugar in a saucepan and add the 2 tbsp water.
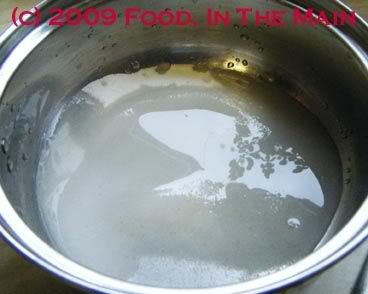
2. Bring the mixture to a boil, stirring 2-3 times to dissolve the sugar.
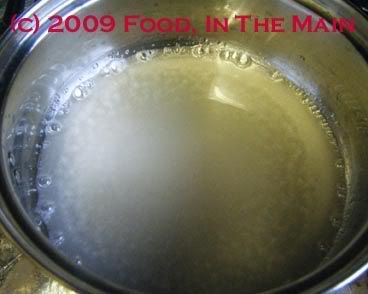
3. Turn down the heat to medium and let the mixture cook undisturbed until it begins to turn colour.
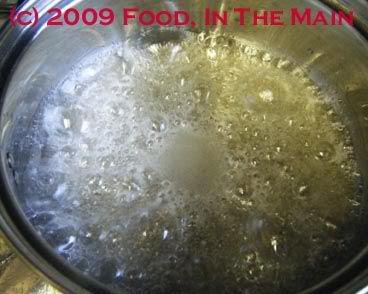
4. Watch the caramel carefully now, as it can burn really quickly - you need to take the saucepan off the heat as soon as the mixture turns amber in colour.
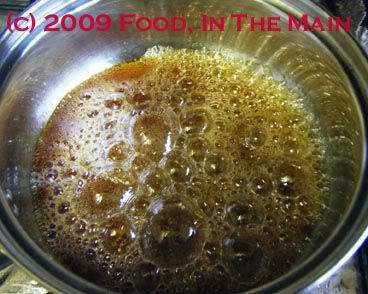
5. Pour the caramel immediately into a pressure-cooker safe pan (eversilver or steel is good). Swirl it gently so that it evenly coats the sides of the pan. Let the caramel cool.
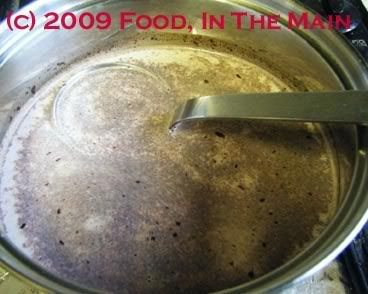
6. In another saucepan, heat the chopped chocolate along with 1/2 cup milk, till the chocolate melts.
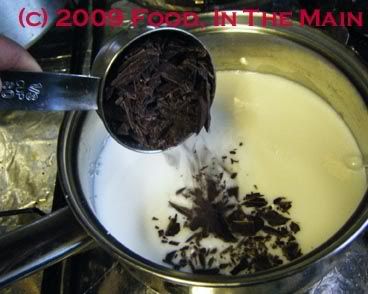
Whisk in the rest of the milk and heat till it's hot, but not boiling.
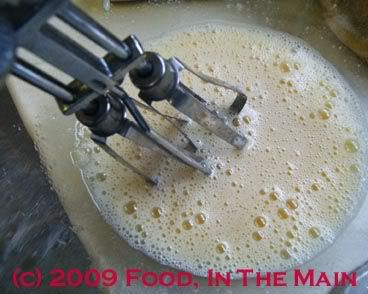
7. While the milk is heating, whisk together the eggs, 1/4 cup sugar and vanilla
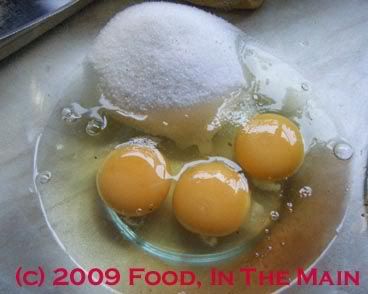
till lightly frothy.
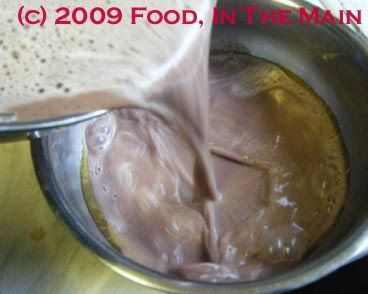
8. Pour the hot milk in a slow and steady stream into the egg mixture, whisking briskly all the while. (My non-slip mat came in very handy here - it held the bowl in place while I did the simultaneous pouring and whisking! No photos of this manoeuvre though - my third hand was inexplicably absent!)
9. Then pour this mixture into the pan containing the caramel.
10. Place the pan in a pressure cooker (without using the weight),
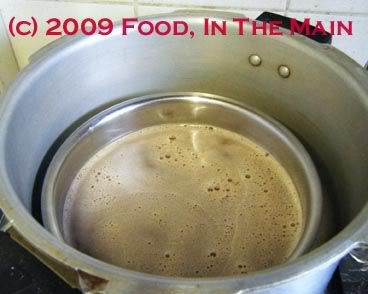
pouring sufficient water in the cooker to steam the pudding (covered) for 35 minutes, first on high heat till you can see the steam coming strongly, then reducing the heat to medium-high.
11. Remove the lid and let the crème caramel come to room temperature. It might look wobbly in the middle while hot, but it will firm up as it cools.
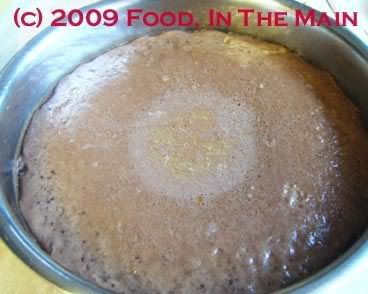
12. Chill in the fridge for 3-4 hours before unmoulding the custard onto a serving dish. (Run a thin knife around the outside edge of the pudding, then place the serving dish over the pan containing the pudding and invert quickly.)