skip to main |
skip to sidebar
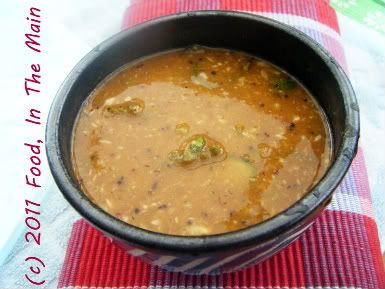
Over the last few years, I’ve been testing my limits with that most unattractive of vegetables, the bittergourd (or karela, bitter melon, pavakkai or whatever name you call it – my husband terms them “rats”), to see just HOW much I love it.
I used to hate it completely, in any form, as a kid. In my late teens or thereabouts, I would as a concession eat them deep fried (yes, I know, very broad-minded of me) mainly because the ones from Hot Chips in Abhiramapuram were sensational.
Eventually, after a couple of decades, I got around to eating them pan-fried crisp, as a dry curry. After that things moved a lot more rapidly in the experimentation department, and I moved on to karela-without-frying-too-much, karela as a semi-dry curry cooked with onions and tomatoes, karela with mustard paste (a double-whammy in the strong flavour department).
While karela pitla (South Indian style) is probably not as scary as it used to be, or even as full-on as karela-with-mustard-paste, I still had to see if I'd like it - just to drive away the last of the childhood fear and hatred of the karela's bitter flavour. And, of course, I passed the test with flying colours, practically inhaling the pitla which my mother made a day or two before she left Shrewsbury.
The only karela-based item that I know I won't like is karela juice. Where that is concerned, I think I'm as blinkered as I ever was, with just one standard reaction: "No way Felipe." (Jose wasn't available.)
Recipe for: Bittergourd/karela/pavakkai pitla
Ingredients:
2 medium karela/bittergourd/pavakkai, sliced into rounds
1 cup masoor dal, cooked
1 tbsp tamarind paste
3 tsp gingelly oil (or any neutral cooking oil)
1 tsp mustard seeds
2 tbsp sambar powder
2 tbsp finely grated coconut
1/2 tsp asafoetida powder
1 tbsp rice flour
Salt to taste
a few fresh curry leaves, torn up
3-4 cups water
Method:
1. Heat the oil in a small pan and add the asafoetida powder, mustard seeds and curry leaves.
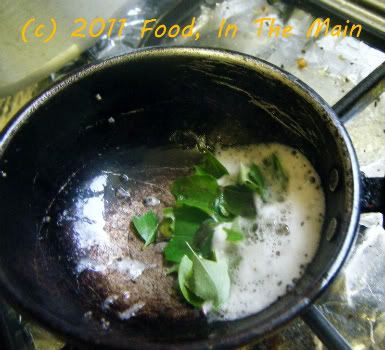 Cover and let the seeds pop, then add the grated coconut.
 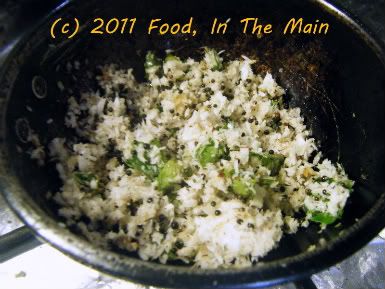 Fry on medium heat till the coconut is light brown and aromatic.
 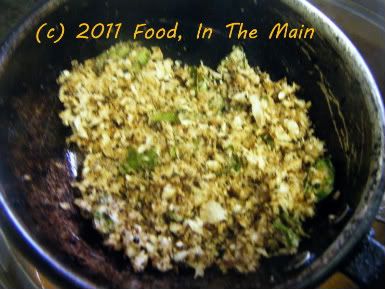 Remove from heat and set aside till required.
2. Put about a cupful of water in a pan along with the karela/bittergourd/pavakkai and turmeric powder.
Remove from heat and set aside till required.
2. Put about a cupful of water in a pan along with the karela/bittergourd/pavakkai and turmeric powder. 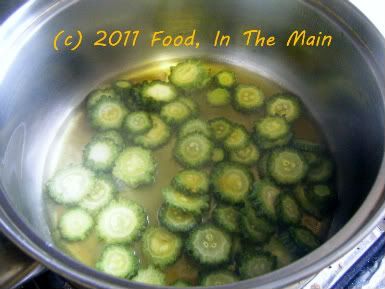 Let it cook till it becomes soft.
3. Dissolve the tamarind paste in 2 cup water and add it to the cooked karela/bittergourd/pavakkai.
Let it cook till it becomes soft.
3. Dissolve the tamarind paste in 2 cup water and add it to the cooked karela/bittergourd/pavakkai.
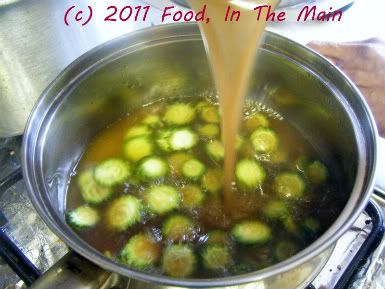 4. Bring this to a boil, then add the sambar powder and rice powder and stir till well mixed.
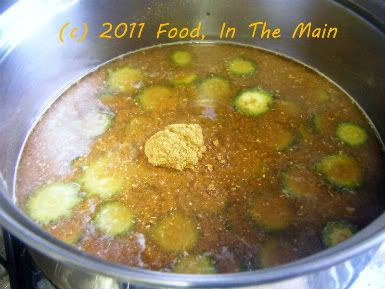 5. Stir in the cooked masoor dal
 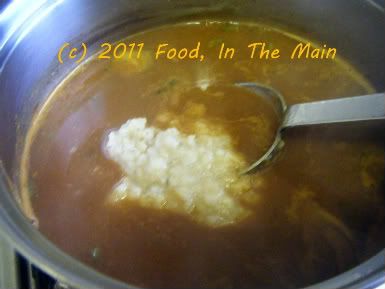 6. Add salt to taste along with the roasted coconut and mix in.
 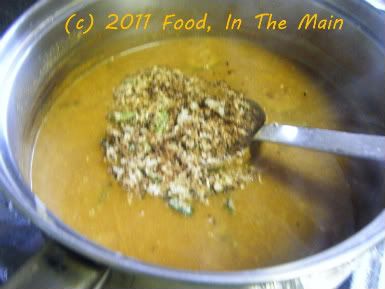 7. Boil the pitla for a few minutes longer till it thickens.
 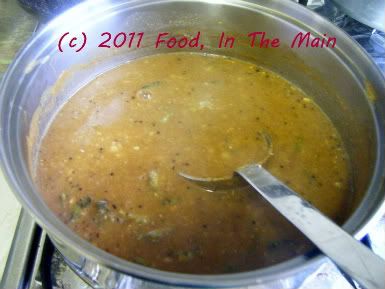 Serve hot with rice.
 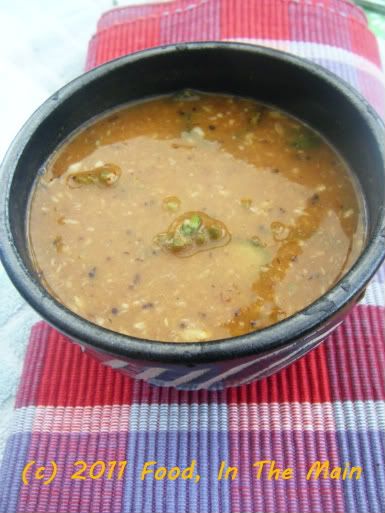 RECIPE: BITTERGOURD/KARELA/PAVAKKAI PITLA
Ingredients:
2 medium karela/bittergourd/pavakkai, sliced into rounds
1 tbsp tamarind paste
3 tsp gingelly oil (or any neutral cooking oil)
1 tsp mustard seeds
2 tbsp sambar powder
2 tbsp finely grated coconut
1/2 tsp asafoetida powder
1 tbsp rice flour
Salt to taste
a few fresh curry leaves, torn up
3-4 cups water
Method:
1. Heat the oil in a small pan and add the asafoetida powder, mustard seeds and curry leaves. Cover and let the seeds pop, then add the grated coconut. Fry on medium heat till the coconut is light brown and aromatic. Remove from heat and set aside till required.
2. Put about a cupful of water in a pan along with the karela/bittergourd/pavakkai and turmeric powder. Let it cook till it becomes soft.
3. Dissolve the tamarind paste in 2 cup water and add it to the cooked karela/bittergourd/pavakkai.
4. Bring this to a boil, then add the sambar powder and rice powder and stir till well mixed.
5. Stir in the cooked masoor dal.
6. Add salt to taste along with the roasted coconut and mix in.
7. Boil the pitla for a couple of minutes longer. Serve hot with rice.
RECIPE: BITTERGOURD/KARELA/PAVAKKAI PITLA
Ingredients:
2 medium karela/bittergourd/pavakkai, sliced into rounds
1 tbsp tamarind paste
3 tsp gingelly oil (or any neutral cooking oil)
1 tsp mustard seeds
2 tbsp sambar powder
2 tbsp finely grated coconut
1/2 tsp asafoetida powder
1 tbsp rice flour
Salt to taste
a few fresh curry leaves, torn up
3-4 cups water
Method:
1. Heat the oil in a small pan and add the asafoetida powder, mustard seeds and curry leaves. Cover and let the seeds pop, then add the grated coconut. Fry on medium heat till the coconut is light brown and aromatic. Remove from heat and set aside till required.
2. Put about a cupful of water in a pan along with the karela/bittergourd/pavakkai and turmeric powder. Let it cook till it becomes soft.
3. Dissolve the tamarind paste in 2 cup water and add it to the cooked karela/bittergourd/pavakkai.
4. Bring this to a boil, then add the sambar powder and rice powder and stir till well mixed.
5. Stir in the cooked masoor dal.
6. Add salt to taste along with the roasted coconut and mix in.
7. Boil the pitla for a couple of minutes longer. Serve hot with rice.
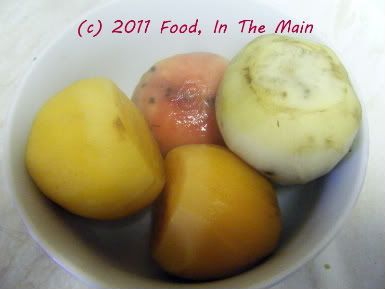
Yesterday I went to a supermarket called Morrisons, which I visit only occasionally. It turned out to be very exciting, in the event, because I saw display after display of vegetables and fruits that I'd only ever seen in "ethnic" markets before... bittergourd (albeit the Chinese kind), colocasia, bottlegourd, plantains, curry leaves and so on, along with even more exotic heirloom items - tomatoes and golden beets and pink beets.
To say that I was thrilled is an understatement - Pete was amused by my ecstatic squeaks of joy as I came upon more and more things, some of which I'd only seen in Singapore, or heard of from other food blogs. My first instinct was to buy everything in sight, but in the end I restricted myself to buying some heirloom tomatoes and beetroots (and some spiky looking rambutan. I just couldnt resist those fruits).
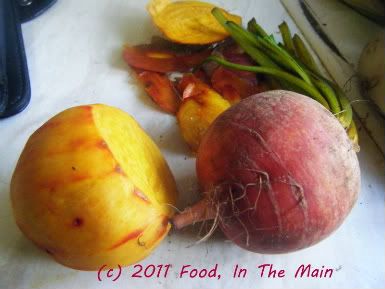 To get back to the beets, they looked absolutely lovely when they were peeled - a sort of golden orangey pink, all the shades of a glorious sunset. The intensity of the colours lessened somewhat when the beets were cooked, but they were still very apparent. I have to say I prefer these heirloom beets to the regular red ones because they don't turn everything they touch to a lurid pink. And they still taste like proper beets. They definitely made my dal look pretty in pastel shades! Don't you think so too?
PS. The rambutan? Pete and I ate them. They were beautifully sweet.
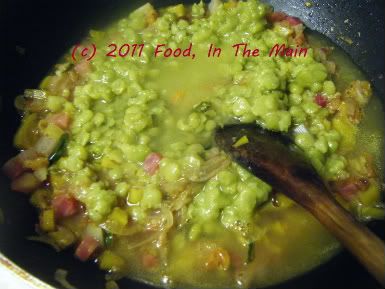
Recipe for: Golden beet and split-pea dal
To get back to the beets, they looked absolutely lovely when they were peeled - a sort of golden orangey pink, all the shades of a glorious sunset. The intensity of the colours lessened somewhat when the beets were cooked, but they were still very apparent. I have to say I prefer these heirloom beets to the regular red ones because they don't turn everything they touch to a lurid pink. And they still taste like proper beets. They definitely made my dal look pretty in pastel shades! Don't you think so too?
PS. The rambutan? Pete and I ate them. They were beautifully sweet.
Recipe for: Golden beet and split-pea dal 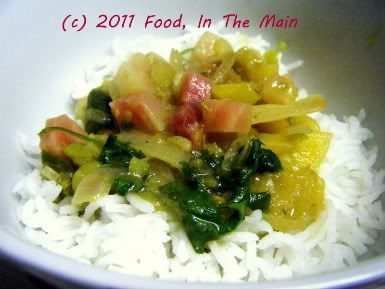 Ingredients:
2-3 medium heirloom golden/pink beets, cooked
Ingredients:
2-3 medium heirloom golden/pink beets, cooked
 1 cup green split-peas, cooked
 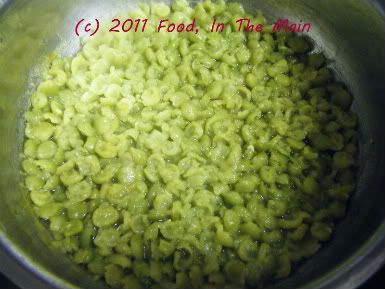 2 medium red onions, sliced thinly
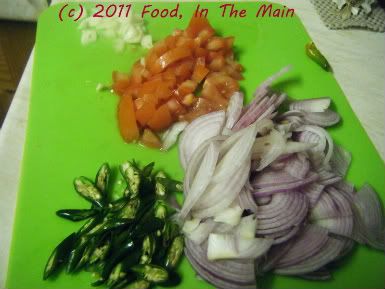
-5 fresh green chillies, sliced thinly
2 medium tomatoes, chopped
2-3 garlic cloves, sliced
2 medium red onions, sliced thinly
-5 fresh green chillies, sliced thinly
2 medium tomatoes, chopped
2-3 garlic cloves, sliced
 1 tsp cumin-coriander powder
1 tsp Kitchen King masala (or other garam masala)
1 tbsp oil
Fresh coriander leaves for garnish
Salt to taste
1-2 cups water
Method:
1. Heat the oil in a pan and add the chillies and garlic cloves. Fry for a minute or so, until it's fragrant, then add the cumin-coriander powder.
1 tsp cumin-coriander powder
1 tsp Kitchen King masala (or other garam masala)
1 tbsp oil
Fresh coriander leaves for garnish
Salt to taste
1-2 cups water
Method:
1. Heat the oil in a pan and add the chillies and garlic cloves. Fry for a minute or so, until it's fragrant, then add the cumin-coriander powder. 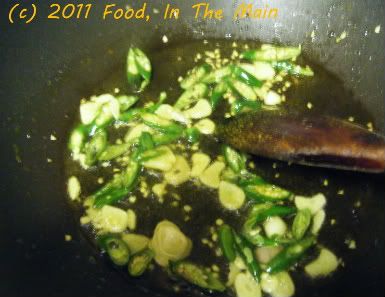 2. Add the sliced onions and fry till they start to become soft
  then add the chopped tomatoes and fry till they're mushy and soft.
 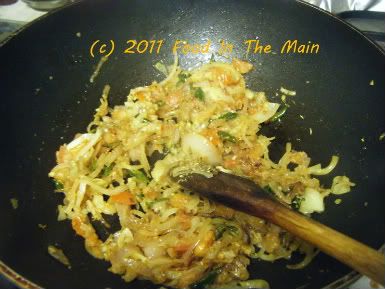 3. Add the chopped cooked beets and mix them in with the masala,
 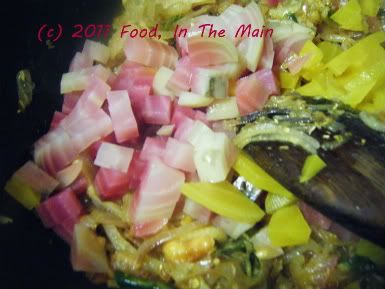 then add the cooked split-peas.
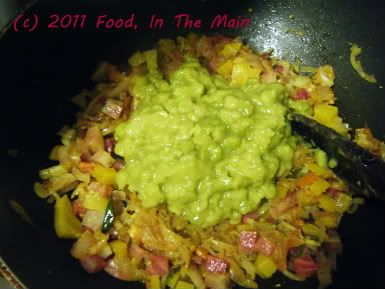 Pour in a cup or two of water, depending on how thick you want the dal, and stir well.
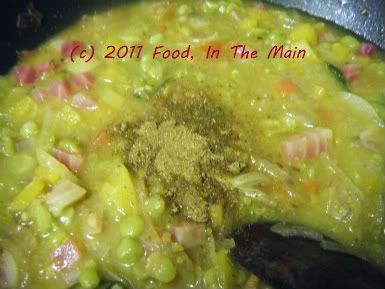
 4. Bring to a gentle boil, then stir in the Kitchen King/garam masala. Add salt to taste.
 5. Turn off the heat after a couple of minutes, then stir in the chopped coriander.
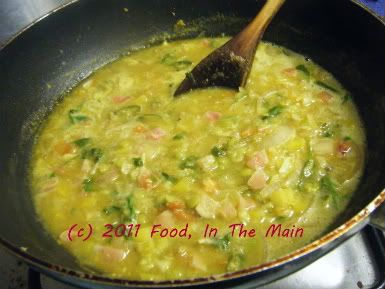 Serve hot over rice or with rotis.
RECIPE: GOLDEN BEET AND SPLIT-PEA DAL
Ingredients:
2-3 medium heirloom golden/pink beets, cooked
1 cup green split-peas, cooked
2 medium red onions, sliced thinly
4-5 fresh green chillies, sliced thinly
2 medium tomatoes, chopped
2-3 garlic cloves, sliced
1 tsp cumin-coriander powder
1 tsp Kitchen King masala (or other garam masala)
1 tbsp oil
Fresh coriander leaves for garnish
Salt to taste
1-2 cups water
Method:
1. Heat the oil in a pan and add the chillies and garlic cloves. Fry for a minute or so, until it's fragrant, then add the cumin-coriander powder.
2. Add the sliced onions and fry till they start to become soft then add the chopped tomatoes and fry till they're mushy and soft.
3. Add the chopped cooked beets and mix them in with the masala, then add the cooked split-peas. Pour in a cup or two of water, depending on how thick you want the dal, and stir well.
4. Bring to a gentle boil, then stir in the Kitchen King/garam masala. Add salt to taste.
5. Turn off the heat after a couple of minutes, then stir in the chopped coriander. Serve hot over rice or with rotis.
Serve hot over rice or with rotis.
RECIPE: GOLDEN BEET AND SPLIT-PEA DAL
Ingredients:
2-3 medium heirloom golden/pink beets, cooked
1 cup green split-peas, cooked
2 medium red onions, sliced thinly
4-5 fresh green chillies, sliced thinly
2 medium tomatoes, chopped
2-3 garlic cloves, sliced
1 tsp cumin-coriander powder
1 tsp Kitchen King masala (or other garam masala)
1 tbsp oil
Fresh coriander leaves for garnish
Salt to taste
1-2 cups water
Method:
1. Heat the oil in a pan and add the chillies and garlic cloves. Fry for a minute or so, until it's fragrant, then add the cumin-coriander powder.
2. Add the sliced onions and fry till they start to become soft then add the chopped tomatoes and fry till they're mushy and soft.
3. Add the chopped cooked beets and mix them in with the masala, then add the cooked split-peas. Pour in a cup or two of water, depending on how thick you want the dal, and stir well.
4. Bring to a gentle boil, then stir in the Kitchen King/garam masala. Add salt to taste.
5. Turn off the heat after a couple of minutes, then stir in the chopped coriander. Serve hot over rice or with rotis.
It’s been a long time since my last post. (If I were to count the number of times that I started a post with the previous sentence, I probably would need to make use of the fingers and toes of my friends and family in order to sum it up!)
The reason is that my mother was here for the last month or so, and I happily quit the kitchen – partly because it was convenient, and partly because there would not really have been any way to prevent her from cooking and cleaning, what with me being away at work from 9 to 5. Besides, it's been a while since I've had the comfort and pleasure of amma's cooking!
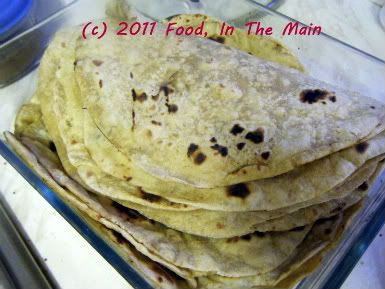
Anyway, I made these phulkas at least two months ago, and the post has been hanging fire ever since. It’s not going to be new for many people, because it’s possibly been a few years since the whole use-mashed-avocado-to-make-chapati-dough sensation arose and died down. I like to think that I’m like one of those marathon runners who lag way behind everybody all through the event and limp in alone a few hours/days/weeks/months/years later, and then get applauded for at least finishing the darned thing - although I doubt there will be any applause coming my way in this instance. However, if you do wish to congratulate me, I will be happy to accept any commendation. I’m not too proud for that.
The only other thing I wish to say that is unrelated to this post is that I will probably be taking it slow – or rather, taking it slower – with this blog in the coming months for personal reasons. I do still have 2-3 recipes that I want to post, but beyond that… well, hopefully 2012 will see in a more committed and enthusiastic me.
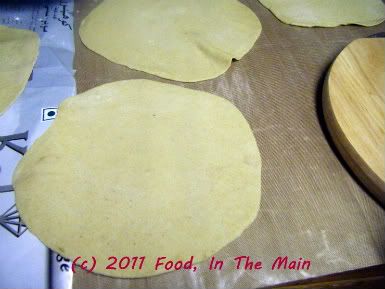
So, about the avocado effect – the chapatti dough was soft and could be rolled out beautifully thin, and the phulkas stayed soft for longer than they normally do with me. Very nice, as you all probably know already.
Recipe for: Avocado phulkas
 Ingredients:
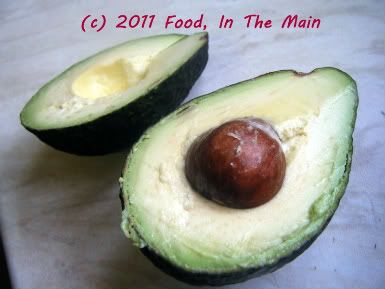
1 large ripe avocado
 4 cups wholewheat chapati flour
salt to taste
water as required
1 tbsp omam/ajwain/carom seeds
4 cups wholewheat chapati flour
salt to taste
water as required
1 tbsp omam/ajwain/carom seeds
Method:
1. Scoop out the avocado flesh, discarding the skin and seed, and mash it smooth.
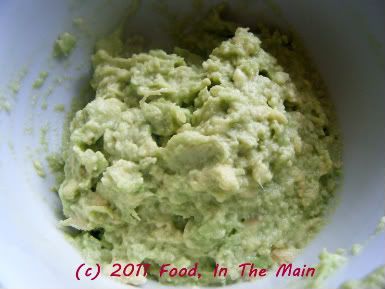 2. Put the mashed avocado in a large mixing bowl and add the flour, ajwain/carom seeds, and salt to taste. Using water as required, slowly mix the flour and avocado to make an elastic, smooth dough. It shouldn't be sticky.
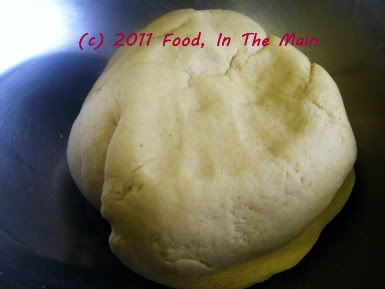 Let the dough rest for at least 30 minutes.
3. Pinch off a piece of dough about the size of a lime, and roll it out into an even, thin circle, sprinkling extra flour if it looks like sticking to the rolling pin, and turning it over as required.
Let the dough rest for at least 30 minutes.
3. Pinch off a piece of dough about the size of a lime, and roll it out into an even, thin circle, sprinkling extra flour if it looks like sticking to the rolling pin, and turning it over as required.
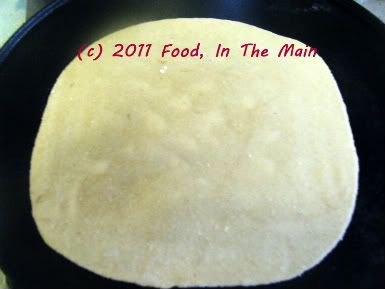
 4. Place the rolled out dough on a hot tava, letting it cook for 30 seconds or so, then flip it over and let that side cook.
 5. At this point you can use a phulka "mesh" to cook the phulka directly over the open flame, letting it puff up, then flipping it over to cook the other side.
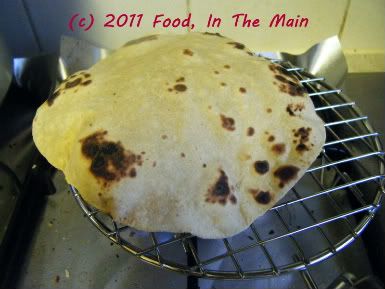 If you're unfamiliar with this method, you can cook the phulka on the tava itself by gently pressing down on the dough with a clean, bunched up tea towel till the phulka acquires brown spots.
6. Serve hot with dal and a vegetable curry.
RECIPE: AVOCADO PHULKAS
Ingredients:
1 large ripe avocado
4 cups wholewheat chapati flour
salt to taste
water as required
1 tbsp omam/ajwain/carom seeds
Method:
1. Scoop out the avocado flesh, discarding the skin and seed, and mash it smooth.
2. Put the mashed avocado in a large mixing bowl and add the flour, ajwain/carom seeds, and salt to taste. Using water as required, slowly mix the flour and avocado to make an elastic, smooth dough. It shouldn't be sticky.
Let the dough rest for at least 30 minutes.
3. Pinch off a piece of dough about the size of a lime, and roll it out into an even, thin circle, sprinkling extra flour if it looks like sticking to the rolling pin, and turning it over as required.
4. Place the rolled out dough on a hot tava, letting it cook for 30 seconds or so, then flip it over and let that side cook.
5. At this point you can use a phulka "mesh" to cook the phulka directly over the open flame, letting it puff up, then flipping it over to cook the other side.
If you're unfamiliar with this method, you can cook the phulka on the tava itself by gently pressing down on the dough with a clean, bunched up tea towel till the phulka acquires brown spots.
6. Serve hot with dal and a vegetable curry.
If you're unfamiliar with this method, you can cook the phulka on the tava itself by gently pressing down on the dough with a clean, bunched up tea towel till the phulka acquires brown spots.
6. Serve hot with dal and a vegetable curry.
RECIPE: AVOCADO PHULKAS
Ingredients:
1 large ripe avocado
4 cups wholewheat chapati flour
salt to taste
water as required
1 tbsp omam/ajwain/carom seeds
Method:
1. Scoop out the avocado flesh, discarding the skin and seed, and mash it smooth.
2. Put the mashed avocado in a large mixing bowl and add the flour, ajwain/carom seeds, and salt to taste. Using water as required, slowly mix the flour and avocado to make an elastic, smooth dough. It shouldn't be sticky.
Let the dough rest for at least 30 minutes.
3. Pinch off a piece of dough about the size of a lime, and roll it out into an even, thin circle, sprinkling extra flour if it looks like sticking to the rolling pin, and turning it over as required.
4. Place the rolled out dough on a hot tava, letting it cook for 30 seconds or so, then flip it over and let that side cook.
5. At this point you can use a phulka "mesh" to cook the phulka directly over the open flame, letting it puff up, then flipping it over to cook the other side.
If you're unfamiliar with this method, you can cook the phulka on the tava itself by gently pressing down on the dough with a clean, bunched up tea towel till the phulka acquires brown spots.
6. Serve hot with dal and a vegetable curry.

