skip to main |
skip to sidebar
(Adapted from A Baker’s Tour by Nick Malgieri)
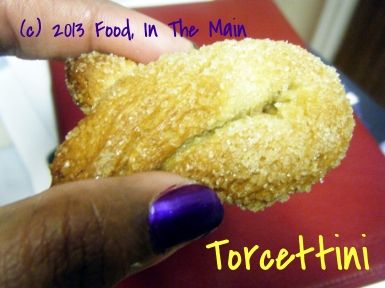
Cookies are not my thing. I might have tried baking cookies maybe a scant 2 dozen times in the last 10 years (or since I started cooking, anyway). Not always successfully, I might add. There aren't many biscuits that have come out well, except for the multiple batches of ginger biscuits that I baked last Christmas, much to Pete's satisfaction. Pete loves ginger biscuits, but not really any others. As for me, I'm no cookie monster!
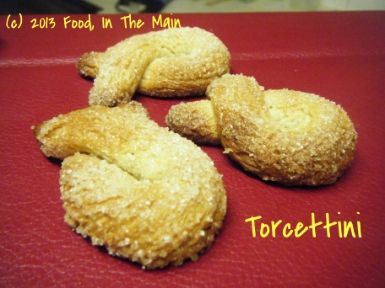
Anyway - these yeasted cookies were pretty easy to make. Like most everyone else, we both liked the sugar crust and the caramelised underside of the cookies. They were different from anything I've had before, that's for certain!
And one more thing - I'm glad I've managed to post this recipe before the end of April. I missed the publish date of 24th April because of a combination of circumstances, the most distressing one being a bereavement in the family. Still... it's a part of the cycle of life, I suppose, and life being what it is, it must go on. So... onward to May's challenge!
 Ingredients:
1/2 cup warm water
1-1/4 tsp active dry yeast (or 1 tsp instant yeast)
1-1/2 cups all-purpose flour
1/4 tsp salt
1 tsp lime/lemon zest or 1 tsp crushed anise seeds
2-1/2 tbsp unsalted butter, cold and cut into small pieces
about 1/3 cup granulated sugar for rolling the cookies
Method:
1. Dissolve the yeast in the warm water, in a small bowl and keep aside.
2. Put the flour and the salt in a large bowl and stir everything together. Add the butter pieces and pulse until the butter is well mixed and the flour-butter mixture looks powdery.
3. Add the yeast-water mixture and knead just till it all comes together as a ball. Place the ball of dough in a oiled bowl, turning it so it is well coated with the oil. Cover the bowl, and let the dough rise. This dough does not really double in volume, but it should look “puffy” after about an hour or so. When you pinch off a bit from the top you can see the interior looking a bit like honeycomb. Press down the dough to deflate it, wrap it in cling wrap and refrigerate it for at least one hour or up to 24 hours.
4. When ready to make the cookies, take the dough out and lightly roll it out into an approximately 6” square. If the dough feels sticky, scatter a little sugar on it. Using a pizza wheel cut the dough into four strips of equal width. Cut each strip into 6 equal pieces, by cutting across, making a total of 24 pieces. The measurements are not very critical in this part because this just makes it easier to have 24 equal sized bits of dough, as compared to pinching of bits of the dough.
5. Roll each piece into a pencil thick “rope” about 5” long. Sprinkle a little sugar on your work surface and roll the “rope” in it so the sugar crusts the dough uniformly. Form the “rope” into a loop crossing it over before the ends.
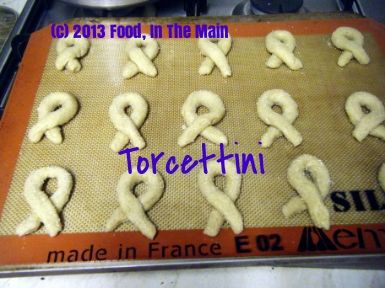 6. Place the Torcettini on parchment lined baking sheets, leaving 1-1/2" between them. Leave them for about 20 minutes or so till they rise/ puff up slightly. They will not “puff up” much, like bread, but the “puff” will be visible.
7. Bake them at 160C (325F) for about 25 minutes till they’re a nice golden brown.
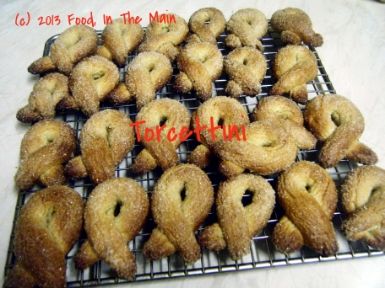 Cool the cookies completely, on a rack. Store them in an air-tight container at room temperature.
I just wanted to try the pull-apart recipe again, to see if I could manage the miraculous "second rising" of the bread dough. I started this before I checked to see if I had any cheese - and sure enough, when I did get around to checking the fridge, there was no cheese - no, not even a bog-standard Cheddar *sigh*. I couldn't go out to get cheese because of all the snow (it's been snowing all day) and because I didn't want to venture out into the freezing cold.
This should have been a CHEESY bread... ideally I was hoping to use feta, as a Mediterranean cheese to go with the somewhat Mediterraneanish Dukkah (Sainsbury's finest version, I'll have you know).
(Ok, yeah, I know Dukkah is Egyptian, but it's kinda sorta close to Mediterranean cuisine, no? Work with me here, people... I suppose you could say that Dukkah and feta are about as compatible as Dukkah and cheddar - but that's for YOU to say. I say different.)
Anyway... I halved the quantity of ingredients in the original recipe because I'm back home and there are fewer than half the people that were there when I made my first attempt in Seattle earlier this month. I'm glad to say that, on the plus side, the second rising in my second attempt was successful. Unfortunately, while I turned the former negative into a present positive, a couple of other negatives arose in the present version - one being, as mentioned earlier, a lack of cheese; the second being that the tomato flavour was at best only mild. I guess 1 tbsp of concentrated tomato paste was not enough even though the ingredients were halved. Next time I'd probably double the amount of paste and use finely chopped sun-dried tomatoes in oil too.
Oh well, live and learn.
The bread, by the way, was good, but it would have been better with cheese (a friend of mine at work insists that most things are better with cheese).
Recipe for: Tomato-garlic pull-apart bread with dukkah
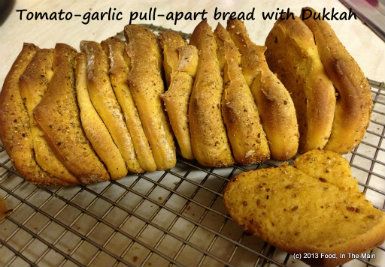 Ingredients:
For the Dough
1/4 cup warm milk
1/2 tsp sugar
1 tsp active dry yeast
1.5 cups bread flour (+ a couple of tbsp more for dusting if necessary)
1/2 tsp salt
1 tbsp butter, soft at room temperature
1 tbsp concentrated tomato paste
2 fat cloves garlic, grated (use only 1 clove or 1/2 tsp garlic paste if you want a milder flavour)1/3 cup milk
1 tbsp milk for brushing
For the Filling
1 tbsp melted butter
2 tsp Dukkah (I pounded it with a mortar and pestle to make it more uniformly sized)
Method:
1. In a small bowl, dissolve the sugar and the yeast in the 1/4 cup of warm milk. Keep aside for about 5 minutes till the yeast mixture bubbles up.
2. Put 1.5 cup of flour, salt, softened butter, and grated garlic in a large bowl and mix. Then add the yeast mixture and most of the 1/3 cup of milk and mix together. If there is more than a tbsp of flour that keeps dropping off from the dough (i.e, it isn't coming together) and the dough itself seems dry, add the remainder of the milk and knead it in.
Transfer the dough to a non-stick mat (lightly flour your kneading area if it is not non-stick) and knead away till you have a soft, smooth and elastic/ pliable dough which is not sticky (about 10 minutes of energetic kneading). Add a little extra flour if your dough is sticking, but only just as much as is necessary.
3. Shape the dough into a ball and place it in a well-oiled bowl, turning the dough to coat it completely with oil. Cover and let it rise for about 1 to 1 1/2 hours or until almost doubled in volume.
4. Dust your work surface lightly with flour. Deflate the dough, shape it into a square and roll the dough out into a square that is about 8" by 8". Brush the surface of the square with the melted butter.
5. Evenly sprinkle the Dukkah mix. Use a rolling pin to very lightly press the topping into the dough to ensure the topping doesn’t fall off when you are stacking the strips.
6. Using a pizza cutter, slice the dough from top to bottom into 4 long and even strips – they do not have to be perfect. Lay each strip on top of the next, with the topping facing upwards, until you have a stack of the strips. You can put the 2 strips cut from the sides in the middle of the stack so it looks neater. Using a pastry scraper or a sharp knife, cut straight down through the stack dividing it into 3 or 4 equal pieces.
7. Grease and lightly flour a small loaf tin that will fit the pieces comfortably (or any other baking container you like). Layer the slices, cut sides down into the loaf tin. Cover the loaf tin dough with a towel and allow the dough to rise for an hour. Lightly brush some milk over the top of the loaf.
8. Bake the dough at 180C (350F) for about 25-30 minutes (but check from 25 minutes, as every oven differs in its performance) until it is done and the top is golden brown, and the bread sounds hollow when tapped on the bottom.
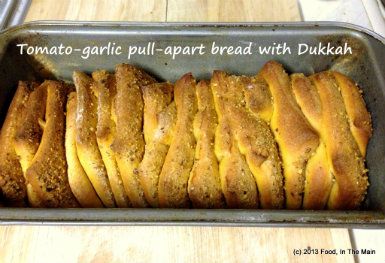
9. Serve hot with soup.
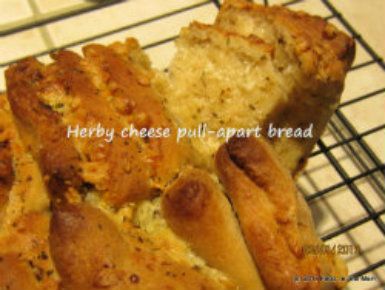 This is the first challenge of the monthly baking event started by Aparna Balasubramaniam of My Diverse Kitchen - she of the gorgeous photos and amazing baking ability in particular and lovely recipes in general. When I signed up to join the group, I happened to be in the States, visiting my family in Seattle. It was the perfect opportunity to try the recipe for pull-apart bread, especially as I'd kinda sorta earmarked it for making (at some unspecified point) when I'd seen the original photo on the Huffington Post's selection of photos of pull-apart breads.
The other point was, of course, that there were lots of people at home who would help demolish the bread... whereas at home in Shrewsbury, there's usually just me and Pete. It's difficult to invite people over when you can't be sure that you can provide something edible - I'm a million miles from being the world's best baker, that's the problem.
Happily, family don't fall into the worrisome category, so I was quite pleased to make them my guinea pigs as far as this bread was concerned. As it happened, the dough didn't rise as much as it should have, or as evenly. And since the oven was unfamiliar to me, I didn't really know anything thing about its particular quirks - its hot spots, or cold spots, etc.
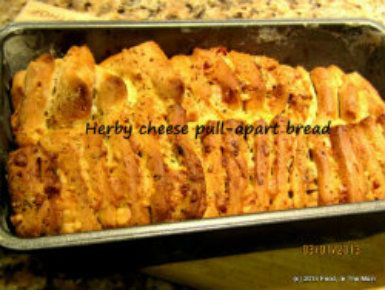
But - and this is important - the bread turned out beautifully golden and really tasty with the mushroom-vegetable soup that I'd made.
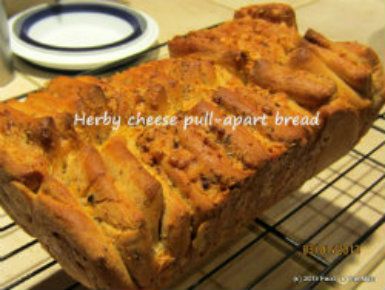
The aroma as it was baking nearly drove us mad, and there was nothing to do but tear into it the moment it came out of the oven! Granted, the texture of the bread was a bit dense, but I don't think anybody cared.
I changed the original recipe just a tad - I used Pepperjack cheese on request from my sister, instead of cheddar, and I used an Italian herb mix, because that's what I had. I hope to make this bread again, with slightly different toppings. If I do, I'll definitely post it here. But for now, here's my tear-and-share bread.
Recipe for: Herby cheese pull-apart bread
Ingredients:
For the Dough
1/2 cup warm milk
1 tsp sugar
2 tsp active dry yeast
2-3/4 - 3 cups all-purpose flour
1 tsp salt
25gm butter, soft at room temperature
3/4 to 1 tsp garlic paste
3/4 cup milk (+ a couple of tbsp to brush over the bread)
For the Filling:
15 to 20gm melted butter
2 tsp dried Italian-style herb mix
1 tsp crushed cumin seeds
1/2 cup grated Pepperjack cheese
Method:
1. In a small bowl, dissolve the sugar and the yeast in the 1/2 cup of warm milk. Keep aside for about 5 minutes till the yeast mixture bubbles up.
2. Put 2 3/4 cup of flour, salt, softened butter, and garlic paste in a large bowl and mix. Then add the yeast mixture and the 3/4 cup of milk and knead till you have a soft, smooth and elastic/ pliable dough which is not sticky. Add a little extra flour if your dough is sticking, but only just as much as is necessary.
3. Shape the dough into a ball and place it in a well-oiled bowl, turning the dough to coat it completely with oil. Cover and let it rise for about 1 to 1 1/2 hours or until almost doubled in volume.
4. Dust your work surface lightly with flour. Deflate the dough, shape it into a square and roll the dough out into a larger square that is about 12’ by 12”. Brush the surface of the square with the melted butter.
5. Evenly sprinkle the herbs and the cumin seeds and then the grated cheese. Use a rolling pin to very lightly press the topping into the dough to ensure the topping doesn’t fall off when you are stacking the strips.
6. Using a pizza cutter, slice the dough from top to bottom into 6 long and even strips – they do not have to be perfect. Lay each strip on top of the next, with the topping facing upwards, until you have a stack of the strips. You can put the 2 strips cut from the sides in the middle of the stack so it looks neater. Using a pastry scraper or a sharp knife, cut straight down through the stack dividing it into 6 equal pieces (6 square stacks).
7. Grease and lightly flour a 9” by 4” (or 5”) loaf tin. Layer the square slices, cut sides down into the loaf tin. Cover the loaf tin dough with a towel and allow the dough to rise for an hour. Lightly brush some milk over the top of the loaf.
8. Bake the dough at 180C (350F) for about 30 to 40 minutes until it is done and the top is golden brown.
This recipe bakes one 9” by 5” loaf.
9. Serve hot with any soup.
Naan naan paNninaen.*
There. A two-language pun. I know, it’s dreadful... but honestly, it was better out than in – specifically because of its awfulness. Imagine the harm it could have done to my system had it not been externalised! If the pun is hurting all y’all who know Tamil, I can only say that it’s just as painful for me.
Because – brace yourself for some very hi-funda philosophy - a bad pun is like using a two-edged razor. It may hurt the wielder as much as it hurts the wieldee(s), but it cannot be left unwielded.
Anyway... the good thing about the naans (that I made naan-ey† *sorry*) is that they were as yummy as the puns are gruesome. They disappeared as quickly as I could turn them out – and the coolest thing was that I didn’t need a tandoori oven to make them. In fact, I didn’t even use the regular oven. What I used was my cast-iron skillet. It’s a small one (but mighty expensive for all that, when I bought it!) so the naans were small. Mini “me”s, I guess (because naan = me, bwahahahahahahahahha, and this time I’m not sorry!).
This was the first time I’d made naans, so I wasn’t quite sure about how thick (or how thin) to roll them. I settled on about 1/2-cm thick, but they became somewhat thicker than that when they puffed up on cooking. Everybody (Pete, his two kids and amma) liked them as they were – soft in the centre but crispish and brown around the edges – but I think I would have liked them better thinner. But that’s just me.
I plan to roll the dough thinner the next time I make naans, because I like them to be on the thinner and crisper side... but I’ll also find out if thin naans will still be soft without being doughy.
I used two toppings – sesame seeds and kalonji seeds. Both were great.
Oh yeah, the cast-iron skillet method of making naans on the hob. Nearly forgot about detailing my gratifyingly successful experience with that!
Basically, it HAS to be a cast-iron skillet or tava. Non-stick items are useless for this, even the hard anodized triple-coated last-you-a-lifetime expensive kind. At least, I wouldn’t attempt it with mine because I’m certain that the naans and the naan-stick – er, NON-stick (NOT sorry, so there) – coating would be ruined.
Anyway, what you do is brush one surface of the rolled-out naan generously with water (I used my soft pastry brush so as not to brush the topping right off), slap it wet-side down onto a well heated skillet, cook it with the skillet on the heat for 30-40 seconds, then turn the skillet upside down and hold it over the flame, letting the dry side cook over the direct heat. (Note: a hot-plate or non-gas hob would be spectacularly useless for this method of making naan.)
The naan is (usually) done when it falls off the skillet – (usually) right onto the flame, so keep a pair of tongs handy to grab the naan before it burns too much!
You get the hang of it easily, though – how long to keep the skillet on the flame, and when to turn it upside down so as to cook the naan evenly. And even if you don’t get the hang of it, no harm done (as long as your hob is clean!). Really. I’m not talking naan-sense.
That’s it, I’m done with the puns, and this post.
* Naan = "I" (or me), in Tamil - therefore the pun. Naan naan paNninaen translates to "I made naan" in Tamil
† Naan-ey = "I (did it) myself"
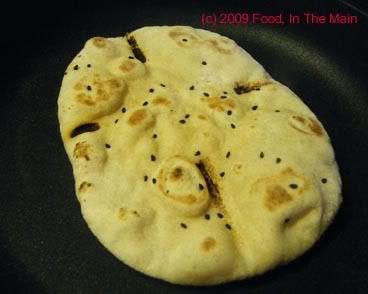
The first naan I ever made - see the four scorch marks from the hob? They happened while I was scrabbling around for a pair of tongs with which to grab the darn thing off the flame!
Recipe for: Naan
Ingredients:
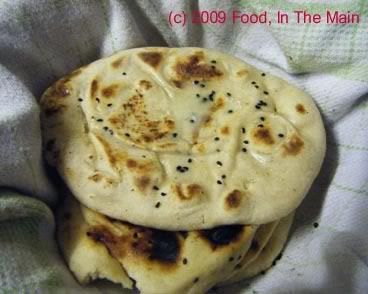
2-1/2 cups whole wheat flour
1/2 cup plain flour
1 tsp salt
1 sachet instant yeast
1/4 cup warm milk
1/2 cup yogurt
Warm water as required Toppings: 2-3 tbsp sesame seeds, nigella seeds (or as you like - green chillies, garlic, chopped coriander, etc)
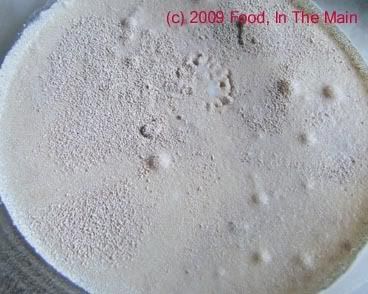
1. Dissolve the yeast in the warm milk and let rest covered for 15 minutes till it turns bubbly.

2. Whisk together the whole wheat and plain flours and salt in a deep bowl, and make a well in the centre. Add the yogurt and as much warm water as required (add little by little) to make a soft dough. Place the dough in an oiled bowl and let rise covered in a warm place for 2-3 hours.
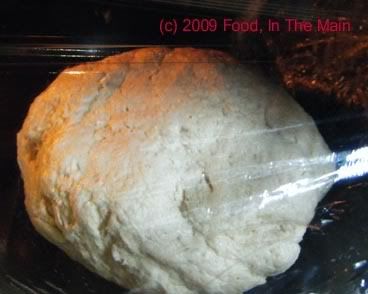
Punch the dough down after it has risen, and knead briefly. 3. Pinch off a lime-sized piece of dough and roll it into an oval about 1/2-cm thick. Sprinkle with your topping of choice, and press down gently with the belan (roller) so that the topping is embedded in the naan. This is to stop the seeds or herbs or whatever falling off.
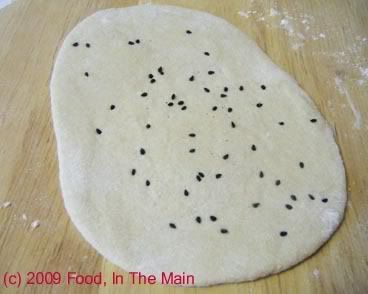
with kalonji (nigella seeds)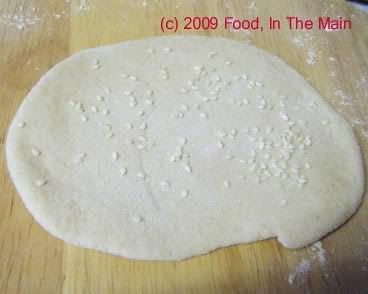
with sesame seeds4. Brush the surface of the naan (the side with the topping) with water and slap it down quickly on the well-heated cast-iron pan. Leave it on the hob for 30-40 seconds, or till the naan puffs up in places. 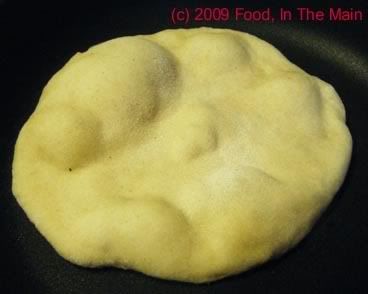
5. Now turn the skillet upside down over the flame 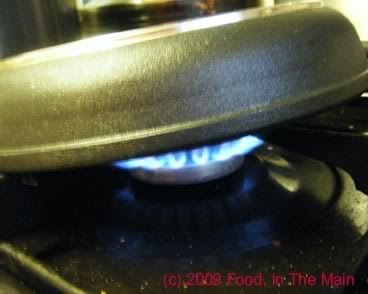
so that the dry surface of the naan cooks as well, acquiring brown spots. 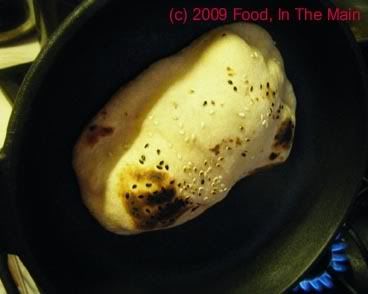
6. The naan is done when it falls off the skillet. Place in a clean tea cloth and keep warm while you make the rest of the naans. Brush with melted butter or ghee before serving with any gravy curry, if you like.
There's a traditional way of making jilebi that I just didnt bother with for two reasons: 1. I didnt have enough time. 2. I wasn't sure I could get the batter to ferment (kinda cold here now, plus see Reason 1 again).
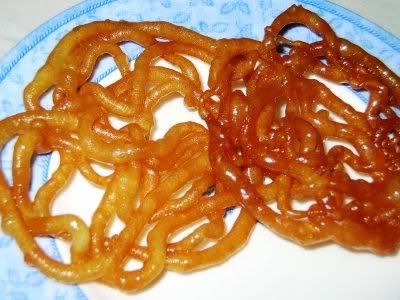
So I followed a recipe (adapted only very slightly) from Bilbo of Smorgasboard for instant jilebis. I have to say it worked out rather well... Pete loved it (he even said it was as good as those from my favourite sweetshop in Birmingham - which, although not true, was very nice to hear!) and as for Rebecca, his daughter, she couldnt get enough of them.
Cant blame them, I love jilebis as well. They're one of the few Indian sweets that I can go on eating indefinitely... perhaps it's because they're not just tooth-achingly sweet but have a sour tang to them that comes from fermenting the batter.
Jilebis are lovely to eat crisp and hot, of course, but I especially love them the next day - I store them in the refrigerator - by which time they've lost most, but not all, of their crispness and gained a softness (and a sticky sugar glaze) that is just irresistible combined with the tangy/sweet taste. (I'm drooling here.)
Strangely enough, I dont like jangri, IMO jilebi's less attractive cousin, which starts out dripping with syrup and with a soft texture. (If anybody's thinking "jeez, what a fuss-budget she is" by now, I will gracefully admit to being one... sometimes.)
Anyway... back to my Diwali jilebis. Turned out I didnt have a proper jilebi press (press, mold, whatever), and my icing accessories had unaccountably gone AWOL. So I made do with a conical disposable plastic icing bag with the tip cut off, and poured the batter into it. Not the best idea, really - it kind of worked, but a good portion of the batter was wasted as it squirted out of the top and oozed down my hand and down the bag. It also meant that my jilebis turned out a bit wonky in shape. Then again, I'm not a professional halwai (sweet-maker) so they would have been shapeless no matter what I used.
I would suggest using one of the medium-size icing/piping nozzle to make jilebis... havent tried it that way, so I cant be more accurate. Odd, now that I think of it, but I havent actually seen jilebis being made so I dunno how the professionals do it!
Recipe for: Instant jilebi
Ingredients:
For the jilebi
--------------
1 cup plain flour
1 tsp chickpea/gram flour
1/2 tsp active dry yeast
1 cup water (a few tbsp more or less as required)
2 tablespoons fresh lemon juice
Oil for deep frying
For the sugar syrup
-------------------
2 cups sugar
2 cups water
1 tbsp rosewater
OR
1/2 tsp powdered cardamom seeds
Method:
1. Combine the flours and yeast in a bowl, add enough water to make a fairly thick but pourable batter. Let this sit for 10 minutes, then stir in the lemon juice.
2. To make the sugar syrup, combine the water and sugar in a pan, stirring over medium heat until the sugar dissolves completely.
3. Let the mixture boil briskly for 10-15 minutes and then turn off the heat.
4. Heat the oil in a wok. Fit a medium nozzle (not sure of size, but it shouldnt be one with a big opening, because the batter expands in the oil) onto an icing bag and pour the batter into it.
5. Squeeze the batter directly into the hot oil, looping the stream to make pretzel-shapes. Fry the jilebis one or two at a time (depending on the size of your wok) until a golden brown on both sides.
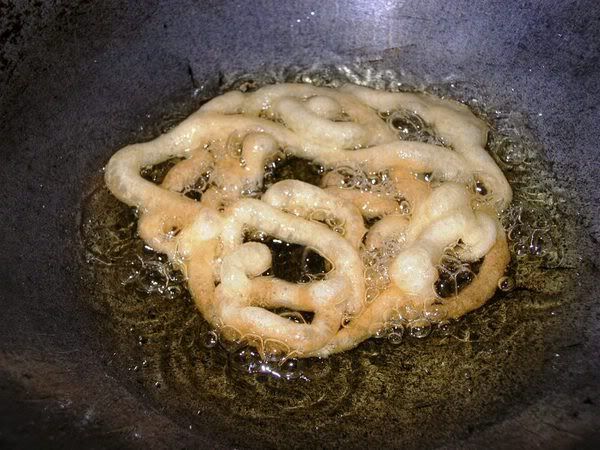
6. Drain and drop directly into the sugar syrup, soaking the jilebis for about 30 seconds each side.
7. Remove with a slotted spoon and place on a plate. Serve hot, cold or at room temperature.


