skip to main |
skip to sidebar
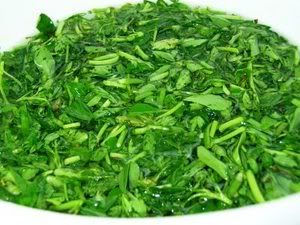
I was inspired to make methi chana when I read Garam Masala's recipe for fenugreek chickpeas. The recipe is pretty much hers, with a few tweaks. The fact that the recipe doesnt call for onions was quite intriguing, because onions and garlic are integral to most of the things I make (not cakes, though. Honest!).
Of course I've eaten no-garlic-no-onion food and enjoyed it one heck of a lot but it was always made by someone else - usually professionals! Theoretically I was aware that it is possible to make aromatic, tasty dishes that dont contain onions... but thus far I hadnt tried it myself.
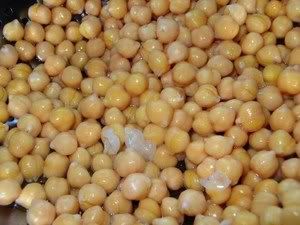
As an added bonus, I love chickpeas, and I love methi - what's not to try, right?
Seeing isnt believing in some cases. Making is. And y'all know what? I made it! And I believe! I've seen the light! I BELIEVE!
This recipe is for you, ma.
Recipe for: Methi chana
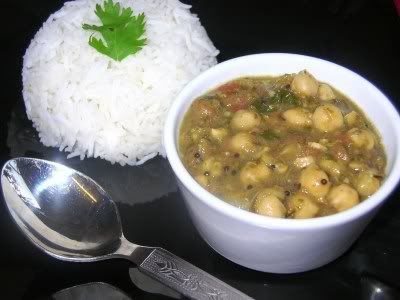
Ingredients:
2 cups fresh fenugreek leaves (grind this coarsely)
1 can (440gm) chickpeas, rinsed and drained
1 tbsp ghee (I'd advocate using ghee, its fragrance is essential!)
1/2 tsp fenugreek seeds
1 tsp cumin seeds
2 cloves
1/2 inch stick cinnamon
3/4 tsp mustard seeds
2 green chillies, chopped finely
1 tsp kasuri methi (dried fenugreek leaves) - optional
3/4 tsp cumin powder
1/2 tsp garam masala powder
1/4 tsp asafoetida
1/4 tsp turmeric powder
salt to taste
2 tomatoes - blanched, de-skinned and chopped
Amchur (dry mango powder) or tamarind paste, to taste for desired sourness
1 tbsp fresh coriander leaves
Method:
1. Dry roast the fenugreek seeds, cloves, cinnamon stick and cumin seeds for 30 seconds. Cool and pound into a powder using a mortar and pestle. Reserve.
2. In a pan, heat the ghee, add the green chillies and mustard seeds. Once the mustard seeds have popped, briefly fry the dried kasuri methi (15 seconds or so) then add the chopped tomatoes and fry till they become soft.
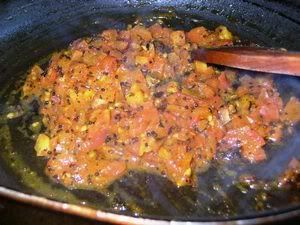
3. Add the coarsely ground raw methi leaves and mix well. Add 1/2 cup water and the powdered masala, and bring to a gentle simmer till the methi is cooked.
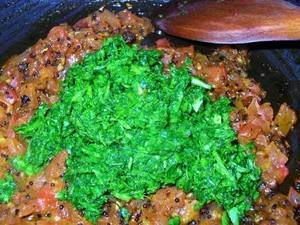
4. Now add the chickpeas, amchur or tamarind paste, turmeric powder, asafoetida and garam masala, and mix again. Add salt to taste, then pour in 1-1/2 cups water.
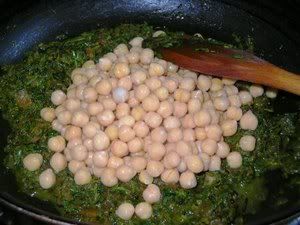
5. Simmer the chana till the gravy comes together. Crush some of the chickpeas to thicken the gravy.
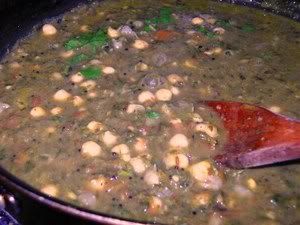
If required, mix 2 tbsp gram flour in 4 tbsp water and add it to the gravy. Simmer for 5 minutes more. Garnish with fresh coriander leaves.
Serve hot over rice or with chapaties, puris.
 With all those berries waiting patiently in the fridge, I searched the Net for the perfect berry muffin recipe. I came across quite a few recipes, but none of them quite appealed. I like recipes to sound (or read) like they know what they're about, and especially so if the end product is something with which I'm not really familiar.
Anyway, just when I was getting tired of seeing the same old recipe on different websites, I came across a blog from Boston (http://homeyturtleg.blogspot.com/) that had JUST what I was looking for - a quest for a better mixed berry muffin.
Now how could I resist that, especially as the write-up wasnt over gushy (mea culpa sometimes, I know *blush*), just matter-of-fact about the delectableness of the end product. I HAD to try the recipe. So I did. The recipe said it made 12 muffins, but when I saw the amount of batter I ended up with, I wondered if that was a mistake. Perhaps they made 24 muffins. But no, the instructions were to fill the muffin cups 3/4 of an inch over the top - not 3/4 of an inch from the top.
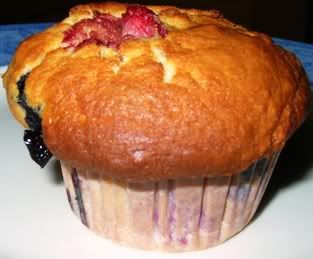
I understood why when the muffins began to bake - they rose up and rested their rims on the actual muffin pan, looking extremely professional (sorta mushroom shaped... or if you like your similes to be more virile, they were like the "V" shape so preferred by M&B authors for their heroes... broad shoulders tapering to a narrow waist - heheheheh). Anyway, I was extremely impressed with the result (not to mention impressed with myself).
The muffins were delightful - melt in the mouth softness with a wonderful aroma and taste. They were pretty good the next day too, warmed in the microwave. But if you wish to attain muffin nirvana, you've just gotta have 'em when they're oven-fresh and warm.
I've found the perfect mixed berry muffin recipe. My quest is ended. Guess I have to start another quest now! :)
This is my submission for ARF/5-a-day #30 hosted by Cate at Sweetnicks
Recipe for: Berry berry berry perfect muffins
Ingredients:
3-1/2 cups flour
4 tsp baking powder
1/2 tsp baking soda
1/2 tsp salt
1-1/3 cup white sugar
3/4 cup unsalted butter, melted and cooled slightly
1 cup whole milk
1 cup Greek yogurt, room temperature
2 large eggs, room temperature
1 large egg yolk, room temperature
2 tsp vanilla extract
1 tbsp finely grated lemon zest
2 cups mixed berries (I used fresh blueberries, raspberries, and strawberries)
Method:
1. Preheat the oven to 180C. Line a large 12-cup muffin pan with paper cups.
2. In a large bowl, sift the flour, baking powder, baking soda and salt and mix well.
3. In another bowl, whisk sugar, melted butter, milk, Greek yogurt, eggs, egg yolk, vanilla, and lemon zest.
4. Pour the wet batter into the flour mix and fold gently with rubber spatula until the flour is moistened. Do not beat.
5. Fold in the berries carefully.
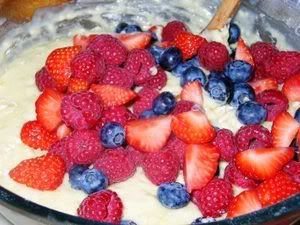
6. Use a scoop to put the batter into the muffin cups so that the batter rises above the cup rim by about 3/4-inch.

7. Bake for 25 minutes or so until the muffins are golden brown. Let the muffin pan cool on a rack for 15-20 minutes. Eat warm (the muffins, not the pan...).

The muffins can be stored for a day or two in a tightly sealed container. Re-heat for 20 seconds in the microwave before serving (my preference).
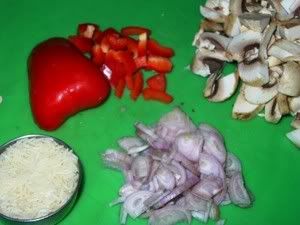
I came across the recipe for this soup on the Vegetarian Society website and was attracted by what seemed to me like rather an odd selection of ingredients - red bell pepper, chunky peanut butter, coconut milk and mushrooms, not forgetting rice. Amazingly, no fresh herbs were required. I didnt have the spring onions called for, so I used shallots instead. And since I didnt have button mushrooms at that point, I used a mixture of chestnut and large white mushrooms.
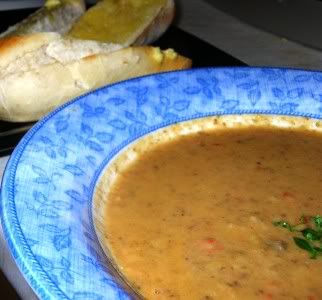
I wasnt sure how the ingredients would work together, but decided to try it anyway. And what a pleasant surprise I got, because the soup was d-e-l-i-c-i-o-u-s! Hearty, filling, flavourful and very tasty - despite not having any chillies in it (I like chillies in most things). It was a definite hit with me, and a HUGE hit with Pete. Not only that, it was pretty easy to make, too... maybe just a wee bit of preparation, but otherwise really easy. A definite keeper, this recipe.
I cant wait to try it with different mushrooms and different coloured bell peppers, and see if the taste differs!
Recipe for: Mushroom and bell pepper soup
Ingredients:
1 cup boiling water
3 tbsp fresh grated coconut
2 cups mushrooms (chestnut and white), sliced
1/2 tsp turmeric powder
1/2 tsp chilli powder
4 shallots, chopped
2 cups vegetable stock
2 tbsp lemon juice
1 tsp soft brown sugar
1/3 cup long grain rice, uncooked
2 tbsp crunchy peanut butter
1 red bell pepper, chopped
salt to taste
Method:
1. Mix together the mushrooms, turmeric powder and chilli powder. Set aside.
2. Pour one cup boiling over the grated coconut and leave to infuse for 20 minutes. Squeeze the coconut to extract the milk, strain and reserve the liquid.
3. In a large pan, add the shallots, coconut milk, vegetable stock, lemon juice, sugar, rice, peanut butter and red pepper. Stir well.
4. Bring to the boil, stirring to make sure the peanut butter melts, then cover and simmer for 10 minutes.
5. Add the mushrooms and simmer for a further 5 minutes, until the rice is tender. Add salt to taste, if necessary. (The soup can be had as is, or if you prefer, you can blend some of it to create a better texture.)
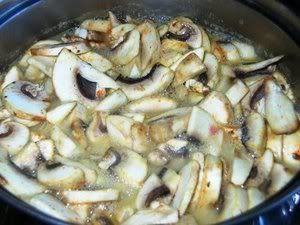
6. Remove about half of the soup, let it cool, then blend to a puree. Add it back to the remaining soup.
Serve hot with fresh baked, buttered baguette slices.
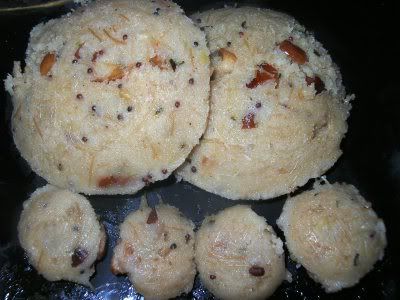
In other words, "vermicelli-semolina idlis".
I was kindly invited by Nandita of Saffron Trail to take part in her first-ever Weekend Breakfast Blogging event last week. Unfortunately, although I wanted to, I couldnt - we went away for the weekend and I couldnt get to a computer, and all of last week has been ridiculously busy at work.
Anyway, sob story aside, I'm happy to say that this week I AM participating! I didnt have regular vermicelli, which is slightly thicker than the angel-hair version I used. As far as I'm concerned, neither has any merit over the other when it comes to taste, but I'd say regular semiya would be a lot easier to handle. The angel-hair vermicelli nearly did my head in by being so light and - dont laugh - sharp when I tried to break it up into smaller pieces. It was really annoying to be hurt by something that looks so delicate!
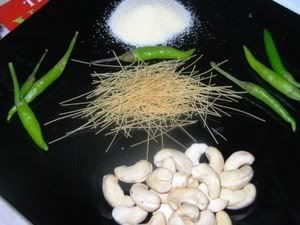
Still, I managed (I know, I deserve an award for bravery, and I'm already working on my acceptance speech). And here it is, my entry for Weekend Breakfast Blogging #2.
Recipe for: Semiya-rava idlis
Ingredients:
3/4 cup rava (cream of wheat)
2 cups vermicelli or angel-hair pasta, broken into small pieces
4 tsp oil
2-3 cups slightly sour yogurt or curds (not sour is also ok)
5-6 green chillies, sliced into thin circles
2 tsp mustard seeds
1 tsp urad dal
1/2 tsp cumin seeds, lightly crushed
3 tbsp cashewnuts, broken into pieces
10 curry leaves, torn in halves or quarters
1/2 tsp asafoetida powder
Salt to taste
Method:
1. Heat 1 tsp oil and fry the rava, stirring all the time till it turns light brown and smells nicely roasted. This should take 4-5 minutes on medium heat. Remove to a big bowl once it's done.
2. Heat another tsp oil and fry the vermicelli till golden brown. Add that to the roasted rava.
3. Heat 2 tsp oil and fry the cashewnuts till they turn a nice reddish-brown. Set aside with the vermicelli and rava.
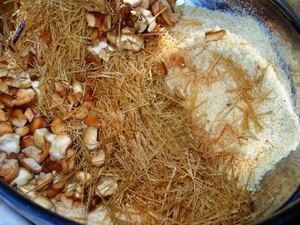
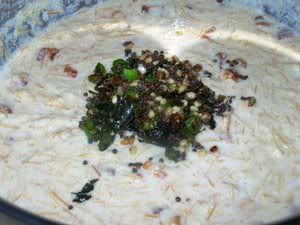
4. In the oil that's remaining in the pan, pop the mustard seeds. Then add the sliced green chillies, curry leaves, cumin seeds, urad dal and asafoetida powder and stir till the dal begins to turn golden brown. Remove from the heat and set aside.
5. Add the yogurt/curds to the rava-semiya and mix into a thick batter. It should not be too stiff, but it shouldnt be runny either.
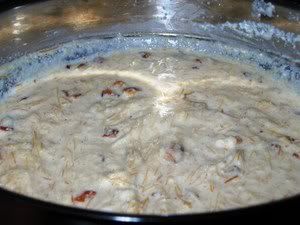
6. Mix in salt to taste and set the batter aside for 15 minutes. By this time the batter might have absorbed some of the liquid and become really thick. Thin it out if required with some water or beaten curds.
7. Mix in the seasoning.
8. Pour into greased idli plates and steam exactly like idlis for about 10-12 minutes.
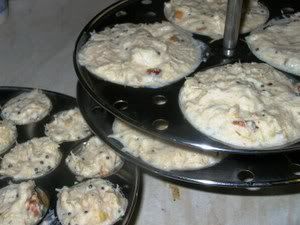
9. Serve hot with coconut chutney.
If I remember right, this recipe was printed off Saroj's Cookbook online... quite a while back. It's a one-pot meal with rice and dal and whatever vegetables you want to add to the pot. The more, the merrier.
For me, as always, it turned out convenient because I cleared out the odds and ends of vegetables that were languishing in my fridge. In fact, I ended up with way more vegetables than dal OR rice - which is always good, isnt it? And of course, it was easy as easy can be because I used my trusty Prestige pressure cooker.
I have to say that this rice tasted quite a lot like bisibela baath - delicious eaten hot with some plain cold Greek yogurt on top. Weird? Perhaps. Satisfying? Without a doubt! Oh by the way, this dish is quite soupy, which is how I prefer it. If you like your rice and veggies, drier, reduce the amount of water to 2 or even 1-1/2 cups.
PS. If the thought of yogurt with this doesnt quite appeal, feel free to eat it with potato crisps, poppadum or vadam.
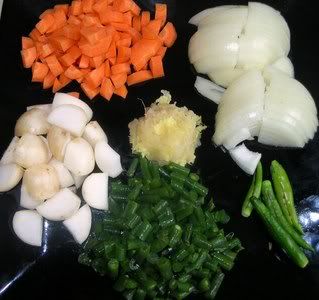
With all the vegetables I used in making this dish (onions, baby turnips, carrots, asparagus, peas, green beans, spinach, methi), I thought it was the perfect submission for Cate's ARF/5-a-Day #29 - so here it is!
Recipe for: Chootidal rice (vegetable-rice medley)

Ingredients:
1/3 cup rice + 1/3 cup toovar dal (preferably) both washed and soaked for at least 15 minutes in water
1 onion, sliced thin
3 cups mixed vegetables, cut into small pieces
1 cup methi and/or spinach
1 tbsp ginger-garlic paste
4 green chillies, sliced into thin rings
1 tsp cumin seeds
2 tsp mustard seeds
1/2 tsp turmeric powder
1/2 tsp red chilli powder
1 tbsp sambar powder
Juice of one large lemon
Salt to taste
1/2 tsp asafoetida powder
2 tbsp oil
3 cups water
10 curry leaves (optional)
2 tbsp coriander leaves, chopped coarsely
Method:
1. Heat the oil in a pan and add the mustard and cumin seeds. Let them splutter, covered.
2. Add the curry leaves, ginger-garlic paste and chopped green chillies. Stir for 30 seconds.
3. Add the sliced onions and stir-fry till soft and pale brown.
4. Add the rest of whatever vegetables you are using (bar the spinach) and stir well, then let them cook for 5 minutes on medium-heat.
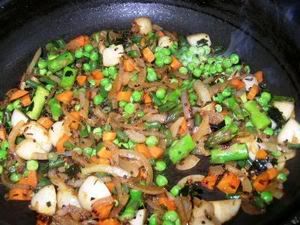
5. Put in the drained dal-rice and stir for 2 minutes more. Then add the spinach/methi if using.
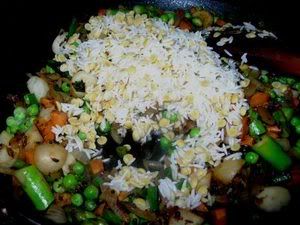
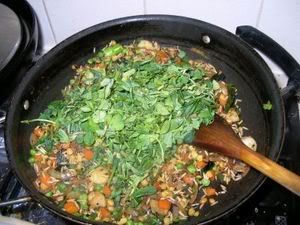
6. Add the turmeric, chilli and sambar powders and mix well again.
7. Now pour in the water, lemon juice and salt to taste and stir well.
8. Pressure-cook for one whistle, then lower the heat and let it simmer for 5 minutes. Turn up the heat again, let the pressure come back up to one whistle, then turn the heat off. Only open the cooker after the pressure has reduced naturally.
9. Stir the mixture, sprinkle with chopped coriander and serve hot with cold, thick Greek yogurt on the side, lemon or mango pickle and poppadums.
It's unbelievable what you can get on Ebay - honestly! I was trawling through Ebay for kicks, decided to see what was online in the way of cookbooks (answer: LOADS! but not many I wanted). Then I tried to narrow it down to country and cuisine and vegetarian... and guess what turned up? Vasantha Moorthy's The Complete Vegetable Cookbook with over 300 ways of cooking vegetables! I have been looking for this cookbook for a while, and I consider myself absolutely lucky to have got it on Ebay for £3 + postage. What a find!
The nice thing is, ALL of the recipes are homely and simple, redolent of everyday home cooking. Nothing fancy, nothing flashy, nothing glossy. There are a few photographs, but I wouldnt call them particularly professional - they didnt make me want to lick the page, for instance. But the recipes DID make me want to try them out, and that's really what makes a cookbook successful, right? (The photos, in fact, looked a bit like mine... well ok, a little better than mine, but not by much. Heheh.)
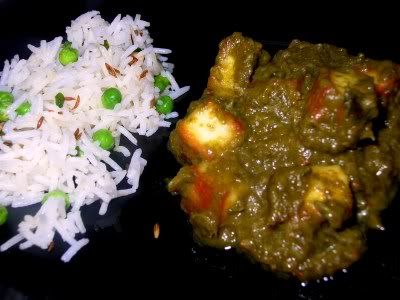
Anyway, this recipe is from her book, minus the deep frying and heavy cream which was called for - I shallow-fried the paneer and used milk instead of cream, and I dont think it affected the taste even a bit (I mean for the worse... heh). The addition of the methi, however, was absolutely inspired, and hats off to Vasantha Moorthy for that!
Recipe for: Methi-palak paneer
Ingredients:
2 cups chopped spinach (palak)
1 cup chopped methi leaves
1 cup paneer cubes
2 tbsp oil + 1 tsp ghee
1/2 tsp turmeric powder
2 tsp plain flour
3/4 cup milk (or cream, if you wish)
Salt to taste
1/2 cup hot milk
Wet masala:
1 small onion - pureed
2 small tomatoes - pureed
1 tbsp ginger-garlic-green chilli paste (use 3-4 green chillies)
Dry masala:
1 tsp coriander powder
1/2 tsp cumin powder
1 tsp chilli powder (or to taste)
1/2 tsp garam masala
Method:
1. Cook palak and methi with a little salt (and 2 tbsp water) till wilted, on low flame. Cool, puree and reserve.
2. Toss the paneer cubes with the flour, shallow-fry in 1 tbsp oil + 1 tbsp ghee till golden. Soak the paneer in the 1/2 cup hot milk to which 1/2 tsp turmeric has been added. Reserve.
3. Heat the remaining 1 tbsp oil, add the pureed onion. Fry on high flame, stirring briskly, till some of the moisture evaporates and the puree starts turning colour.
4. Add the pureed tomatoes and ginger-garlic-chilli paste, fry on high till the sauce becomes thick (about 5 minutes).
5. Now add the powdered masalas and let it simmer for a couple of minutes.
6. Add the pureed spinach-methi mixture and 3/4 cup milk, and let it simmer on low heat for 5 minutes.
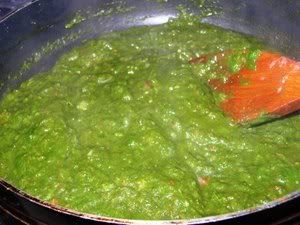
7. Add the paneer cubes along with the milk it was soaked in, plus salt to taste.
8. Simmer on low heat till the sauce thickens to your liking. You can add 1 tbsp cornflour to the sauce (stir very well) if it doesnt thicken enough.
Serve hot with chapaties or over rice.
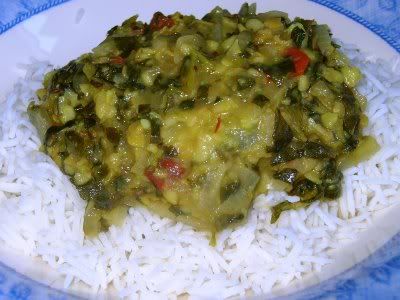
This is a homely, everyday dal that tastes and smells heavenly. All you need to pair with it is some ghee, hot plain rice and a nice spicy pickle like mango avakkai... bliss on a plate! The dal's usually made with tuvar dal, but I had a little bit of the salmon-pink masoor dal left in the jar (I like to thoroughly wash and clean my storage jars before putting in a new pack of whatever food stuff), so I added that to the tuvar dal I was using - thereby getting extra protein in the recipe and extra space in my cupboard!
This is my entry for the ARF/5-a-Day event hosted by Cate.
Recipe for: Methi dal with two dals
1 bunch methi (fenugreek) leaves, washed and chopped (1 cup)
1 cup cooked tuvar/toor dal, mashed
1/4 cup masoor dal, uncooked
2 tomatoes, chopped
1 large onion, chopped fine
1 tsp ginger-garlic paste
1 tsp coriander powder
1 tsp whole cumin seeds
2 tsp oil
3-4 fresh green chillies, minced (to taste)
2-3 dried red chillies (optional)
Salt to taste
3-4 cups water
For tempering and garnish:
1 tsp ghee
1/2 tsp garam masala
1/2 tsp cumin seeds
1 tbsp fresh coriander leaves
Method:
1. Heat the oil in a pan and fry the cumin seeds and dry red chillies for 30 seconds.
2. Then add the ginger garlic paste and green chillies and fry for 1 minute or so.
3. Add the chopped onions and saute, stirring well, until the onions begin to go soft and brown.
4. Put in the chopped tomatoes, fry for 2-3 minutes, then add a cupful of water and cook till the tomato-onion mixture turns into a thick sauce.
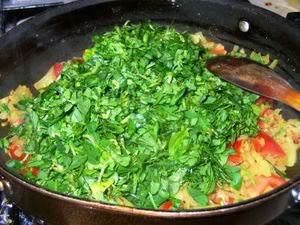
5. Now add the methi leaves and stir.
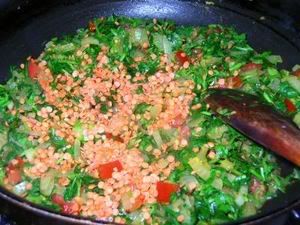
6. Then put in the masoor dal, add another cupful of water and cook covered on medium-low heat till the masoor dal is cooked.
7. Mix the cooked tuvar dal with 1 cup water to make a pourable paste. Add that to the methi along with the coriander powder and salt to taste, and stir well.
8. Let the dal come to a gentle bubbling boil; let it cook on low heat for 7-8 minutes.
9. In a small pan, melt the ghee. Sizzle the garam masala and the cumin seeds for 30 seconds, then pour the tempering on the dal. Sprinkle with coriander leaves and serve hot with rice and pickles.
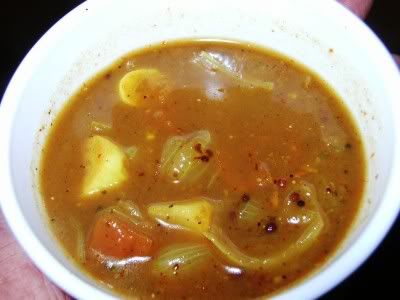
I'm not sure if the recipe I have for kara kuzhambu is authentic, because it's kind of cobbled together from recipes I've seen online - I've omitted some ingredients that I didnt really want included (like coconut, for instance) or didnt have at that point and couldnt be bothered about and cant remember now... so it might not be what a genuine Chettinad-ite makes at home! It does taste pretty damn good with rice, though, especially if you like hot stuff with lots of garlic! Serve it with fluffy steamed rice, crisply roasted potatoes, fried pappadums and cucumber raita, and you can call it a feast fit for a king.
PS. I am submitting this as my entry for The Spice is Right IV - It's Too Darned Hot event hosted by Barbara (of Tigers and Strawberries fame).
Recipe for: Garlic kaara kuzhambu
Ingredients:
For the sambar:
1/4 cup shallots, chopped into thirds (If you dont have shallots, onions are ok to use)
1/4 cup garlic, chopped into chunks
2 cups tomatoes, chopped fine
1 htsp tamarind paste, dissolved in 4 cups water
1 tsp red chilli powder
1/2 tsp turmeric powder
2 tsp mustard seeds
1/4 tsp each of urad dal, fenugreek seeds and cumin seeds
3-4 tbsp oil
1 tbsp fresh chopped coriander leaves for garnishing
4-5 curry leaves (optional)
Salt to taste
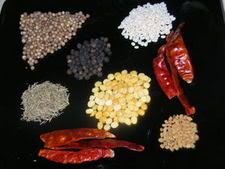
For the dry masala powder:
1 tbsp coriander seeds
1 tsp black peppercorns
1/2 tsp cumin seeds
1/2 tsp channa dal
1/2 tsp urad dal
7-8 dry red chillies
1/4 tsp fenugreek seeds
Dry roast till aromatic, then cool and powder finely. Mix with 4 tbsp water to make a thick paste. Reserve.
Method:
1. Heat the oil in a pan and add the mustard, cumin, urad dal and fenugreek seeds and the curry leaves, if using.
2. Cover the pan and let the seeds pop (about 30 seconds).
3. Add the chopped shallots and garlic and fry for a few minutes till they turn soft.
4. Then put in the chopped tomatoes and cook till the tomatoes are soft and mushy.
5. Mix in the chilli powder and turmeric, then add the tamarind water and stir.
6. Bring the mixture to a boil and let it bubble briskly for about 7 minutes, then add the masala paste and mix.
7. Let the kuzhambu simmer for another 10 minutes, then turn off the heat. Let it rest for about an hour to let the flavours mix, then warm it on a medium-low fire until thoroughly heated. Sprinkle with chopped coriander and serve hot with plain cooked rice.
There must be a zillion chocolate muffin recipes floating around the Internet, so I thought I'd add my version to the general confusion. I wanted to make a "chocolate surprise" muffin, with melted chocolate in the centre... but the only "surprise" was that there was no melted chocolate - it had all been incorporated in the baking. Oh dear.
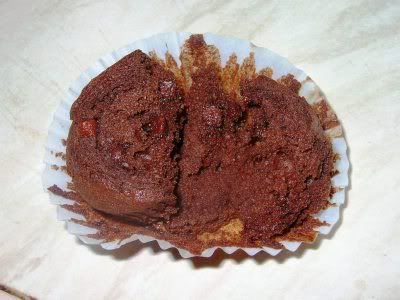
Oh dear, what can the matter be? The chocolate's all disappeared! (sung to the tune of "Oh dear, what can the matter be, Johnny's so long at the fair")
I'd put in 10-12 chocolate chips in the middle - perhaps those werent enough. Perhaps I should have used chocolate chunks instead. I dont know. I'd appreciate any tips from those who DO know!
The muffins were pretty good as plain chocolate muffins go, though - fluffy and very chocolatey. I added a simple vanilla icing, but chocolate icing might have been just as nice - or nicer.
PS. Please excuse the pathetic quality of icing (as seen, not as tasted!) - I'm the most amateur of "icers" (what's the technical term?) and have practically no experience with decorative icing.
Recipe for: Chocolate muffins

Ingredients:
2 eggs
1 cup sugar
1 cup flour
6 tbsp cocoa powder (I used plain ol' Cadbury's, nothing fancy)
1 tbsp instant coffee
2 tsp baking powder
2 tsp vanilla extract
2/3 cup milk
1/2 cup vegetable or sunflower oil (anything that is tasteless and odourless)
1/4 cup butter
Chocolate chips or chunks (optional)
For the icing:
2 cups icing sugar
Cold milk as required (3-4 tbsp)
1 tsp vanilla extract
Mix carefully in a bowl till the sugar is incorporated, then beat for 3 minutes by hand, until smooth. Reserve.
Method:
1. Pre-heat oven to 180C. Line a 12-cup muffin pan with paper muffin bake cups.
2. In a large bowl, beat the eggs with the sugar till well blended.
3. Sift in the flour, cocoa powder, instant coffee granules and baking powder. Add the vanilla and milk and mix.
4. Add the oil and melted butter and fold in gently.
5. Fill each muffin cup with about 2 tbsp batter (till about a third full), then place a few chocolate chips (15-20) or chunks in the centre.
6. Top up with more batter until the muffin cups are 3/4 full. Bake at 180C for 25-30 minutes or till done.

7. Allow to cool completely, then spread with the prepared icing.

This is another of Tarla Dalal's recipes that I had printed off at least two years back, when I was a member of her website. I have a bad habit of printing off all sorts of recipes on the off chance that I might actually make them one day. For the same sort of reason, I buy unknown spices, odd ingredients and unfamiliar utensils in the eventuality that some day, for whatever reason, I might need any or all of those. And what would I do if I didnt have the required items? Well, the answer is, of course, that I'd improvise... but I still like my larder/cupboards to be like a mini-supermarket where I can always get what I want!
Moong dal kebabs sounded like a good idea at the time, but I never did get around to making them. But then I thought it would be fun to contribute to Meeta's Monthly Mingle #2: Big on Barbecue event. So I took down my cookbooks from India and sifted through the sheaves of printed recipes that were shoved in between the pages... and finally found the one for moong dal kebabs. The paper was actually a bit brittle and yellowing around the edges - a sign of age or incompetent housekeeping. A bit of both, I guess. :)
The kebabs turned out okay... not anything soectacular. There was no point of reference for comparision, really, as I've never made or had anything like it before. I added some bread crumbs to the dough as otherwise it would have been too wet to form kebab shapes.
Tarla Dalal's instructions were to cut the cooked "kebabs" into pieces after they'd been grilled/barbecued - but my kebabs werent up to that sort of treatment. They stayed fairly soft in the middle and did not take kindly to being messed with. Cooked moong dal has a stronger flavour than other dals (I feel), and to my tastebuds, it overwhelmed the other ingredients. I might try making this again with some other dal that has a little less personality!
Anyway, here it is - my nearly last-minute entry for Meeta's Monthly Mingle #2: Big on Barbecue.
Recipe for: Moong dal kebabs

Ingredients:
1/2 cup moong dal, cooked till soft but not mushy
2 medium potatoes, boiled, cooled and grated
1/2 cup fresh breadcrumbs
1 onion, grated
2 cloves garlic, grated
1/2 tsp grated ginger root
2 tsp chilli powder (or to taste)
2 tsp chaat masala
1 tsp coriander powder
1 tsp cumin powder
1 tsp sesame seeds
1/2 cup coriander leaves, chopped
2 tbsp oil + more for brushing
Salt to taste
Method:
1. In a large bowl, mix together all the ingredients to make a thick mass of dough.
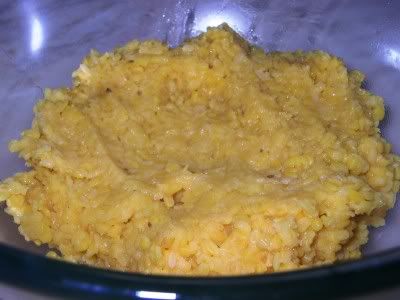
2. Using your hands (oil them first, the dough will be sticky), form 3" long oval or sausage-like shapes with the dough.
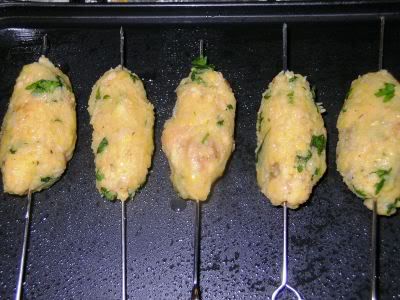
3. Brush oil gently over the kebabs.
4. Run skewers carefully lengthwise through each kebab. Cook under a grill (or over a barbeque) until the kebabs begin to get golden brown spots, turning them so that the kebabs are cooked evenly on all sides.
5. Serve hot, accompanied by tomatoes, salad and a variety of dipping sauces.
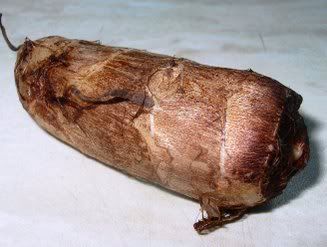
This was a vegetable I hated as a kid - except when it was roasted and/or fried, but of course with the use of generous amounts of oil to crisp it up. One of my aunts made deep-fried taro root that was always a smash-hit with us kids (and adults too). Honestly, she simply couldnt make too much of it... there were always, always takers clamouring for it.
Oddly enough, I dont know much about the kind of person she is, for two reasons - one, we've never had much time together because of always having been in different countries, and two, because she comes across as very reserved and aloof.
What I DO know, however, is that she has incredible patience and is a perfectionist - and this is just going by the way she cooked this vegetable. The basic method is to boil it till it's three-fourths cooked, cut it into rounds, then make a batter of seasoned gram flour, dunk each piece in and deep-fry the pieces till crisp and golden brown. She would take the utmost care to separate each piece without breaking it up, fry only a few pieces at a time so that they were cooked to perfection and finally present a plateful of perfect golden crispy cheppankizhangu that disappeared in about two minutes flat.
I've not deep-fried cheppankizhangu myself, but I know that if I did, I wouldnt take the trouble of separating each and every piece from the others (boiled taro root can get a bit gooey if you're not careful) and ensuring that each piece was covered evenly in the batter, and fried to a perfect golden brown... I KNOW I wouldnt go to that much trouble for perfection. An approximation of perfection is usually enough for me.
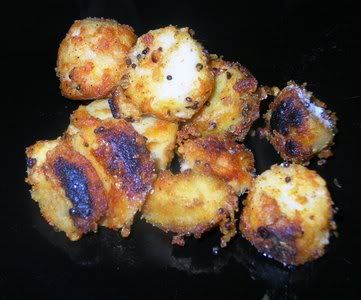
Anyhow, I didnt deep-fry the taro root when I made it yesterday... nor did I make a proper dipping batter. I just mixed up what I term a "dry batter" and used a couple more tbsp oil than normal while pan-roasting the steam-cooked pieces. The results were more than satisfactory, they were pretty darn near perfect!
Recipe for: Chepankizhangu (taro root) fry
Ingredients:
1/2 kg chepankizhangu
1 tsp urad dal
2 tsp brown mustard seeds
5-6 curry leaves, torn in half
3-4 tbsp oil
Salt to taste
1/2 tsp asafoetida powder (optional)
For the "dry batter" (Mix together and set aside till required):
2-3 tbsp gram flour
2 tbsp rice flour
2 tsp red chilli powder (or to taste)
1/2 tsp coriander powder
1/2 tsp cumin powder
1/2 tsp powdered black peppercorns
1/8 tsp fenugreek seeds, powdered
Method:
1. Boil the chepankizhangu in lots of water till cooked but not mushy (if a skewer goes through easily, it's done). Or use a pressure-cooker to do the job quicker, but be very careful not to overcook the vegetable or it will turn to a gooey mush.
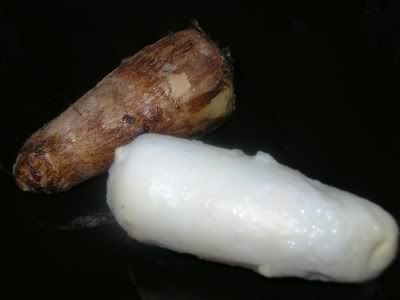
2. Cool, peel and cut into 1/2" thick pieces. Toss with the "dry batter" mix and reserve.

3. In a wide pan, heat 2 tbsp oil. Add the asafoetida if using, the mustard seeds, urad dal and curry leaves. Cover the pan and let the mustard seeds pop.
4. Put in the chepankizhangu pieces and stir carefully to mix, so that the pieces do not break up. Sprinkle salt to taste.
5. Turn the heat up to medium-high and fry the pieces for 3-4 minutes. Pour over the remaining oil, turn over the pieces again and let roast, stirring occasionally, until they begin to turn crisp and golden brown on the outside.
Serve hot with any sambar and plain rice.


