
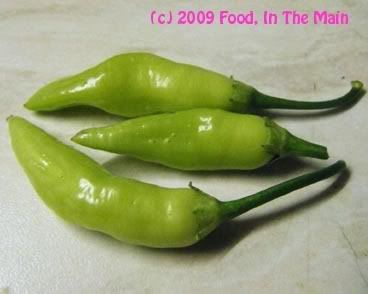
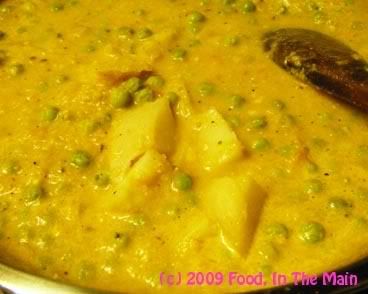
Fresh off (one of) my plants... but I only wish I knew what variety of chilli they are, the sun and rain having bleached the writing on the marker stick I’d used. I used these chillies (and added two more store-bought green chillies) to make alu matar (curried potatoes and peas) a couple of days back, but to my surprise, they didn’t seem to have any effect on the heat content at all.
I found that out only the next day, as I hadn’t bothered with tasting it after I’d made it in the evening (to use up odds and ends of tomatoes and green peas and a couple of boiled potatoes). Pete and his son Andy came back late that night after a deejaying stint at a club, and along with the lemon chicken (sauce sadly from a jar) that I’d made for them, they also demolished a good portion of my alu matar.
Which fact I discovered the next morning, to my great surprise.
Andy doesn’t shy away from chilli-hot food, but put Pete next to a green chilli and he starts sweating just from its proximity. So when he said, on being questioned, that he thought the alu matar was very tasty, I couldn’t believe my ears.
“You ate food with chillies in it?”, I asked. “YOU?”
“Yes, it tasted fantastic,” he said calmly.
“Okay..." I edged away from him warily. "Which planet are you from and when did you take over my husband’s body?”
“Look," he said, shrugging. "I stuck a finger in and tasted it, and when it didn’t burn my tongue off, I decided it was safe to eat."
"It wasn’t hot,” he added.
“It wasn’t HOT? It wasnt HOT?" I repeated, my voice rising to a squeak of outrage. "Right, bad enough that you’ve taken over my husband’s body, but to make five green chillies disappear as well... that’s too much! What have you done with my green chillies? Do you use them to fuel your space-machines?”
“It wasn’t hot,” he said again, absolutely radiating saintly patience. “Really. You try it.”
So I did.
He was right. It wasn't hot.
That was good news and bad news – good news in that apparently Pete hadn’t been possessed by chilli-neutralising aliens from outer space, but bad news (kind of) that my chillies were not hot. I was growing chillies that were *gasp* not hot? I might as well let the slugs and snails have the darned chilli plant – naaaah, just kidding! I wouldn’t let those nasty creatures have a go at my nastiest WEEDS if I could possibly help it, never mind relinquish something grown after so much difficulty, even if it was lacking in the one quality that defines a real chilli!
Anyway, my aim for next summer is to source a Bhut Jolokia chilli plant... and then we’ll see about chillies that aren’t hot. Ha.
For now, in any case, my recipe for alu matar. Yes, I know, it’s a basic recipe and one that can be found on practically everybody’s blog, and yes, I also know that I have another recipe on this very same blog for this preparation... but my point is, that’s another recipe (and those on other blogs are other recipes) - not this one.
And with that final triumphant flourish of logic, here goes...
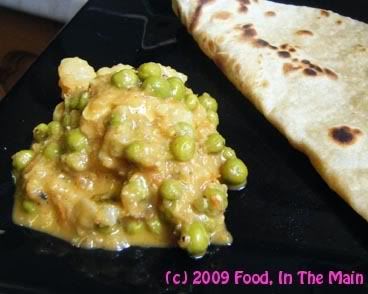
Recipe for: Alu matar (curried peas and potatoes)
Ingredients:
2 medium potatoes, boiled, peeled and cut into 1 cm cubes
2 cups ripe tomatoes chopped (I added a few baby plum tomatoes)
1-1/2 cups fresh garden peas
1 medium onion chopped
8-10 small shallots (I used sambar onions)
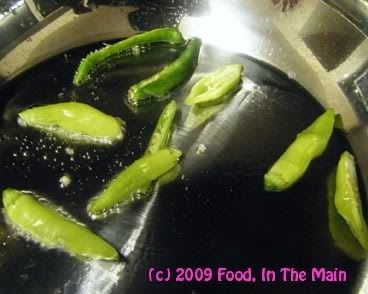
4-5 fresh green chillies (or to taste) halved vertically
7-8 cashew nuts
1 tsp grated ginger root
1/4 cup milk or cream
1/2 tsp coriander powder
1/2 tsp cumin seeds
1 level tsp chana masala (or garam masala)
1 cup water
3 tsp oil
Salt to taste
Chopped coriander leaves for garnish
Method:
1. Heat 2 tsp oil in a pan and fry the green chillies for 30 seconds.
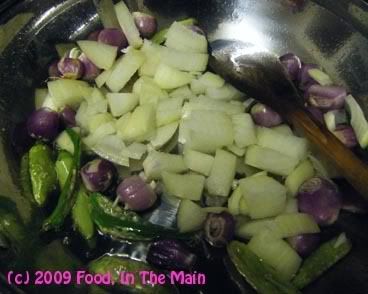
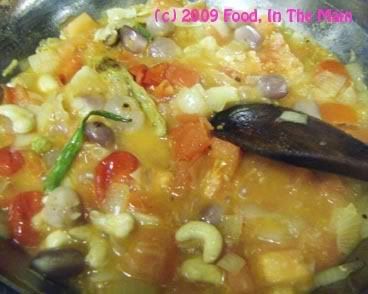
2. Add the onions and the cashew nuts now and stir fry till they begin to soften and turn translucent.
3. Now add the chopped tomatoes and grated ginger,
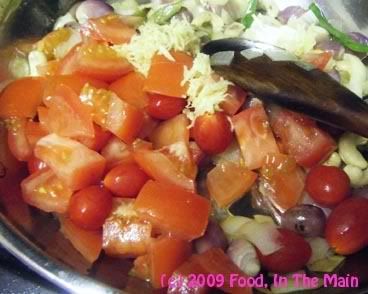
stir and let them cook on med-high heat till the tomatoes begin to soften.
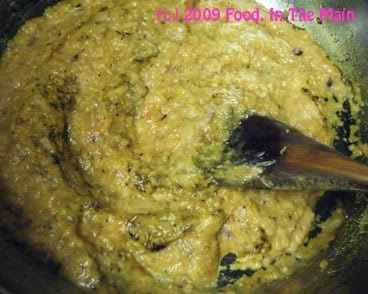
Let cool and grind to a smooth sauce.
4. Now heat the remaining 1 tsp oil and throw in the coriander powder, cumin seeds and garam masala. Stir fry for 10 seconds, then pour in the pureed sauce.
5. Add the green peas
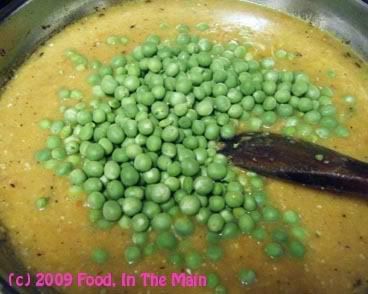
along with 1 cup water and 1/4 cup milk,
bring to a brisk boil, then allow to simmer for 10 minutes, covered, till the peas are cooked to your liking.
6. Add the boiled potatoes and salt to taste, and let the masala reduce to a consistency you like (slightly runny if serving with rice, and thicker if accompanying rotis or parathas).
7. Sprinkle with chopped coriander and serve hot.

13 comments:
Oh.. Wow.. looks spicy and delicious... Amazing clicks.. Thanks for sharing!!
That looks like one creamy and tasty curry...my tummy growls as I gaze upon it :)
I've read that the heat of a chilli is a complex trait to predict. It depends a LOT on growing conditions, such as soil and temperature and moisture. Tough conditions (drought, extreme temps) result in hotter chillies, I've heard.
That curry looks fantastic! sorry to hear your green chillies werent HOT
All looks os good! i have chilli plants myslef at the mo...www.chillisgalore.com will identify and chillis!! Vikki
http://girlinrandomthought.blogspot.com/
The curry is so inviting, shyam!
Here goes the hole in meduvada 101 - for beginners. Experts, please look elsewhere.
Grind the batter very thick - as thick as you can. Use very little, ice cold water for grinding. If the batter looks coarse, it is still fine. Adding onions/green chillies etc will loosen the batter (making it difficult to make holes for beginners), so to start with use slightly cracked peppercorn and salt.
This technique uses only the right hand to make the vada shape with the hole and put it inside the oil. The left hand is free to hold the strainer and remove the vadas from the oil. (Left handed people, change the technique accordingly)
Wet your fingers lightly, slightly cup your fingers (of right hand), take a small ball of the vada batter using your fingers without the thumb - take the batter from the edge of your container, that way you don't need the thumb to help - Now, don't press it flat (ever!), keep it like a ball, insert your thumb (which is still wet) and make a nice big hole in the vada, move this hand over the hot oil and gently straighten your fingers flat - the vada batter with the hole falls down in oil to make nice vadas with beautiful holes.
Again, Dip the fingers of right hand in oil , move the thumb slightly , take batter from the edges, keep it in the shape of a ball, insert thumb and make a hole, take the thumb out, move our hand over the oil, straighten the fingers lightly - the vada shape falls inside with the hole intact.
That helps? If not, I'll make a video sometime soon after I reach India. My sister, the vada expert will oblige my request for taking pictures or video of her vada demonstration.
I still remember that I promised to show you how to roll a leak free stuffed paratta. I'll get to that soon.
Shyam, I meant Dip the fingers of right hand in WATER NOT OIL.
Kay: Thanks so MUCH for the instructions :) will try it out and if I cant make nice holes, I'll wait for your video! :)
Re your follow-up - yep, I guessed as much! Water, not oil. :D
Shyam, you don't have to wait for my video. Apparently my friend learnt her easy vada with hole idea from this video. Read my instructions once and watch this video, all will be clear. :)
http://www.youtube.com/watch?v=DwiDbLfHnjI
thsi looks like an restaurant curry , nice , rich n creamy
Love the write up, Shyam.... The curry looks mouth wateringly awesome!!!
thats a nice one tho..but i tried it without grinding to sauce...tasted so good...thanks for the recipe
Hi Shyam! Looks like banana peppers to me -- you grew those?!! Good on you!!! Curry looks YUM :)
Post a Comment