Wednesday, June 29, 2005
Paruppu vada (lentil patties)
These vadas can be jazzed up with chopped onions or white cabbage, in which case they're called masala vadas, and you can get them at practically every roadside food stall in Chennai. I prefer them un-jazzed up, and that's how I made them today.
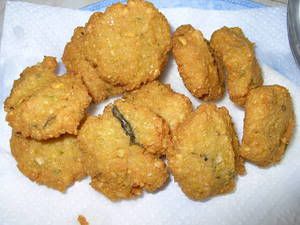
I havent made these very often, and this time I remembered a tip that my mother had imparted to me at some point in the past - which was to add a tablespoon of hot oil to the batter just before making the vadas. She said it would make the vadas crisp on the outside and soft on the inside... and by god, it worked.
Recipe for: Paruppu Vada
Ingredients:
1 cup chana dal
1/2 cup tuvar dal
1/2 cup urad dal
1/4 tsp asafoetida powder (optional)
4-5 green chillies (or to taste)
Salt to taste
4-5 fresh curry leaves, torn into small pieces
Sunflower or vegetable oil for deep-frying
Method:
1. Soak the three dals together for a couple of hours, until they soften. Grind them with the green chillies to a thick but fairly coarse paste, using as little water as possible.
2. Transfer the paste/batter to a bowl and add the curry leaves, salt and asafoetida. Mix well.
3. Heat the oil in a deep wok or kadai. (You can also use a deep-fat fryer.) When it is hot enough that a drop of water sizzles at once, use a ladle to pour about a tablespoonful of the hot oil onto the batter. Mix well again.
4. Take a ping-pong ball sized amount of batter in your fingers and flatten it slightly with your thumb. Carefully put it into the hot oil. Repeat this until you have as many vadas as can fit comfortably in the wok/kadai.
5. Fry, turning the vadas over occasionally, until they are a golden brown all over. Drain on paper towels and serve hot with ketchup.
Saturday, June 25, 2005
Tagged again - what fun!
What's your first memory of baking/cooking on your own?
Hmmm... this would have to be when I was probably about 12, in a little village called Songea, in the heart of Tanzania. My dad's neighbour (whom I knew only as "Ranawat uncle") was a fantastic cook - I had my first taste of pizza thanks to him. His pizza inspired me to make my own... only I overbaked it and everything dried out. The peas (yes, I put peas on it!) were like bullets. I was so ashamed of it that I threw a tantrum when my mom drew Ranawat uncle's attention to my sad pizza - I didnt want anybody to see it! But the adults were all very nice about the whole thing and nobody laughed at me. *phew*
Who had the most influence on your cooking?
I guess that would have to be my mom, but my aunts (and some of my cousins) are very good cooks too - I associate certain well-loved dishes with each of them. But for pure South Indian-style dishes, it has to be my mother.
Do you have an old photo as "evidence" of an early exposure to the culinary world?
Unfortunately not... we werent big on photo-taking, as a family, I guess.
Mageiricophobia - do you suffer from any cooking phobia, a dish that makes your palms sweat?
Man yes... anything to do with pastries (pie crusts, tarts, etc).
What are your most valued or used kitchen gadgets and/or what was the biggest letdown?
My most valued would have to be my Sumeet mixer from India - there's nothing as heavy-duty in the western world, as far as I know.
Biggest let-down... well, that would have to be a food-processor bought when I first came here... total waste of time, that thing. It wouldnt grind a darned thing the way I wanted it - not even soaked urad dal for idli batter. Which is why I had to import my beloved Sumeet in the first place. Three cheers for it!
Biggest disappointment?
Hmmm... when I tried to make khandvi (fairly recent episode this). It was a TOTAL disaster! The batter wouldnt spread at all - it just lumped up and made a horrendous mess. I've decided that khandvi is best bought from the Indian sweetshop that I visit every time I go to Birmingham...
Name some funny or weird food combinations/dishes you really like - and probably no one else does.
I'm partial to sambar mixed with Greek yogurt - I eat it from a bowl, sprinkled with spicy, crunchy "Bombay mix" or chivda.
What are the three edibles or dishes you simply don't want to live without?
Back to basics here - rice, dal, chillies.
Your favorite ice-cream
Hand-made vanilla icecream, with real vanilla beans.
You will definitely never eat...
Seafood, meat, most things garnished with coconut (including cakes)
Your own signature dish...
Hmm... I think in India it was vegetable pulao. Now, for my husband and his friends, it's onion bhajis and lamb rogan josh. I only have their word for it that the rogan josh I make is wonderful, because I'm never going to taste it myself.
What is your most memorable meal?
My most memorable meal... hm, after a few days on the move in New Zealand, eating bland sandwiches and McDonalds fries and milkshakes, my friend and I splurged on a meal in an Indian restaurant. We might've downed our weight in yogurt and dal, I think, among other things. That was definitely the most memorable in terms of Indian food. We were so STARVED of all things spicy till then.
My own added question:
Name 3 of your favourite sweets (traditional Indian or otherwise)?
Ahhh... Hot, crisp jelabis (or cold, I'll eat 'em any way!).
Semiya payasam (vermicelli kheer) with lots of cashewnuts and sultanas, hot or cold.
Caramel custard, chilled.
Thanks for tagging me, Nupur :) I think I'll tag Ammani, of ChaiPani
Thursday, June 23, 2005
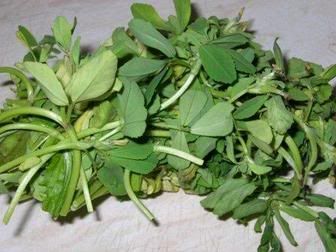
Growing my own methi (fenugreek) leaves
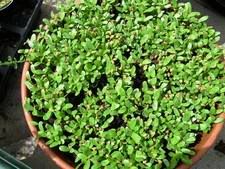
Given this situation, I've thought on and off about trying to grow my own methi greens. Didnt get around to it, however, because I didnt have enough fenugreek seeds to spare. But on my latest trip to Birmingham, I got a bag of seeds for the express purpose of trying to grow them. The idea of germinating them before planting them came from Nupur (food blog: One Hot Stove). Her post Primer on sprouting lentils was a great help!
So I soaked the hard brown fenugreek seeds for a day, then wrapped them up in damp cheesecloth for 4-5 hours - by which time they were sprouting little green shoots. Then I dumped half of them into a pot of virgin compost, and the rest in a small area that I cleared in the back garden. This was on Sunday. And what with the strong sunlight and the torrential rains we had, the sprouts grew an entire inch in just a day!
Here they are, growing very nicely indeed:
Cant wait for them to grow up so I can use my very own fresh, home-grown methi greens!
Wednesday, June 22, 2005
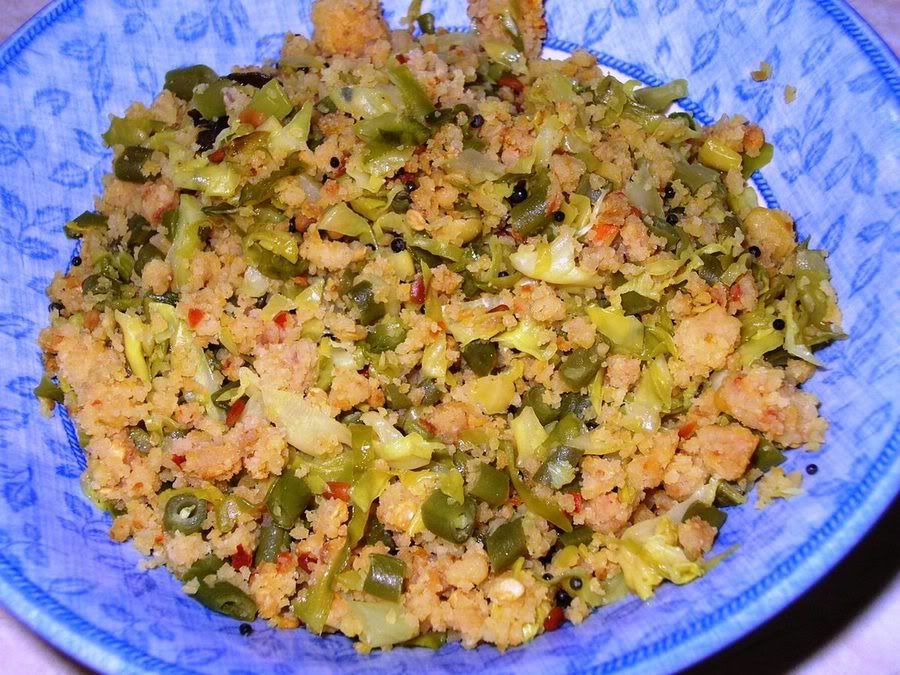
Cabbage and beans paruppu usili
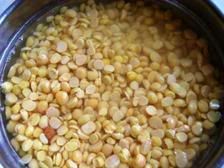
The soaked dals.
When my mother made this, she would ensure that the accompanying gravy dish (to be eaten with steamed rice) did not contain any lentils, to ensure that we didnt have TOO much protein in the diet. Paruppu usili would be a wonderful pairing with Mika's coconut sambar or Ammani's eri kolli, as neither item contains a major proportion of lentils in its recipe.
Usili can be made with green beans, cabbage, even banana flower (vazhaippoo) that I am aware of. I cant think of any other vegetable that would lend itself to such a method of cooking. This is not to say, of course, that there aren't any enterprising cooks who've used other vegetables to make usili, and very possibly with a great deal of success!
I used a combination of green cabbage and green beans because I didnt have enough of either vegetable, but the two together made just the right amount.
Recipe for: Cabbage and beans paruppu usili
Ingredients:
1 cup thuvar dal or chana dal (or a mix of both in any proportion to make up one cup)
3-4 dry red chillies
a pinch of asafoetida powder (optional)
Salt to taste
Green beans (chopped)/green or white cabbage (shredded) - 3 generous cups
For tempering:
2 tsp urad dal
2 tsp black mustard seeds
4-5 curry leaves (optional)
2 tsp oil
Method:
1. Soak the dal(s) in hot water for 2 hours, then grind to a coarse paste along with the dry red chillies and salt. The paste should be thick.
2. Spread the paste on a shallow greased plate (or use idli steamer plates if you have them) and steam for 12 minutes or so. If using a pressure cooker to steam the paste, do not use the weight.
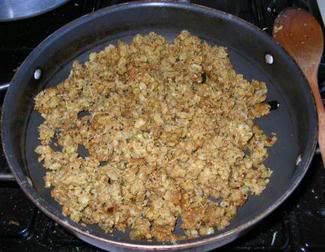
3. Let the steamed usili mix cool down. When it is cool, crumble the mix by hand so that there are no big lumps - it should look like bulgur grains, more or less.
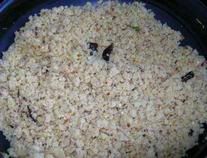
Usili crumbled
4. Meanwhile, cook the cabbage/green beans in the microwave oven in a covered bowl, (usually takes 8-9 minutes) with a little water. (If using green beans AND cabbage, make sure the beans are at the bottom of the bowl - this is because they cook slower than cabbage.)
5. Heat one tsp oil in a wok or kadai, then put in the mustard seeds, urad dal and curry leaves (if using). Cover the wok and let the seeds splutter.
6. Add the crumbled usili and mix well, frying until the usili begins to acquire golden brown spots at the bottom. Turn out into a bowl and set aside.
7. In the same wok, heat the remaining tsp of oil and fry the cooked cabbage/beans for a couple of minutes on high heat, being careful that it doesnt begin to burn. Add salt to this, if required.
8. Finally, add the usili to the cabbage/beans and combine well.
Tadaaaaaa! The end product.
Serve hot.
Sunday, June 19, 2005
Crisp salad with apples
No much nutrition in ice cubes, though, so I decided to make myself a salad. Not one of those gourmet salads with exotic ingredients, but a run-of-the-mill garden salad with the lettuce and red cabbage cold from the fridge, crunchy and crisp. Some shredded carrot, sliced tomatoes, cucumber as well. And since there was a nice red apple in the fruit bowl, I sliced up that too.
Olive oil didnt seem right for this salad, so I used a tablespoon of light salad dressing, added a generous sprinkling of freshly ground pepper, a dash of salt and a good squeeze of lemon juice and mixed it all up.
And that, along with a tall glass of fresh, tart-sweet lemon juice over lots of ice cubes, was my meal. Absolutely gorgeous and exactly what the weather called for.
Recipe for: Crisp salad with apples
Ingredients:
Two generous handfuls of iceberg lettuce, roughly torn up
1/2 cup shredded red cabbage
1/2 cup shredded (or matchstick-cut) carrot
1 red apple (I used Red Delicious), sliced into medium wedges
1/2 cup cucumber, sliced into medium wedges
2 firm tomatoes, sliced into medium wedges
1 tbsp light creamy salad dressing
1/2 tsp fresh ground black pepper
1/4 tsp salt (optional)
1-2 tbsp freshly squeezed lemon or lime juice
Put the salad vegetables into a big bowl. Add the dressing and seasonings and mix well. Serve cold.
Saturday, June 18, 2005
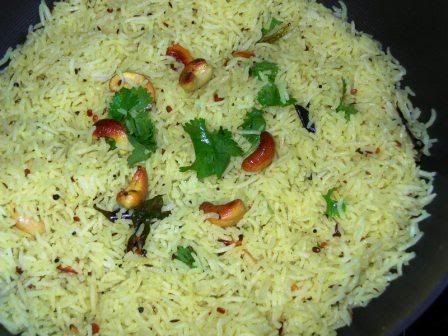
Lemon rice
From left, going clockwise: Cashew nuts, urad dal, chana dal, mustard seeds, cumin seeds. Centre: Turmeric powder
I guess this can be jazzed up with finely cut, cooked vegetables like green peas, green beans, bell peppers, even corn - but what I made today is the basic version. I dont think my mother used to add the cumin seeds in her version, but I like them as they add to the flavour of the rice.
Recipe for: Lemon rice
Ingredients:
4 cups basmati rice cooked al dente
1 tsp turmeric powder
1 tsp urad dal
1 tsp chana dal
1 tsp black mustard seeds
1 tsp cumin seeds
4-5 fresh curry leaves
2-3 green chillies, chopped very fine (more or less acc. to taste)
2-3 dry red chillies (optional)
Juice of one lime/lemon (4-5 tbsp, or as required)
2 tbsp oil
Salt to taste
10-12 cashew nuts, roasted in a little oil to a golden brown
2 tbsp fresh coriander leaves, roughly chopped
Method:
1. Heat the oil in a large wok. Add the curry leaves, the dals, mustard seeds, cumin seeds, the chopped green chillies and the dry red chillies (if using). Fry on high, covered, until the mustard seeds stop popping and the dals have turned reddish brown.
2. Add the turmeric powder and mix. Then put in the rice and salt to taste, and mix well, being careful not to break the grains.
3. Heat the rice thoroughly, then turn off the heat and pour the lemon juice evenly over the top of the rice. Stir again so that the juice is distributed throughout. Taste and add more lemon juice, if required.
4. Serve hot, garnished with the cashewnuts and coriander leaves.
Note: You can use roasted peanuts instead of cashewnuts.
Friday, June 17, 2005
Playing food tag...
1. Total number of cook/food books I own:
Hmmm... perhaps about 15 or so. Some of which are so high-funda that I just look admiringly at the photos. Food porn, I guess :)
2. Last cook/food book(s) I bought:
The Complete Book of Bread and Bread Machines by Christine Ingram and Jennie Shapter
It was on sale, and has the most glorious pictures of breads from all over the world, and recipes as well. Just HAD to buy it!
3. Last cook/food book I read:
Hmm...Nicey & Wifey's Nice Cup of Tea and a Sit Down... funny and interesting. Very English.
4. Five cook books (or one) that mean a lot to me:
I'll stick with one - and it's not a published cookbook - it's the recipes my mother wrote down for me in a little notebook. The basics of South Indian cooking, for me.
5. Which five people would you most like to see fill this out in their blog?
Hmmm once again... Mika, I think, of The Green Jackfruit
Monday, June 13, 2005
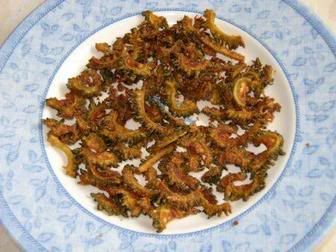
Karela (bittergourd) chips
I DO know that my mom hardly ever made karela at home because we kids simply would not touch it. I have to confess that even now, the only way I can eat it is if it's fried. Some of the bitterness lingers on the palate even then, but it's almost a pleasant sort of bitterness - if that can be imagined. Definitely an acquired taste.
And annoyingly, like most other unpleasant things, bittergourds are excellent for health - it's known for helping to lower blood sugar and high blood pressure, among other things. I guess the vegetable is mostly known in the Far East and India, the Caribbean and possibly parts of Africa. Bittergourds wouldnt carry off the first prize for good looks, either - the outer skin, ridged and knobbly, always reminds me of crocodile skin.
The bitterest part of the vegetable is the seeds inside. So unless the bittergourds are very young and tender, I would always recommend that the middle portion (containing the seeds) should be scraped out. Sprinkling the cut vegetable with salt and leaving it to sit for about an hour helps bring out the watery content, thereby reducing the bitterness some more.
I dont know how much of the goodness is lost in frying the bittergourd, but I figure that eating it fried will still be more beneficial than not eating it at all. Well, it makes sense to me...
Recipe for: Karela (bittergourd) chips
Ingredients:
3-4 bittergourds
2 tsp salt
For the seasoning:
2 tbsp rice flour
2 tbsp gram flour
1 tsp red chilli powder (or more according to taste)
1 tsp coriander powder
1 tsp cumin powder
a pinch of asafoetida powder (optional)
Method:
1. Slice each piece of bittergourd into fairly thin half-moon shape. Transfer them to a colander and sprinkle the salt over. Shake the colander to distribute the salt evenly. Leave to rest for about an hour or so.
2. Squeeze out as much moisture as possible from the bittergourd pieces and dry them on paper towels. Transfer to a Ziploc bag or a big bowl.
3. Mix the seasoning ingredients together and sprinkle over the pieces. Shake the bag or bowl so that the seasoning is distributed evenly over the pieces.
4. Heat the oil in a wok, and fry the bittergourd pieces in batches to a crisp brown.
Serve as an accompaniment with Indian rice dishes, or eat as a snack.
Friday, June 10, 2005
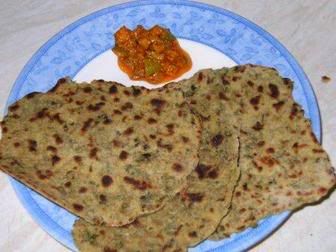
Masala chappathis
The beauty of this recipe is that you can add finely chopped spinach, fenugreek, coriander, mint or other fresh herbs (probably even parsley if you like the taste, though it's not something I've tried) to the flour while making the dough.
Or, if you dont mind having to roll out slightly bumpy dough into approximate circles, you can add finely chopped onions, grated carrots, etc. It's very versatile, this recipe, very nice as a snack with hot, sweet tea (for those who like tea). Just serve with tomato ketchup or even with any Indian pickle. The mango avakkai is perfect for this, IMHO.
Recipe for: Masala Chappathis
Ingredients:
2 cups flour (I used 1 cup wholewheat flour, 3/4 cup soyflour or millet flour, 2 tbsp gram flour, 2 tbsp semolina/rava, 2 tsp rice flour)
1/2 cup fresh chopped methi leaves (or any other herbs/greens you wish)
1/4 cup coriander leaves, chopped
1 tbsp ginger-garlic paste
3-4 fresh green chillies, chopped fine (optional)
1/2 tsp red chilli powder (optional)
1/2 tsp cumin seed powder
1/2 cup plain yoghurt
1 tbsp oil
Salt to taste
Water as required
Extras -
1/2 cup flour for dusting
Oil/ghee for shallow-frying
Method:
1. Put all the ingredients together in a big bowl and make it into a soft dough. It will be sticky. Add water only as required.
2. Let it rest for 10 minutes.
3. Pinch off medium-sized balls and roll out gently into approximate circles, dusting liberally with flour on each side.
4. Cook on a flat tava or fry-pan, spreading a little oil/ghee on either side, until golden spots appear. Keep warm in an oven while cooking the rest of the chappathis.
5. Serve hot with ketchup or any Indian pickles.
Thursday, June 09, 2005
Vazhakkai podimas (plantain/green banana "scrambled")
Me and my siblings all love green bananas/plantains cooked any way that my mother makes it. The only way in which I WILL not eat them is boiled and mildly sauteed and then mixed with fresh grated coconut - my grandmother's speciality... bleagh!!! to put it mildly. Not that I dislike the combination of coconut and bananas... it's just that I prefer the coconut ground to a paste and used to make a gravy for the bananas. Vazhakkai kootu, in other words. But that's not what I made today.
Usually I get the hard plantain variety for making "podimas" - they retain their shape better and dont get over-soft when they are pressure-cooked. Makes for much easier grating, although you do have to be careful that it doesnt get too dry after being grated. In that case it might taste like seasoned wood-chips.
Anyway... I didnt have the nendrankai, so I used vazhakkai this time. I was careful not to pressure-cook them for more than 2 whistles, but they were still quite soft. So I let them cool completely before grating them... however, I couldnt quite avoid bits breaking off in lumps. It wasnt a problem of anything but aesthetics, though. Tastes a lot better than it looks!
The recipe for the masala powder used to season the cooked, grated bananas is my mother's version. I cant better it, so I'm not even going to try. One of my favourite South Indian-style meal combinations (and I'm sure my sister and brother would agree) is mor kuzhambu (buttermilk-based gravy) and vazhakkai podimas with plain white rice. What I'd call a comforting classic.
Recipe for: Vazhakkai podimas
Ingredients:
1 big green plantain or 3-4 unripe green bananas
2 tsp urad dal (white)
2 tsp black mustard seeds
1/2 tsp turmeric powder
3 tbsp sunflower/vegetable oil
2 tbsp coconut oil (optional)
Salt to taste
a few fresh curry leaves
For the masala powder -
2 tsp chana dal
2 tsp urad dal
2 tsp coriander seeds whole
1/2 tsp black peppercorns
4-5 dried red chillies (more or less according to taste)
a pinch of asafoetida powder (optional)
a few fresh curry leaves
Method:
1. Dry-fry the masala powder ingredients till the the dals turn pale brown/red. Cool and grind to a fairly smooth powder in a spice mill.
2. Cut off about a half-inch from each end of the banana(s) and then cut them in half.
3. Pressure-cook them for 2 whistles (or 5 minutes at full pressure). Cool completely.
4. Peel the skin off the banana pieces - it should come off very easily - and grate the bananas.
5. In a wide-bottomed pan, heat the oil. Add the turmeric powder, mustard seeds, urad dal and curry leaves; cover and let the mustard seeds splutter (about 30-45 seconds) on high heat.
6. Turn down the heat and add the grated bananas. Mix well, taking care not to mash the bananas too much.
7. Now add about 3-4 tsp of the masala powder and salt to taste, and stir well so that it's well mixed with the vegetable.
8. Fry on medium heat for a few minutes, then pour the coconut oil (if using) over as much of the mixture as possible. Mix once more.
9. Cook on medium until crisp golden spots start to appear on the bottom layer. Serve hot with sambar/mor kuzhambu and white rice.
Note: You can double the quantities of the masala powder and store it tightly sealed for future use. It works well even with fried potatoes, Indian style.
Wednesday, June 08, 2005
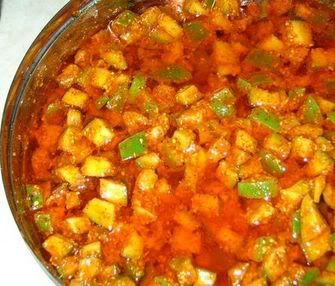
Quick mango avakkai (spicy mango pickle)
Unripe mangoes are difficult to come by in my local Tesco or Asda - well, let's say, those that are deliberately unripe, that is. I've had a couple of mangoes from there which were supposed to be sweet but weren't - but that's another story.
I love pickles - or oorugai - as they are known in Tamil. "Pickle" doesnt quite convey the correct meaning in English, because pickles as they are known in the western world are never chilli-hot... they're usually vinegary. Oorugai arent exactly relish, either, because relish is usually sweet-sour and, again, fairly vinegary. There isn't an exact translation from the Tamil to English. Or, for that matter, from the Hindi achaar either.
Oh well.
Anyway, pickle-making in India can be a long-drawn-out, complicated affair. Especially if you're from Andhra Pradesh, which makes the most wicked ones imaginable. If you know a good Andhra cook who makes authentic avakkai and is willing to share the finished product with you... consider yourself blessed.
Almost any vegetable can be made into pickle, Indian-style, but mango pickle is my personal favourite. I love it any way - grated and cooked into a gooey mess with red chilli powder and various spices (thokku); cut into small pieces with skin on, tossed with chilli powder and salt (molaga mangai) for instant gratification; salted, sun-dried, mixed with a fantastic combination of powdered spices and condiments, Andhra-style (avakkai); shredded and made into a sweet-sour relish that's heavenly with parathas (Chhundoo) North Indian style - I'll eat it all.
But since I dont have the patience nor do I get the strong sunshine necessary for sun-curing pickle, I made up my own recipe for instant "avakkai", a sort of amalgamation of various recipes I've read or been told about. It's beautifully simple, and it only needs an hour or so before it's ready to eat. Actually I didnt bother waiting the hour and it tasted just as yummy anyway.
Recipe for: Quick mango avakkai
Ingredients:
Unripe green mangoes, seed discarded and cut into small pieces - 2 cups
1 tbsp fenugreek seeds
3 tbsp black mustard seeds
2 tsp salt (or to taste)
4 tsp red chilli powder (or to taste)
1-1/4 cups cooking oil
Method:
1. Mix the cut mango pieces with the salt and red chilli powder, and set aside for about 10 minutes. Use a heat-proof bowl for this.
2. Blend the fenugreek seeds and mustard seeds together into a fine powder. Use a spice grinder or coffee grinder for maximum effect. Mix the powder with the mangoes.
3. Heat the oil until a droplet of water flicked into it splutters. Pour the oil over the mango-spice mixture and stir until well-blended.
This pickle is ready to eat at once but it will taste better for sitting a couple of hours to let the spices mellow a little. Stir well everytime, before eating.
This should keep well for about a week without refrigeration, as long as you dont use a wet spoon to stir it.
Tuesday, June 07, 2005
Spinach rice with green cabbage and cheese
Still, spinach isnt such a bad thing. I rather like it. And since there was lots of cooked rice left over from the previous night, the choice was clear about what to make for dinner - spinach rice. With cabbage, since there was half a cabbage in the fridge. It was a Savoy cabbage, but you can use any cabbage really. I prefer the green variety to the white, though. I dont know what would happen if you used red cabbage - speaking colour-wise, I mean.
With green cabbage and green spinach, the rice ends up almost emerald coloured. And it tastes very nice indeed, especially if you use a lot of cheese. This time I used grated paneer to mix with the rice, and medium-strong cheddar to sprinkle over the top, but I've also made it with just cheddar cheese throughout. It tastes just as nice in a slightly different way if you use only cheddar - the texture of the rice becomes stickier because cheddar melts and paneer doesnt.
I suppose this could be classified as some kind of fusion cooking, but I'm not sure what's fused. It's basically Indian, with some cheese added.
Oh, one thing to look out for - big green-toothed smiles after you finish eating!
PS. I took photos of this, but for some unknown reason they didnt register on my camera chip :( Will add a photo the next time I make this recipe again. I'm really bummed out over this because I dont know what I did wrong with the camera - so there's every chance that it will happen again. Bah.
Recipe for: Spinach rice with green cabbage and cheese
Ingredients:
1 cup basmati rice, cooked al dente and cooled
To puree -
3 cups spinach leaves
3 tbsp coriander leaves (optional)
1" piece ginger root
1 clove garlic
For the masala -
1 cup green cabbage (Savoy is ok), shredded
2 onions, sliced into thin strips
1 tsp cinnamon powder
2 whole cloves (or 1/4 tsp cloves powdered)
1 bay leaf
1 tsp coriander powder
1 tsp cumin seeds
4 tbsp lemon juice
1/2 cup grated medium-strong cheese - cheddar or similar (I used 1/4 cup grated paneer and 1/4 cup cheddar)
1/2 cup milk
3 tbsp oil/butter
Salt to taste
Method:
1. Puree the spinach, coriander, ginger and garlic to a smooth paste, using as little water as possible. Reserve.
2. In a flat-bottomed pan, heat the oil. Add the bay leaf, cloves, cinnamon and cumin seeds and fry briefly, then put in the onions and let them cook till they begin to turn brown.
3. Add the shredded cabbage and stir-fry for a minute or two, until the cabbage starts wilting. Then add the spinach puree.
4. Fry this mixture on high heat for a couple of minutes, stirring constantly. Then add half a cup of water and salt to taste, mix again and turn the heat down low. Cover and let cook for 3 minutes.
5. Stir in the coriander powder and take the masala off the heat, then pour in the lemon juice. At this point you can remove the bay leaf and the whole cloves, if you like.
6. Gently mix half the cheese with the rice, taking care not to mush the rice.
7. When the onion-cabbage masala has cooled, mix it with the rice until it's evenly distributed throughout.
8. Put the rice in an oven-proof casserole with a lid. Smooth the top, pour the milk over evenly and then sprinkle the rest of the cheese. You can add more cheese if you like.
9. Bake in a pre-heated 190C oven (375 F) for 20 minutes or so, until the cheese is melted and the rice is heated through. Serve hot with plain salted potato crisps on the side, or crushed and sprinkled on top. Add a dollop of Greek yogurt too, if you like.
Note: You can add green peas, shredded carrots or any other quick-cooking (or pre-cooked) vegetables you like to the onion-cabbage masala.
Monday, June 06, 2005
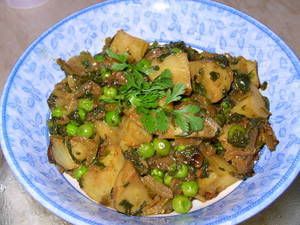
Aloo-matar - aur bahut saare matar (aur saag bhi)
I sing the ad jingle every time I make this dish, weird as that may seem. Just one of those things it is, as Yoda would very likely say. Or possibly, the workings of the mind strange are. And the advertisement industry sometimes very effective is.
Anyhoo, this is a fairly simple dish to make. I used the microwave to cook the potatoes while the onions browned on the hob, so it was really only a question of assembling the ingredients at the end. I like this stuffed in pita bread, eaten with chapatis or naans, even as a sandwich filling - and Pete prefers it over basmati rice. But then he's not much of a fan of chapatis or parathas.
Aloo-matar-saag bhaji
Ingredients:
10-15 baby potatoes, quartered (or 2 medium potatoes cut into 1/2-inch cubes)
2 medium onions, sliced thin
1 bunch saag or palak (spinach), chopped into strips (about 3 cupfuls)
2 cups fresh or frozen green peas, cooked
1 tsp finely chopped fresh green chillies (optional or to taste)
1/2 tsp red chilli powder (optional)
1 tsp coriander powder
1 tsp cumin seeds
1/4 tsp cinnamon powder
1 tsp ginger root, grated
1/2 tsp garam masala or pav bhaji masala (optional)
1-2 green cardamom pods
2 tbsp oil or butter
Salt to taste
1/2 cup hot water
2 generous tbsp fresh coriander leaves, roughly chopped
Method:
1. Cook the potatoes with 1/4 cup water, covered, in the microwave for about 8 minutes. Then rinse in cold water, drain and keep aside.
2. In a karahi or wok, heat the oil or butter. Add the grated ginger, green chillies, cardamom pods and cumin seeds and fry for 15-20 seconds.
3. Add the sliced onions, the red chilli powder (if using), coriander powder and cinnamon and mix well. Cook the onions till they begin to turn brown.
4. Now add the spinach leaves and a tbsp of the coriander leaves. Mix well. Cover the karahi or wok and turn the heat down low. Let the spinach cook for about 5 minutes, till it's wilted.
5. Add a half cup of water along with the potatoes and peas. Mash a few of the potatoes so that it helps make a thickish gravy.
6. Add salt to taste. Mix again, making sure the onions and spinach cover the potatoes evenly.
7. Sprinkle the garam masala or pav bhaji masala powder over, cover the karahi or wok and let it simmer for 5 minutes or so. Before serving, garnish with the remaining coriander leaves.
Serve hot with rice, chapatis, parathas... or just add a dollop of Greek yoghurt over a serving and eat as a snack.