I was kindly invited by Nandita of Saffron Trail to take part in her first-ever Weekend Breakfast Blogging event last week. Unfortunately, although I wanted to, I couldnt - we went away for the weekend and I couldnt get to a computer, and all of last week has been ridiculously busy at work.
Anyway, sob story aside, I'm happy to say that this week I AM participating! I didnt have regular vermicelli, which is slightly thicker than the angel-hair version I used. As far as I'm concerned, neither has any merit over the other when it comes to taste, but I'd say regular semiya would be a lot easier to handle. The angel-hair vermicelli nearly did my head in by being so light and - dont laugh - sharp when I tried to break it up into smaller pieces. It was really annoying to be hurt by something that looks so delicate!
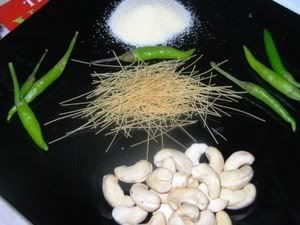
Still, I managed (I know, I deserve an award for bravery, and I'm already working on my acceptance speech). And here it is, my entry for Weekend Breakfast Blogging #2.
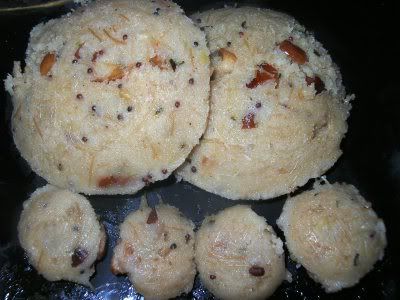
Recipe for: Semiya-rava idlis
Ingredients:
3/4 cup rava (cream of wheat)
2 cups vermicelli or angel-hair pasta, broken into small pieces
4 tsp oil
2-3 cups slightly sour yogurt or curds (not sour is also ok)
5-6 green chillies, sliced into thin circles
2 tsp mustard seeds
1 tsp urad dal
1/2 tsp cumin seeds, lightly crushed
3 tbsp cashewnuts, broken into pieces
10 curry leaves, torn in halves or quarters
1/2 tsp asafoetida powder
Salt to taste
Method:
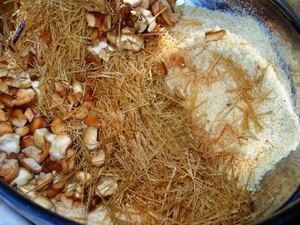
1. Heat 1 tsp oil and fry the rava, stirring all the time till it turns light brown and smells nicely roasted. This should take 4-5 minutes on medium heat. Remove to a big bowl once it's done.
2. Heat another tsp oil and fry the vermicelli till golden brown. Add that to the roasted rava.
3. Heat 2 tsp oil and fry the cashewnuts till they turn a nice reddish-brown. Set aside with the vermicelli and rava.
4. In the oil that's remaining in the pan, pop the mustard seeds. Then add the sliced green chillies, curry leaves, cumin seeds, urad dal and asafoetida powder and stir till the dal begins to turn golden brown. Remove from the heat and set aside.
5. Add the yogurt/curds to the rava-semiya and mix into a thick batter. It should not be too stiff, but it shouldnt be runny either.
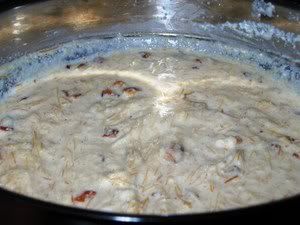
6. Mix in salt to taste and set the batter aside for 15 minutes. By this time the batter might have absorbed some of the liquid and become really thick. Thin it out if required with some water or beaten curds.
7. Mix in the seasoning.
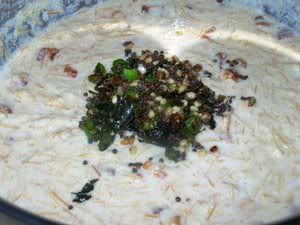
8. Pour into greased idli plates and steam exactly like idlis for about 10-12 minutes.
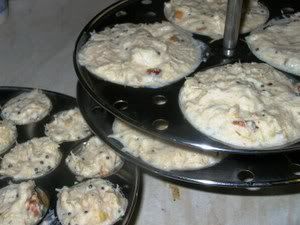
9. Serve hot with coconut chutney.


8 comments:
Shammi, you beat me to it. I had my draft ready for about these semia idlis. I'll post it some other time. Yours looks delicious. Your mini-idlis look so cute
Oh go on, dont let me stop you, Krithika :)
Shammi, same here. I had the pics and recipe ready. Anyway... I will post them (i was not planning to send it to the event though)
Shilpa, really? :) Cant believe we all had the same recipe in mind! Did someone say great minds things alike? ;)
LOL (after reading the likemindedness of great people ) :D
I quite like this, I've only tried Rava idli using the MTR pack and it come sout wonderful each time. But I'd love to try out how it turns out with all-home ingredients'
Thanks for the entry Shammi and cya at the round up!
Shammi,
Back in India, I always made Rava Idlis/Rava Semolina Idlis in the microwave oven. Somehow I found that they cooked better in it. Since I don't have my MW Idli stand here in Germany, I haven't made Rava Idlis at all. Silly? Yes, I can be that at times. :) I'll try steaming them by following your recipe now. Thanks.
Btw, here's your 'Paramvir Chakra' for being a brave girl while fighting the angel-hair pasta. (On second thoughts, shall we start calling it 'Devil's tail' pasta?) :)
Vaishali: hahahaha... Devil's tail pasta is probably the better phrase! :D
PS - got recipe for cooking rava idlis in a microwave? Please tell!
Made this for dinner yesterday and it turned out good. Easy to make and tasty...what more could you ask for???
http://luvgoodfood.blogspot.com/
Post a Comment