Tuesday, October 27, 2009

Chunky apple and orange cake

Photobucket

They say you can’t compare apples and oranges. I guess I can see why. Apples are hard and have thin skins you can usually eat; oranges and soft and you can’t eat the skin (at least not raw). Apples can be red or green or pink, whereas oranges are usually... well, orange. Apples are famously cooked in pies, and as far as I’m aware, I’ve never come across orange pie. (I might be merely ignorant, of course.)

The good thing here is that they – whoever they are – have never said that apples and oranges can’t be used in a recipe together... and I got proof of this from Google, which came up (only eventually) with a recipe for a cake that seemed easy AND doable AND tasty AND good-looking… AND, as it turned out, a blogger’s mum’s recipe. Evidently other people before me have discovered that apples and oranges go rather nicely – in fact quite deliciously - together in some things, like cake.

Boy, was it good. I reduced the quantity of the ingredients and replaced half the sugar with Splenda, and then halved the quantity of the remaining sugar so that I only used 1/4 cup in all.

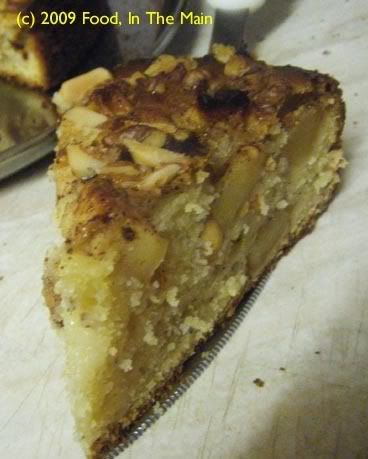
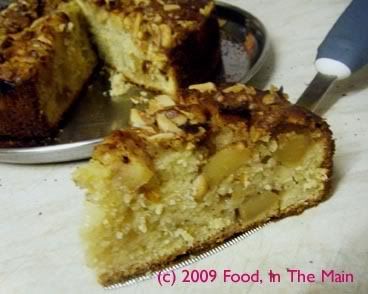
Usually baking with just Splenda makes the cake a bit heavier in texture than otherwise – at least that’s been my experience so far. But this cake, although it seemed a tad sticky/moist at first, sort of fluffed itself out when it cooled, so that the cake part was nice and light and spongy. The apple chunks in it kept the cake moist for three days, and it smelt and tasted just as good as fresh, when it was warmed up in the microwave before serving.

It really was a delicious cake and I managed to use up three apples and four small oranges – which had been my intention in the first place.

Recipe for:
Chunky apple and orange cake

Photobucket

Ingredients:

3 medium apples
1 tsp cinnamon
2-1/2 tbsp unrefined demerara sugar
2 tsp orange zest

1-3/4 cups flour, sifted
1/2 tablespoon baking powder
1/2 teaspoon salt
1/2 cup vegetable oil
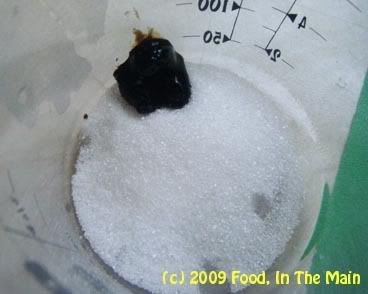
1/4 cup sugar
1/2 cup Splenda
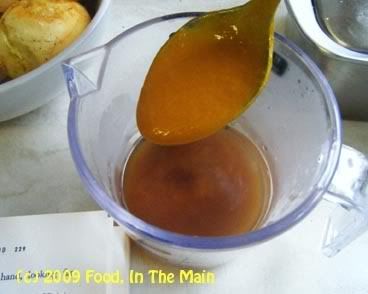
1/2 cup orange juice (from four small oranges)
1-1/2 teaspoons vanilla
2 large eggs
3 tbsp chopped mixed nuts (I used walnuts and almonds)

Method:

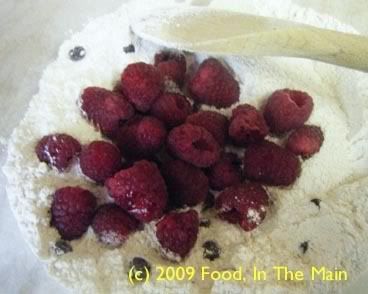
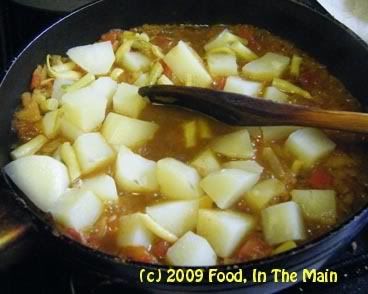
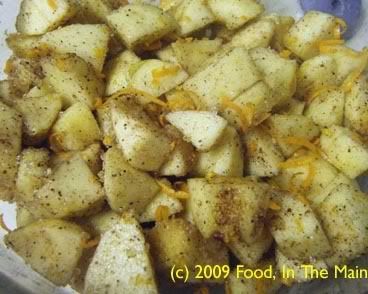
1. Preheat oven to 350F/180C. Grease a round loose-bottomed (or springform) 7" pan. Peel, core and chop apples into chunks. Toss with cinnamon, sugar and orange zest. Set aside for 10 minutes.

Photobucket

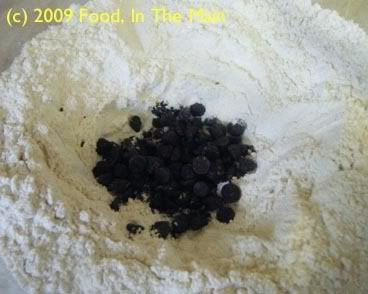
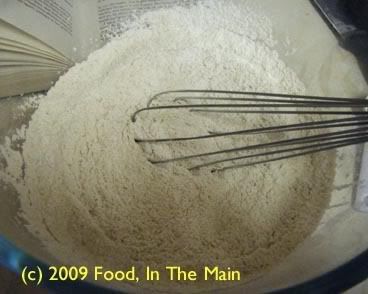
2. Stir together flour, baking powder and salt in a large mixing bowl.

Photobucket

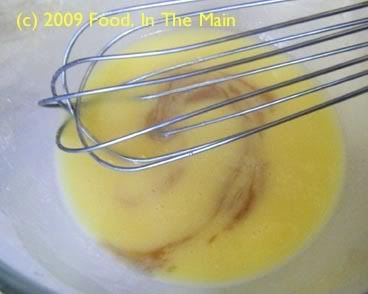
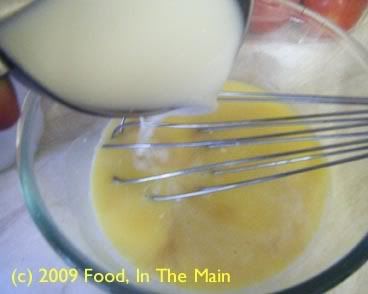
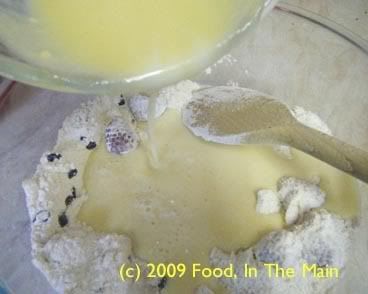
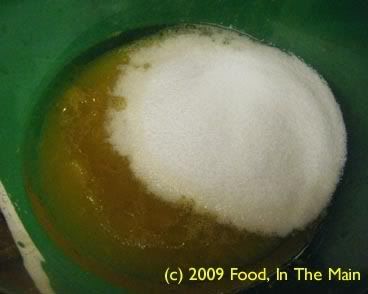
3. In a separate bowl, whisk together oil, orange juice, sugar and vanilla.

Photobucket

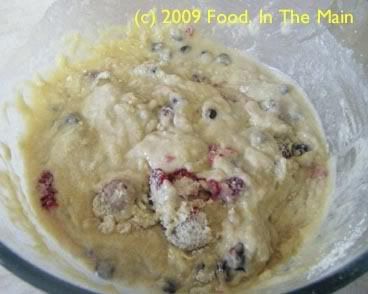
4. Mix wet ingredients into the dry ones,

Photobucket

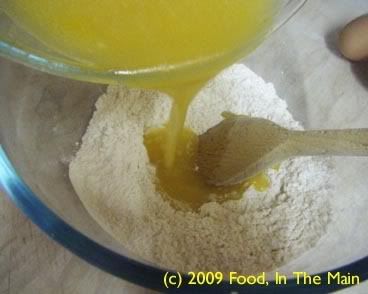
then add eggs, one at a time.

Photobucket

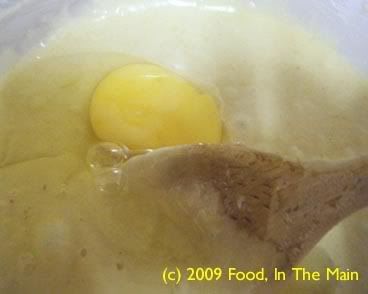
Scrape down the bowl to ensure all ingredients are incorporated.

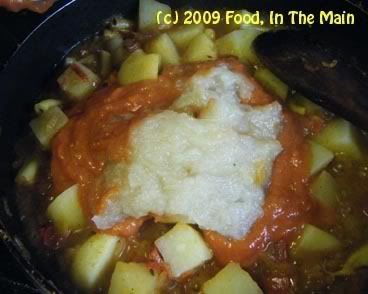
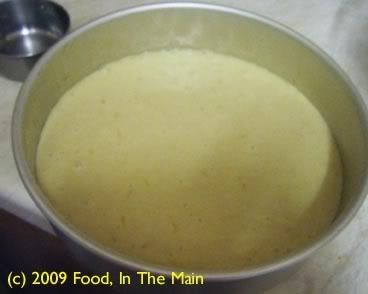
5. Pour half of batter into prepared pan.

Photobucket

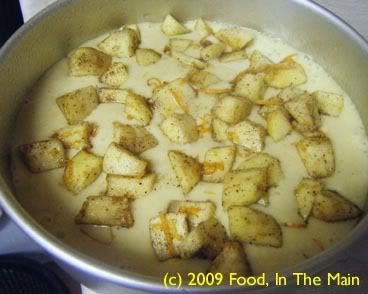
6. Spread half of apples over it.

Photobucket

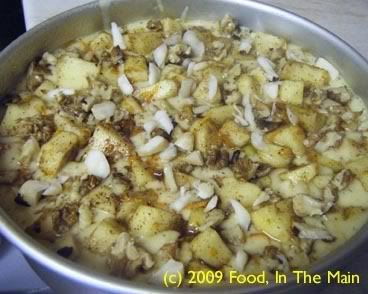
7. Pour the remaining batter over the apples and arrange the remaining apples on top. Sprinkle the nuts around the apple chunks.

Photobucket

8. Bake for about an hour (check after 45 minutes), or until a tester comes out clean and the cake has pulled away slightly from the pan.

Photobucket

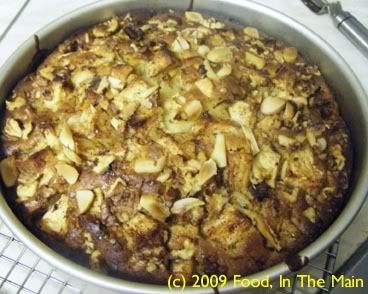
9. Cool the cake in the pan for 10 minutes, then turn out onto a wire rack.
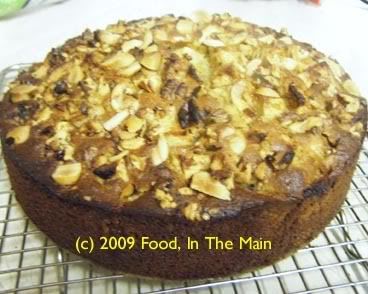
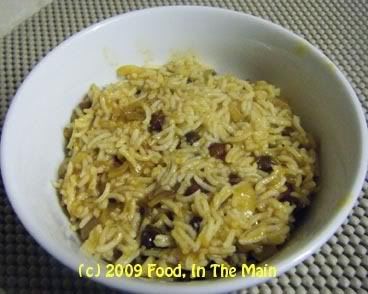
Photobucket

Serve warm.

Thursday, October 22, 2009

Black beans and rice, South Indian style

I may have said this before, but I don’t think there exists a bean that I would not like. I’d never tasted black beans before, so when I saw a small bag of black beans in my local supermarket, I couldn’t resist buying it. I fully intended to make “black beans and rice”, a dish I’d come across enough times that the two main ingredients – black beans and rice (duh) – had paired almost inseparably in my mind, like other famous duos. Torville and Dean. Fred and Ginger. Savitri and Satyavan. Tom and Jerry. Peaches and cream. Black beans and rice. (You must have got the idea by now - but feel free to add other famous duos to the list if you think they pair up better.)

Anyway, by the time I’d soaked the beans overnight and cooked them in the pressure cooker, inexplicably I didn’t feel like making the classic Caribbean-style black beans and rice. Pete was away and there was only me for dinner, and I felt very much in the mood for comfort food. And that to me is Indian food. Actually, getting more precise, South Indian food. But because that phrase “black beans and rice” was still jingling about in my head, refusing to be split apart, I decided to make a lateral move and South Indianise the black-beans-and-rice, keeping the pairing but changing it to my taste. Hey, Torville and Dean giving a Bharatanatyam performance on ice are still Torville and Dean, right?

Actually, I’d rather nobody answered that question. Just make the black-beans-and-rice South-Indian-style and we’ll say no more about any of it, okay?

Recipe for:
Black beans and rice, South Indian style

Photobucket

Ingredients

1 cup black beans, soaked overnight
1 tsp tamarind paste
1/2 cup tiny pearl onions (or use regular onions chopped fine)
2 green chillies, slit vertically halfway (optional)
1 tsp sambar powder
1/2 tsp Kitchen King masala powder (or use garam masala)
1/2 tsp fenugreek seeds
1 tsp coriander powder
2 tsp oil
1 tsp mustard seeds
½ tsp turmeric powder
¼ tsp asafetida powder
1 tbsp rice flour
Salt to taste
Water as required

Method:

1. Pressure-cook the soaked black beans with 1.5 cups water till soft. Reserve along with the cooking liquid.

2. In a pan, heat the oil and add the fenugreek seeds, mustard seeds, asafetida powder, coriander powder and turmeric.

3. Cover the pan and let the seeds pop (about 30 seconds), then add the slit green chillies and the onions.

4. Mix well and let the onions cook for 3 minutes, then add the cooked black beans, the sambar powder and the Kitchen King/garam masala powder.

5. Dissolve the tamarind paste and rice flour in 1.5 cups water and add this to the pan. Let the mixture come to a boil, then turn down the heat and let it simmer for 15 minutes.

Photobucket

6. Add salt to taste. The gravy should not be runny, but should be fairly thick. If it’s runny, let it boil for a few minutes longer; if too thick, thin with a little water. Serve hot over cooked white rice.

Monday, October 19, 2009

Raspberry chocolate muffins

This is a recipe from one of the most flamboyant chefs I've watched on TV - Ainsley Harriot. He called it "Rippled raspberry and chocolate muffins" but I've no idea why "rippled" came into the description, because the muffins didn't look rippled - not when they went into the oven, and not when they came out of the oven. They tasted great, though.

Another thing I've never understood is why raspberries are always paired with white chocolate. Why not dark chocolate? White chocolate isn't even proper chocolate, as I understand it, and I've never liked its sickly look or taste. I substituted dark chocolate drops for the white stuff in this recipe and liked them very much better.

Recipe for:
Raspberry chocolate muffins

Photobucket

2-3/4 cups all-purpose flour
2 tsp baking powder
2/3 cup sugar
1 egg
1 tsp vanilla extract
1 cup milk
4 tablespoons butter, melted
1/2 cup fresh raspberries
1/4 cup dark choc chips

Method:

1. Pre-heat the oven to 400°F. Line a muffin pan (I used a mini muffin pan) with paper cases.

2. Put the flour and baking powder into a large bowl and whisk in the sugar.

3. Crack the egg into a separate bowl and whisk in the vanilla extract and melted butter.

Photobucket

Then add the milk and whisk again.

Photobucket

4. Put the chocolate chips in the flour and stir them in,

Photobucket

then add the raspberries.

Photobucket

Stir the liquid into the dry ingredients with the raspberries and chocolate till just mixed.

Photobucket

Take care not to break up the berries too much.

Photobucket

5. Spoon the mixture into the paper cases and bake for 20 minutes, or so until well risen and a tester comes out clean.

Best served warm with a cup of coffee.

Thursday, October 15, 2009

Black chickpeas in tamarind gravy (kala chana puli kuzhambu)

Here’s a sort of Southie version of kala chana masala, cooked with tomato and onions and tamarind and sambar masala to make a tangy, spicy and really mouth-wateringly aromatic puli kuzhambu.

Yep, that’s it. No more story to this than the preceding.

And you thought I couldn’t be brief and pointful… (as opposed to pointless)


Recipe for: Kala chana puli kuzhambu

Photobucket

Ingredients:

1 can black chickpeas (kala chana)
1 large tomato
1 large onion
2 green chillies
pinch of asafoetida powder
1/2 tsp turmeric powder
1 tsp coriander powder
1/4 tsp roasted fenugreek powder
1 heaped tsp sambar powder
1/2 tsp red chilli powder (or to taste)
1-1/2 tsp tamarind paste
2 tsp oil
1 tbsp rice flour
2 cups water (more if reqd)
Salt to taste

1. Slice the onion, chop the tomato and vertically slit the green chillies.


Photobucket

2. Dissolve the tamarind paste in 1/2 cup hot water, add the rice flour and whisk it in so that there are no lumps. Reserve.


Photobucket

3. Heat the oil in a pan, add the coriander powder, the asafoetida powder, the turmeric powder and the green chillies, and fry these for 30 seconds.


Photobucket

4. Add the sliced onions and stir-fry till they begin to soften.


Photobucket

5. Add the chopped tomato now and cook it till it begins to turn mushy.


Photobucket

6. Next add the roasted fenugreek powder, the red chilli powder and the sambar powder and stir it all in. Fry this for 2 minutes.


Photobucket

7. Then add the drained black chickpeas to the pan

Photobucket
and stir for 2-3 minutes till they are coated well with the masala.

Photobucket

8. Pour in the tamarind water now, add another 1-1/2 cups water and salt to taste. Bring it to a bubbling boil, then reduce the heat to medium-low and simmer the kuzhambu for 10 minutes or till it comes "together" and is no longer watery. That is, it should be fairly thick.

Photobucket
Let the kuzhambu "rest" covered for 10 minutes, then serve it hot over cooked rice.

Wednesday, October 14, 2009

Tomato shallot coconut chutney

I think the previous post exhausted any reserves I might have had of creative writing (my euphemism for "blagging"), so all I have to say about this recipe is that it’s a variation of tomato chutney - or of coconut chutney, or onion chutney... I leave it to you, dear readers, to decide. I personally don’t bother overmuch about the nomenclature of anything edible, so long as it tastes good.

Recipe for:
Tomato shallot coconut chutney

Photobucket


Ingredients:

3-4 shallots
1 tomato
3-4 green chillies (or as per taste)
3-4 tbsp fresh coconut, grated
3-4 tbsp fresh coriander leaves
1-1/2 tsp oil
1/2 tsp mustard seeds
1 tsp urad dal
a few curry leaves
pinch of asafoetida

Salt to taste

1. Chop the shallots, tomato and green chillies into small pieces.

Photobucket

2. Heat the 1 tsp oil in a small pan and add the chopped tomatoes, shallots and chillies.

Photobucket

3. Fry on medium high heat till the onions become soft and the tomatoes mushy.

Photobucket

4. Let the cooked vegetables cool, then grind to a smooth paste along with the coconut and coriander leaves, using 3-4 tbsp of water. Remove to a serving bowl and mix in salt to taste.


Photobucket

5. Heat the remaining 1/2 tsp oil, add the mustard seeds, asafoetida powder, curry leaves and urad dal, cover and let the seeds pop and the dal turn golden. Pour this tempering over the chutney, stir it in and serve as an accompaniment with dosas, idlis, rotis, etc.

Monday, October 12, 2009

Sweet-sour roasted egg curry

This recipe came about because of something that we had eaten at a restaurant called “Saffron” in Shrewsbury. It’s slightly different from the run-of-the-mill takeaways because it offers different types of fish cooked in a sauce chosen by the customer and spiced as specified. It also had a couple of different vegetarian dishes on offer, one of which I tried because it seemed interesting – potatoes in tamarind sauce.

It was interesting – in fact, it was better than that. It was superb, the sauce a perfect balance of sweet and sour and spicy... but the chilli hit snuck in very quietly behind the tangy explosion on the tongue. The only thing that stopped the dish from being perfect was the amount of oil in it, but once I had spooned out the worst of the stuff, the sauce was delicious. In fact, Pete liked it so much that I declared I would try and replicate it at home.

A few weeks later, I had still not done anything about it (big surprise). But then circumstances butted in and forced my hand. I’ll list the circs because I’m sure y’all would want to know – hey, it’s interesting, allright?

Circ 1 - Nearly a dozen eggs that were very close to their use-by date

Circ 2 – Pete’s son’s friend who was staying over unexpectedly

Circ 3 - A nearly empty tin of Alphonso mango puree

Circ 4 – Some new potatoes... oh all right, potatoes that had been new awhile ago, but were now on the verge of parenthood right there in my potato bin.

Circ 5 – Pete, who had been persistently NOT forgetting to remind me to make “that tamarind thing” for the umptyninth time (and that was just counting that week).

(Told ya the circumstances would be interesting. Or perhaps not. But this post needed content, and one way or the other it's now got a decent amount of text in it.)

Anyway, given all that, what could I do but get down to making that tamarind thing. Which incidentally turned out very nicely, thank you for asking.

PS. I read on somebody's blog that making slits in the boiled eggs would allow the sauce to flavour the interior of the eggs while they were simmering in the sauce. I am here to say that the slits did nothing of the sort. But this didn't detract from the taste, so I didnt worry about the unreceptive eggs one bit.

And if unreceptive eggs should happen to happen to you too, neither should you. Not one bit.

Recipe for:
Sweet-sour roasted egg curry

Photobucket

Ingredients:

8 eggs, hard boiled and peeled
3 tsp oil
1/2 tsp cumin powder
1 tsp coriander powder
1/2 tsp turmeric powder
2 onions - 1 chopped fine, 1 pureed
1 tomato, chopped fine
1/4 cup slow-roasted tomato puree (or just puree one tomato)
2 medium potatoes, peeled and cut into 1cm chunks
3 tbsp mango puree (if this isn't available, use 1 heaped tbsp jaggery or dark brown sugar)
1 tbsp sugar
1 tsp tamarind paste
3/4 cup milk
Water as required
1 tsp garam masala
1 tsp red chilli powder (or to taste)
Salt to taste

1. Heat 2 tsp oil in a large pan and add the 1/2 tsp cumin powder, 1 tsp coriander powder and turmeric powder. Let them sizzle for 20 seconds.
Photobucket

2. Make four deep vertical slits in the hard boiled eggs, being careful not to cut all the way through to the other side.
Photobucket

3. Fry the eggs in the tempered oil over medium heat, turning them over gently from time to time, till they are lightly golden all over and the surface is slightly blistered.
Photobucket
Remove the eggs from the oil and reserve.

4. Add the remaining 1 tsp oil to the pain now and fry the chopped onions for 2-3 minutes.
Photobucket

5. Then add the chopped tomatoes and let them cook till they begin to turn mushy.
Photobucket

6. Meanwhile, in a small jug or glass, put in the tamarind paste and 1 tbsp sugar, add 1/2 cup warm water and whisk to mix.
Photobucket

7. Then add the mango puree (or jaggery/brown sugar) and red chilli powder and whisk again.
Photobucket

8. Pour this into the pan over the tomato-onion mixture,
Photobucket

then add the peeled chopped potatoes
Photobucket

and the pureed tomato and onion.
Photobucket

9. Stir it all in, then pour in the milk, and mix.
Photobucket
Bring the mixture to a boil, then lower the heat and cover the pan and let the contents simmer for 10 minutes, or till the potatoes are nearly done.


Taste the sauce now for the sweet-sour-hot balance. Add some lemon juice if required (or amchur if you have it) if it needs to be a bit more sour.

10. Now add the garam masala and stir it in, then add salt to taste and finally the roasted boiled eggs. Simmer the eggs gently in the masala for 7-10 minutes, turning them over occasionally and being careful not to break them, until the potatoes are completely cooked.
Photobucket
Let the curry rest for 5 minutes, then garnish with chopped coriander and serve with any simple pulao or plain white rice.

Friday, October 09, 2009

Fat-free bulgur salad

Photobucket

There's no real reason to post the photo above (even though I used the chillies in the recipe), just as there was no real reason to take the photo in the first place. My heatless green chillies have been remarked on enough times, and photographed and posted enough times on this blog, that any regular reader would likely recognise them and wait with sinking heart for the inevitable whine about how chillies with no heat aren't worth the time...

But I'm not going to whine this time. Besides, I grew the darn things from scratch - and just the fact that the plant survived and the chillies fruited is remarkable enough in itself to merit a mention without the accompanying whine.

The reason I took the photo is because I thought the two chillies looked really cute. Yes, anthropomorphising food items is probably not, strictly speaking, entirely normal - but sue me, I thought they were cute. Like little green mice with long tails, plotting to raid the pantry in secret.

Thanks for indulging me in my moment of whimsy. Now back to the real world and on with the recipe. It's totally fat-free (aside from the garnish of roasted peanuts, which is entirely optional - so any nit-picking anonymous dissenting commenters please take note, without the garnish, this IS totally fat-free) and makes a nice cold (or warm) vegetarian "salad". For non-vegetarians and fishytarians, serve warm as a side with roasted meat dishes, or as a light lunch mixed with smoked mackerel or tuna chunks (as Pete did).

Recipe for:
Fat-free bulgur salad

Photobucket

Ingredients:

1 cup bulgur wheat
1 large onion
Handful of herbs of choice (I used mint, oregano, chives and basil)
2 green chillies, de-seeded and chopped fine (optional)
1 cup canned sweetcorn, drained
1 medium tomato, chopped
3 tbsp lemon juice
Salt to taste
Fresh ground black pepper to taste
Handful of roasted peanuts (optional, for crunch)


Photobucket
1. Cook the bulgur wheat according to the packet instructions (or boil 1.75 cups water, add the bulgur, stir well, let it boil for 2 minutes, then turn the heat off, cover the pan tightly and let the bulgur sit for 20 minutes undisturbed. Fluff with a fork to separate the grains.)

Photobucket
2. Slice the onion thinly.

Photobucket
3. Toss the sliced onions with the lemon juice and place under a hot grill for 5-7 minutes,
Photobucket
or till the onions start browning slightly and are done to taste. Remove from the oven.

Photobucket
4. Fluff up the cooked bulgur and place in a large bowl.

Photobucket
6. Chop the herbs finely and add to the bowl.

Photobucket
7. Add the chopped tomato and the sweetcorn,


Photobucket
and the grilled onions.


Photobucket
8. Mix with a large fork, add salt to taste. Squeeze a little more lemon juice over, if required. Garnish with roasted peanuts if desired, for crunch, and serve the bulgur as a side dish with fish, or eat by itself as a healthy snack or a light lunch.