skip to main |
skip to sidebar
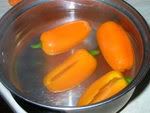
When I saw these lovely, golden-orange baby peppers in the supermarket, I simply could NOT resist buying them! If I could have preserved them in their gorgeous orange colour, I probably wouldnt have used the peppers ever!

As it was, though, I did - I baked them, with two types of stuffing. The cupful or so of leftover rice I had came in useful here.
Neither Pete nor I could settle on what to have for supper, although he wanted onion bhajis which I hadnt made in a long time. Finally we decided to go with a selection of appetizers or light snacks for our supper. The final count was: Baby peppers with two kinds of stuffing, corn fry a la Sury of Lima Beans & Delhi Chaat and onions bhajis. Entirely satisfying and fairly healthy, what with all the vegetables and corn which I consider to have balanced the deep-fried aspect of the bhajis! (Please dont make me lose my grip on fantasy with any down-to-earth comments... please!!) :)
Recipe for: Stuffed baby peppers 1 - Chinese-flavour rice

Ingredients:
5-6 baby peppers
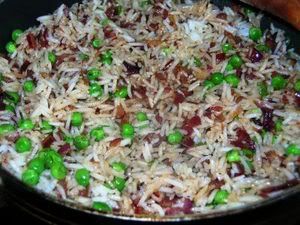
1/2 cup cooked rice, tossed with 2 tsp toasted sesame oil
1 red onion, finely chopped
1/4 cup peas, cooked
1-2 tbsp dark soy sauce
1 tsp hot chilli sauce
1/4 tsp freshly ground black pepper
1/4 tsp chinese 5-spice powder
Pinch of salt
1 tsp oil
1/4 cup fresh breadcrumbs
Olive-oil spray to coat
Method:
1. Heat the oil in a pan, add the chinese five-spice powder and the chopped onions, cooking them on low heat till the onions are soft and tender.
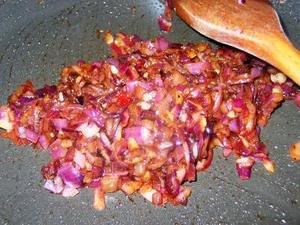
2. Add the cooked peas, rice, soy sauce, chilli sauce, black pepper powder and salt to taste and mix well. Heat through, then allow to cool.
3. While the filling is cooling, prepare the peppers. Make a slit in each pepper vertically on one side, taking care not to cut through to the other side. Remove the seeds carefully but leave the stem still attached. (It'll make it easier to turn the peppers when they're hot from the oven.)

4. Place the peppers in a bowl and pour boiling water over. Let the peppers steep for 5 minutes, then drain and shake the excess water from the peppers.
5. Carefully spoon the filling into each pepper, so as not to split it entirely open. Press a tsp of breadcrumbs firmly over the slit.

6. Spray olive oil to coat the peppers on both sides. Place the peppers slit-side down on a baking tray lined with non-stick paper.
7. Bake at 180C for 10 minutes, then turn the peppers seam-side up so that the breadcrumbs brown nicely (5 minutes or till the peppers are done).
8. Serve warm on a bed of shredded lettuce and matchstick carrots as an appetizer or with a meal as a side.
 It was a long wait, but my postcard from Randi of Culinary Adventures finally got here all the way from Ontario, Canada.
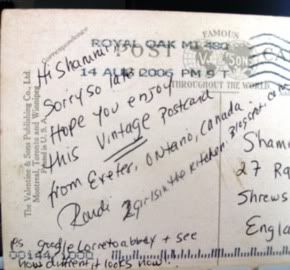
Thanks for the card, Randi (and Robin, the other girl in the kitchen)! And thanks, BPW event! :)
 I know - muffins again! I've been making them in much smaller batches (of 6 large muffins max) so that they last just about 2-3 days - fewer if the kids are around. That means I'm free to try out another muffin recipe quite soon... unlike before, when I'd follow the recipes and make 12-16 muffins. That was simply too many for the two of us (only occasionally four) to reasonably eat without the muffins getting stale and hard, or even before we got tired of eating the same darn muffins every time!
Earlier, when I was a novice at baking anything, I was afraid to change the muffin ingredient quantities for fear of them turning out horrible. Nowadays, I'm not a novice, and I HAVE begun to change the ingredient quantities to cater for just me and Pete. The difference between being a novice and NOT a novice is... I dont care if the muffins turn out horrible! (Luckily most of them dont.)
To be honest, I do have the occasional hiccup - I tried making apricot muffins with canned apricots, and I think the batter got too mushy or something plus I probably didnt bake 'em long enough, I dont know. Anyway, the end result was less than spectacular - when I tried to peel the paper cups away, the muffins went with the paper and refused to hold their shape, ending up as blobby bits. Not what I'd call a big success!
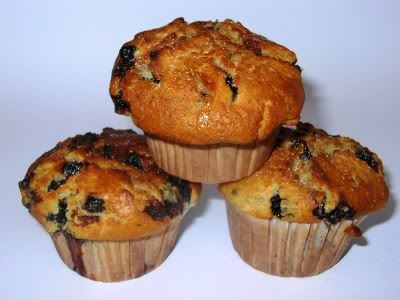
I'm glad to say that these blueberry muffins were not a disaster - anything but! I used frozen blueberries rather than fresh; however, the muffins were wonderfully tasty anyway and oh, the fragrance...! This recipe makes 6 large muffins.
Recipe for: Blueberry lemon muffins

Ingredients:
1 cup flour
1/3 cup sugar
1/2 tsp baking powder
1/4 tsp baking soda
1/4 tsp salt
pinch of ground nutmeg
3 tbsp cold butter
3/4 cup buttermilk
1 tsp vanilla extract
1 large egg
1 tsp grated lemon rind
3/4 cup frozen blueberries
Method:
1. Heat oven to 190C. Line a muffin tray with paper cups.
Sift flour, sugar, baking powder, baking soda, salt and nutmeg in a large bowl.
2. Cut in/rub in the butter until the flour resembles coarse breadcrumbs.
3. Whisk together the egg, buttermilk, vanilla extract and lemon rind until well combined, then add it to the flour mixture. Stir till just moist.
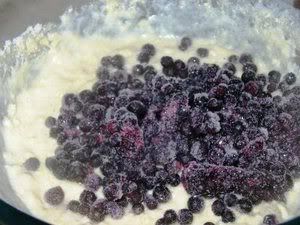
4. Lightly fold in the frozen blueberries, taking care not to break them up.
5. Spoon the batter into the paper cups to the rim.
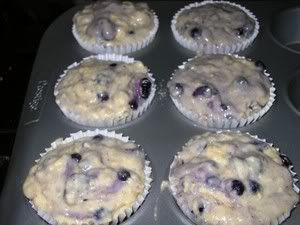
6. Bake for 20 minutes or until a toothpick inserted in a muffin comes out clean.
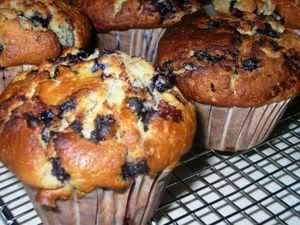
7. Remove the muffins from the tray and serve warm.
I got the recipe for mocha muffins off a vegan site (http://www.theppk.com/) but promptly changed the proportions and some of the ingredients to make it an eggless but not a vegan recipe. (Are you wondering why I bothered to get the recipe from a vegan site if I wasnt going to stick to vegan rules? Well, join the club, because I dont have an answer.)
Anyway, as it turned out, it wasnt so much mocha muffins as seriously coffee muffins with a bit of chocolate. That's because I added too much instant coffee powder... inadvertently deliberately, if you know what I mean. (If you dont, here's what it means: I thought the coffee powder in the original recipe wasnt enough, so I added some more - which sort of turned out to be too much for me.) As if that wasnt enough, instead of chocolate chips in the batter (as specified in the original recipe), I used extra-dark superfine chocolate chunks to make gooey centres in the muffins.
I had one muffin (well, I had to try it, didnt I!) and found it too strong, but Pete and his fellow programmer-coffee addicts LOVED it. So much so that the remaining 11 were gobbled up that same evening. All I can say is, thank GOODNESS they were only mini muffins!
PS. I've reduced the amount of coffee in the recipe below. I cant imagine any but the fiercest of coffee addicts being able to eat the muffins the way I'd made them!
Recipe for: Mini mocha muffins

Ingredients:
3/4 cup plain flour
1/3 cup sugar
3 tbsp cocoa powder
1 htsp instant coffee
1-1/4 tsp baking powder
1/4 teaspoon salt
1/2 cup milk
1/4 cup sunflower oil
1 tbsp yogurt
1 tsp vanilla extract
12 small chunks of dark/milk chocolate
Method:
1. Preheat oven to 180C/375F. Line a 12-cup mini muffin tray with paper cups.
2. In a large bowl, sift together dry ingredients (flour through salt).

3. In a separate bowl, whisk together wet ingredients (milk through yogurt) until emulsified.
4. Pour the batter into the flour mix and combine until dry ingredients are moistened.
5. Fill each muffin cup halfway, put a chocolate chunk in the centre (it shouldnt touch the sides) and spoon in more batter to the top top of the cup.
6. Bake 10-12 minutes, until a toothpick inserted into the side comes out clean. Remove from the pan and let cool.

Serve warm with coffee.
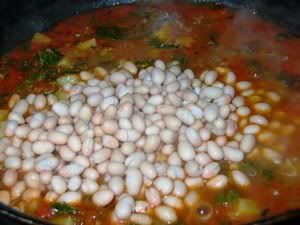
Odd, how haricot beans dont have another name - I mean, since "haricot" is French for "beans", when we say "haricot beans", we're really saying "beans beans". Kinda like the Brits say "naan bread" :) Redundancy, that's what I'm talking about. Tautology, in other words.
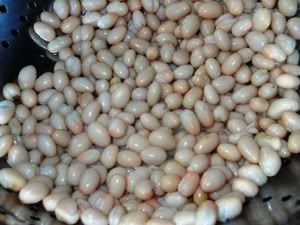
Today I decided to venture into the pantry/store-room to see what there was in the way of canned things. Plenty, as it turned out. A tin of "beans beans" caught my eye because the "best by" date said September 2006. Perfect! Out came a tin of plum tomatoes as well, and I had dinner in hand.
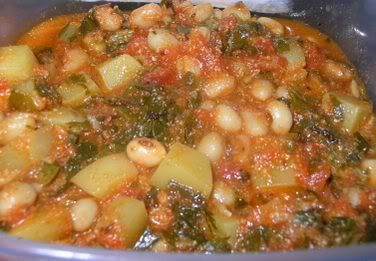
This is a very, very simple curry - it doesnt even use onions and yet the flavour is awesome. It needs only the most basic of spices as well (basic to me, anyway). Serve the curry with chapaties or rice and you have a healthy, balanced meal.
This is my entry for Cate's ARF/5-a-Day event over at Sweetnicks
Recipe for: Haricot beans curry with spinach
Ingredients:
1 can (440gm) tinned haricot beans, rinsed and drained
1 can (440gm) plum tomatoes, crushed
1 medium potato, sliced into small cubes
1 cup spinach (any kind), shredded
1 tsp ginger, grated
1 tsp garlic, grated
1 tsp cumin seeds
1 tsp coriander seeds, powdered
1/2 tsp fenugreek seeds, powdered
1 tsp kasoori methi (dried fenugreek leaves)
1 tsp ghee
1 tsp oil
2 tbsp thick curds/yoghurt
Green chillies to taste, minced
Salt to taste
1 tbsp coriander leaves for garnish
Method:
1. Heat the ghee and oil in a pan. Drop in the cumin seeds, ginger-garlic pastes and green chillies if using. Stir-fry for 30 seconds.
2. Then add the crushed tomatoes and stir in the powdered coriander and fenugreek seeds.
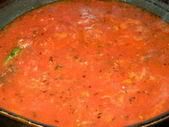
3. Let the tomatoes bubble on high heat for 5 minutes, then add the cubed potatoes.
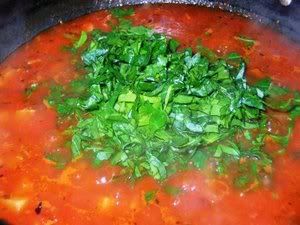
4. Cook on high heat for another 3 minutes, then add the kasoori methi and spinach. Cover and cook on medium low for 10-12 minutes or till the potatoes are soft and cooked.
5. Add the haricot beans now, along with salt to taste, and stir. Let the curry simmer for 5 minutes.
6. Now add the yogurt little by little, stirring constantly so that it doesnt curdle. Leave the curry on low heat for another 2 minutes, then turn off the heat.
7. Sprinkle coriander leaves on the curry and serve hot with chapaties or over rice.
Oranges are some of my favourite fruit - and orange flavoured anything is automatically a favourite with me. I've made a few orange-based cakes, most of them simple, all of them delicious - but I still feel the urge to try out every orange recipe I come across.
Yesterday I got that orange craving again but I didnt want to go to too much trouble - so orange muffins it was. I got the basic recipe here but tweaked it a bit to my own satisfaction. (The recipe called for 1 tsp salt! ONE TSP!!! It also had a recipe for orange glaze, but I didnt bother.)
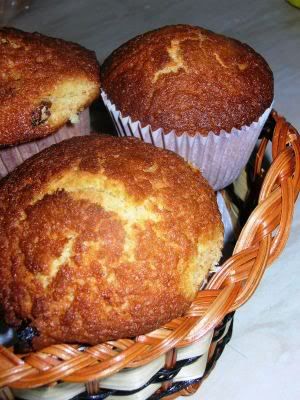
Anyway, the result was quite gorgeously orangey muffins. I got 6 large muffins and one medium muffin out of this recipe. Just right for 4 people - two each for the kids, one for me, one for Pete and the extra muffin for the cook (yes, that was me).
Recipe for: Orange marmalade muffins
Ingredients:
1/4 cup butter, melted and cooled
1/2 cup oil
1 cup sugar
2 eggs
3 tbsp orange marmalade (I used thick-cut)
1-1/2 cups flour
1/4 tsp salt
1 tsp baking soda
1 tsp vanilla
1/2 cup golden sultanas
1/4 cup fresh orange juice
2 tbsp grated orange rind
Glaze (optional)
1/2 cup powdered sugar
1 tablespoon orange juice
Method:
1. Preheat oven to 180C/350F. Line the muffin pan with paper cups - much better than greasing the pan.
2. Combine oil, butter, sugar and eggs and beat well. Beat in the marmalade.
3. Add remaining ingredients and blend. Spoon into the paper cups level with the top of the cup.
4. Bake for 15-20 minutes, or until the muffins are golden brown and test done. (Adjust baking time according to muffin size.)
5. Remove from oven to cool slightly. Serve warm.
If you want to glaze the muffins, mix the ingredients together, then drizzle over warm muffins.
This recipe is from an edition of Food and Wine Magazine - I dont know which one, though. It's pretty much as I found it, except for the addition of a half cup of sweet corn which I added because I LOVE corn!
I'd bought chipotle and a host of other dried chillies from a Mexican grocery shop in Seattle, and they've been waiting quietly for over two months to be used. I've found that I'm all gung-ho to try new recipes - for which, of course, I have to buy the ingredients... something I'm even MORE gung-ho about! Once the elusive, hard-to-get items are bought, though, the gung-ho-ness (new word alert!) sort of dies down a bit. Not because I dont want to make the recipe, but because I know I CAN make it if I want to, so there's no hurry to do it now. (All the hurry is expended on buying the ingredients!)
I'm SURE there must be more people like me... I'd hate to be the only oddball in a blogworld full of efficient cooks!
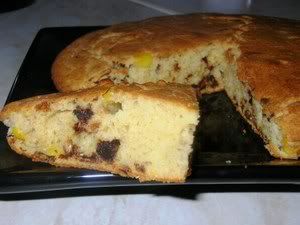
Anyway, I discovered that jalapenos are hotter when fresh and not at all spicy when, in their smoked chipotle avatar (reincarnation), they're reconstituted in hot water. I'll say they lent a lovely smoky flavour to the cornbread, though - something I love (like smoked cheeses -yum!). I am a late starter in the smoked food appreciation category. The first time I tasted anything smoked was at a hangi (traditional Maori feast) in New Zealand, in 2000 - and I loved it! Smoked food is wonderful in small doses, and used sparingly in certain dishes, it adds a extra depth to the taste.
Anyway, again, the cornbread was not at ALL spicy, but it did have a subtle smoky taste to it. It was perfect with chili and would have been nice with soup...but I have to confess I ate most of mine as a snack. Next time I'll probably add more heat to it with fresh jalapenos, but retain the chipotles as well for that smoky taste.
Recipe for: Chipotle cornbread
Ingredients:
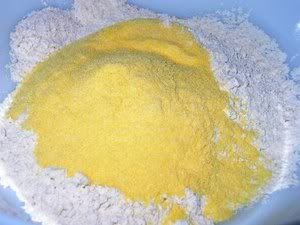
1/2 cup flour
1/2 cup coarse corn meal
1 tbsp sugar
1 tsp baking powder
Salt to taste
1/2 cup buttermilk
1/2 cup milk
1 egg(beaten)
3 tbsp melted butter
1/2 cup sweet corn kernels
3 chipotle chillies (first soaked in a little hot water for 30 minutes, then chopped)
Method:
1. Heat the oven to 220C.
2. In a large bowl, mix together the flour and cornmeal, sugar, baking powder and salt to taste.
3. In another bowl, whisk the buttermilk, milk, egg and melted butter together, then add the sweet corn kernels and chopped chipotle chillies.
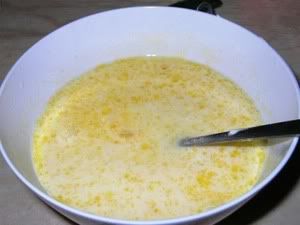
4. Fold the wet ingredients into the flour - mix lightly. Do NOT beat the batter.
5. Place a cast iron fry pan or skillet in the hot oven for 5 minutes, then brush the hot pan with oil and quickly pour in the batter.
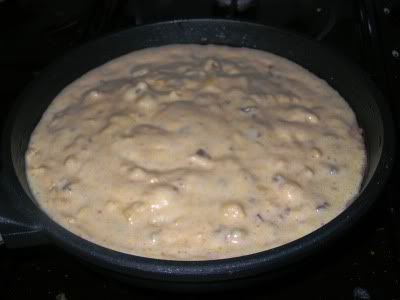
6. Cook for 20 to 25 mins, until the bread is golden on top and tests done.
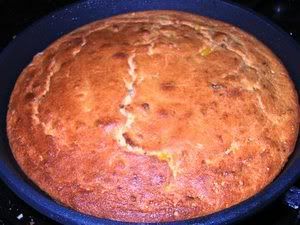
Cut into wedges and serve warm with chili or soup.
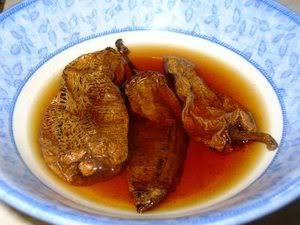
Bittergourd or bitter melon is, as I've said before, an acquired taste. I seem to have acquired it, being older and wiser and aware of this vegetable's medicinal and health properties. (Not to the extent of drinking raw bitter gourd juice, though!)
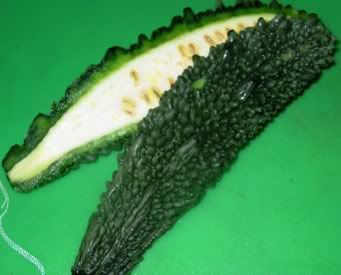
I'd been on the lookout for bittergourd recipes that did not involve deep-frying or otherwise using a lot of oil - which used to be the only way I could eat them - but were also not too bitter. Karela nawabi was a recipe that I found in Vasantha Moorthy's vegetable cookbook - I wasnt sure if I'd like it much, because the preparation was not one I'd come across before. Basically, she just said to dump the bitter gourd, onion and some basic spices (all raw) in one pan and pressure-cook it till done.
Since I was so doubtful of the outcome, I used only one of the two bittergourds I had bought - the other was held in reserve (to be tossed with gram flour and shallow fried... yeah I know, I was close to tarnishing my healthily virtuous halo there) in case the pressure-cooked version didnt work out to my taste.
In the event, the aroma that wafted out when I opened the pressure cooker was unbelievably savoury and wonderful, matched only by the taste. This, folks, is a KEEPER, and the recipe is so simple it's laughable.
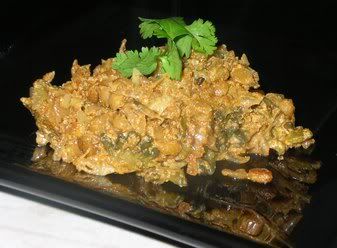
As I had salted the bittergourds at the beginning and squeezed the worst of the bitterness from them, what was left in the cooked dish was just pleasantly bitter. I think I might make Karela Nawabi a lot more often. A thousand thanks to Vasantha Moorthy!
This is my entry for ARF/5-a-day #33 over at Sweetnicks
Recipe for: Karela Nawabi (bittergourd/melon in masala)
Ingredients:
1 medium karela, chopped
1 medium onion, chopped
3 cloves garlic, chopped
2 tsp chana dal (no, not chopped - heheh)
3/4 cup yogurt
1 tsp red chilli powder
2 tsp coriander powder
1 tsp cumin powder
1 tsp amchoor (dried mango powder)
1/2 tsp turmeric powder
2 tsp oil
For tempering:
1/2 tsp fenugreek seeds, dry-toasted and powdered
1 tsp oil
Chopped coriander leaves for garnish
Method:
1. Sprinkle the chopped bittergourd with salt and 1/2 tsp amchoor powder and toss. Place in a colander with a heavy bowl on top, to let the bitter juices out. Let this sit for an hour or so.
2. After an hour, rinse the bittergourd under running cold water and let it drain.
3. Mix the bittergourd with all the ingredients (minus the tempering and garnish) in a steel vessel. Pressure-cook this for 3 whistles, then turn the heat off. Let the pressure reduce by itself, then open the cooker.
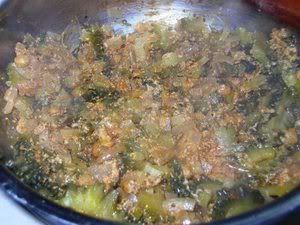
4. Heat 1 tsp oil in a pan and fry the fenugreek powder for 15 seconds, then add the cooked bittergourd masala to it. Stir well. Taste for salt (it shouldnt need much), let it bubble on low heat for 5 minutes.
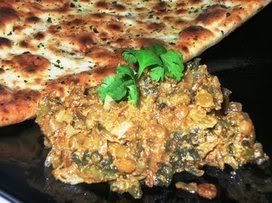
5. Sprinkle with coriander leaves and serve hot with chapaties or naan.
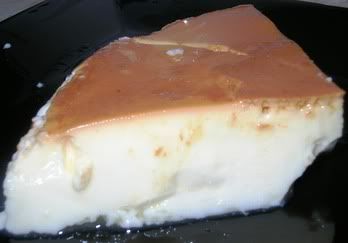
I've made caramel custard before, but baked in the oven. I've even made it steamed in a pressure cooker - but never actually pressure-cooked it. Actually I've read that it's not meant to be cooked under pressure, merely steamed (like idlis, I guess). I was curious about whether pressure-cooking it give the same taste to the custard, whether it would cook and look the same as well - and I followed the recipe in Anupama's food blog, Food n More and whaddya know, it DOES taste the same. The custard tended to accumulate runny juices (probably because of something I didnt do right, but I dont know what!), but that didnt detract from the taste.
Recipe for: Pressure-cooker caramel custard
Ingredients:
3 cups milk
4 eggs
1 cup sugar + 4 tbsp sugar
1 tsp vanilla extract
Method:
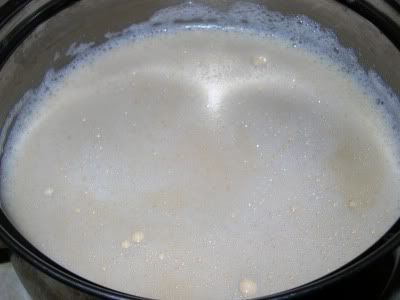
1. Dissolve 1 cup sugar in the milk and bring to a boil. Set aside to cool.
2. Beat the eggs in a bowl till light.
3. In a flat bottomed steel vessel which will fit in the pressure cooker, place 4 tbsp sugar and 2 tbsp water.
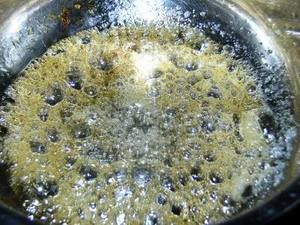
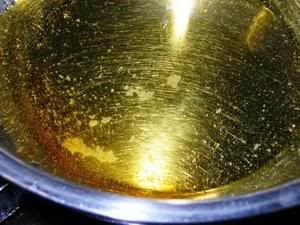
4. Heat this over a very low flame until the sugar caramelizes to a rich golden brown. Swirl the caramelized sugar in the pan so that it coats the pan part-way up the sides. Let this cool for 10 minutes.
5. Add the beaten eggs and vanilla extract to the cooled milk, mix well and pour into the prepared pan.
Cover the pan with lid and pressure cook it for 2 whistles. Then turn down the heat and let it simmer for 5 minutes. Turn up the heat again and when the cooker comes back to full pressure, turn it off.
Let the cooker sit till the custard has cooled in it. Then take the pan out and place it in the fridge for a few hours (or overnight).
To unmold the custard, run a thin spatula or knife around the side of the pan to loosen the custard. Then place a large serving plate over the pan and tilt it quickly. When you take the pan off, the custard should have unmolded onto the plate.
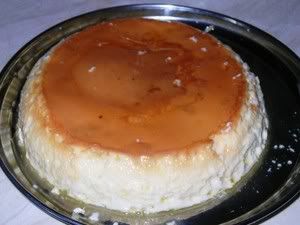
Serve sliced into wedges.
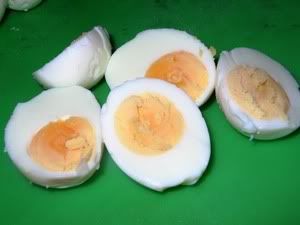
I don't really know if it is a North Indian style egg curry - you'll just have to take Neelam Batra's word for it as I got the recipe from her book 1000 Indian Recipes.
I'll vouch for the taste, though, and Pete will as well. He's far fonder of egg curries than I am, but this was very tasty even by my exacting standards *wink*. I would, of course, have preferred it spiked with more chillies, but since Pete had requested that I make the curry, I kinda figured that he would want to actually be able eat it, not just look at it and salivate (like he does with the sambar I make for myself occasionally). So here it is.
Recipe for: Egg curry - North Indian style

Ingredients:

3 medium tomatoes, pureed
1 large red onion, pureed
4 eggs, hard boiled, peeled and cut in half
1/2 cup yogurt
1 htsp coriander seeds
1 htsp cumin seeds
1/2 tsp turmeric powder
2 tsp paprika
1 htsp kasuri methi (dried fenugreek leaves)

3-4 green chillies, minced (to taste)
2-3 dry red chillies (or to taste)
2 tbsp powdered almonds
2 tbsp oil
Salt to taste
Coriander leaves for garnish
Method:
1. In a small pan, dry toast the coriander seeds and cumin seeds till aromatic (45 seconds or so). Cool, then powder finely with a mortar and pestle. Reserve.

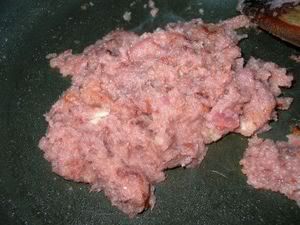
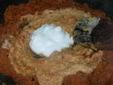
2. Heat one tbsp oil and fry the pureed onions with the minced green chillies till they change colour and lose moisture.
3. Add the pureed tomatoes and fry on medium-high till the sauce is thick. Stir in the turmeric powder, powdered coriander-cumin and paprika.
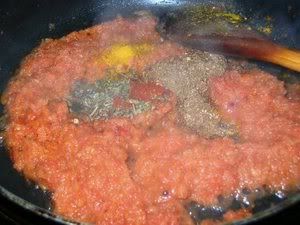
4. Cook for 3-4 minutes on high. Add the yogurt little by little, stirring all the while so that it does not curdle.
5. Pour in 2 cups water and salt to taste, and bring to a boil.
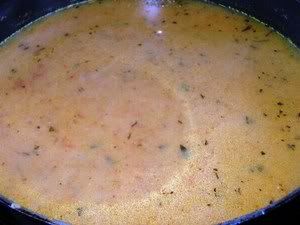
6. When the sauce gets to the consistency you want, add the eggs, carefully ladling the sauce over them to cover. Turn down the heat to a simmer, adding another 1/2 cup of water if required, and let the curry bubble undisturbed for about 7 minutes.

7. Now heat the remaining tbsp of oil in a small pan. Add the dry red chillies (leave them whole) and fry them for 30 seconds. Add the kasuri methi and let it fry for a few seconds, then add the powdered almonds. Stir it on high for about 30 seconds, then add it to the sauce and mix it in gently, careful not to break the eggs.
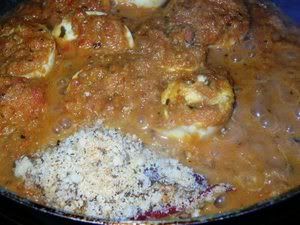
8. Let the curry simmer for 5 minutes longer. Serve hot with rice or roti, garnished with coriander leaves.
Dont be fooled by the term "simple" - that is, it refers only to ease of making, not the end taste, which is delicate and VERY more-ish! The cake is light, redolent of the sweet, gentle flavour and aroma of vanilla and disappears very quickly. It tastes even nicer the next day. I'm guess it would keep for a couple of days, but I cant be sure because the cake didnt last longer than the next day in my house!
I must stress here that the better the quality of the vanilla extract used, the yummier the cake will taste. Since there isnt any other flavouring, it's really important that the vanilla extract be of the highest quality. Better yet, use the scraping from a vanilla bean. I didnt have a bean, but I did have a vanilla extract (containing the seeds) that I got from Sainsbury's. I also used their vanilla sugar to cover the top of the cake. It's gorgeous!
By the way, I used a small heart shaped baking pan but if you dont have one, use a 6" round pan. This isnt a big cake.
Recipe for: Simple vanilla teacake

Ingredients:
1/4 cup butter
3/4 cup sugar
1 egg, lightly beaten
2 tsp top quality vanilla extract
1 cup flour
1/2 cup milk
1/2 tsp baking powder
1/2 tsp baking soda
1 tbsp butter, melted
Vanilla sugar (or cinnamon sugar) for dusting
Method:
1. Preheat the oven to 180C. Grease a 6" round cake pan and dust with flour, knocking off the excess.
2. Beat the 1/4 cup butter and sugar until light and creamy. Add the egg, beating well to avoid curdling. Beat in the vanilla.
3. Stir in the flour alternately with the milk, until smooth. Spoon into the pan (I used a heart-shaped one) and smooth the top.

4. Bake for 30 minutes, or until a skewer comes out clean when inserted into the center.

5. Cool for 5 minutes in the tin, then remove on to a wire rack. Let the cake cool for 10 minutes.
6. While the cake is still warm (not hot), brush the top with the melted butter.

7. Sprinkle with vanilla sugar (or cinnamon sugar) all over, or in a pattern.

Serve along with a cup of coffee.

