skip to main |
skip to sidebar
Deficient in iron? Love peanuts? Love sweetcorn? If you answer "yes" to any or all of these questions, then this recipe from Kiwi Gee is for you. She says: "Got this recipe from some cookbook in my previous life when I actually had time to pore over such things. Just as well that I remember how to make it, coz I have no idea where that cookbook is now…".
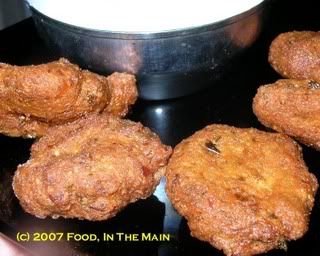
Well, that's the advantage of having a blog - now this recipe need never be forgotten! These are the tastiest vadas I've ever had and it was difficult to stop at just one or two. Good thing the kids were home with one of their friends who's adventurous (food-wise) for his age, with a typical teenager's appetite! Iron-rich though these vadas are, thanks to the peanuts, they are not for the extreme diet-conscious. But once in a while, especially if it's a rainy cold day, they're awesome. Especially when had hot.
Recipe for: KiwiGee's Peanut corn vadas
Ingredients:
Raw peanuts – 200 gms (about a cup)
Corn kernels (fresh or tinned or frozen) – 200 gms
Fresh green chillies – 2-4, depending on chilli tolerance
Corn flour – 2 to 4 tbsp
Rice flour - 1/3 cup (my addition)
Onion – 1 large, chopped
Coriander leaves – a handful
Curry leaves – a handful
Fennel seeds – 1 tsp
Cumin seeds – 1 tsp
Salt – as per taste
Oil to fry
Method:
1. Soak peanuts in water for half an hour. If corn is frozen, make sure it is thawed completely.
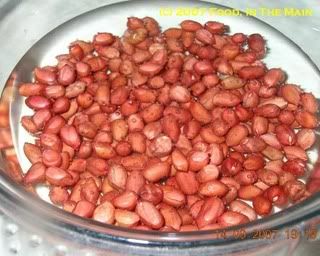
2. Then grind corn and peanuts coarsely along with the green chillies.
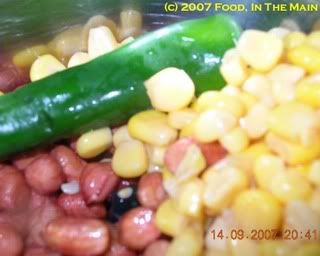
3. In the last run of the grinding, add the saunf (fennel) and jeera (cumin) seeds, onion, coriander and curry leaves, as well as the salt.
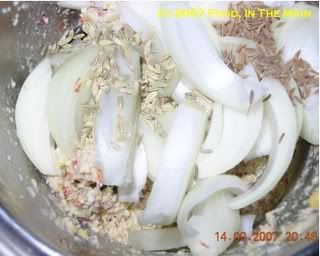
4. Grind the mixture using no or very little water. It has to be roughly the consistency that can be patted into a flat, round shape that won’t come apart when you fry it – this is a bit of a hit-and-miss, but practice makes perfect.
5. To the ground mixture, add the corn flour and rice flour and mix well (add more flour if necessary, and adjust seasoning). If you have added too much water to your mixture while grinding, then you may need to add some extra flour to thicken the mixture – don’t worry, you can’t go wrong with the flour.
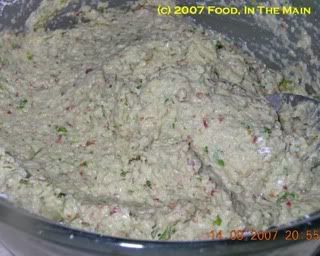
6. Take a small ball of the mixture (size of a plum) and flatten it on an oiled surface (your palm or a plate or whatever) to make a flat round disc of max 1 cm depth.
7. Meanwhile, heat the oil. When the oil is at the right temperature, drop the discs in slowly one by one. Fry till then are a dark golden brown, then drain - and then the best bit – eat hot. Note that because of the peanuts, the vada will be much darker than the normal vada.
A few days ago, when I went through this recipe in my inbox, my first thought was that the dish when finished would look about as unappetising as a train wreck. But I went ahead and tried it anyway, because it was a TNT (Tried 'N' Tested) recipe... which meant that the person who sent it to the food group must have tried it and liked it. The second reason was that I wasnt in the mood to make anything elaborate and this one-pot dish was just a god-send.
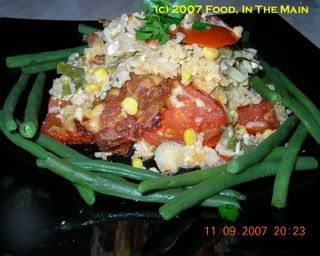
I'm glad I did try it, because it tasted wonderful - the top layers of cheese and ripe red tomatoes was like pizza... but then the rice layer came into its own, luscious with vegetables and loaded with flavours! The one change I would make the next time I make this, is to substitute flavoured cream cheese (garlic-chive, most probably) for the cottage cheese as originally specified in the recipe. It tasted fine, but I have to say the cottage cheese didnt look very nice because of its lumpy character. I ended up with little bumpy white flecks all over and I have to say that it was not what anybody would call "eye candy".
But the savoury bake tasted fantastic - and when you can get your carbs, veggies and proteins all from one easy dish, I for one wont be complaining! Along with its simplicity, the versatility of this dish is also something I like - you can add pretty much any vegetables you like as long as you make it two cupfuls. If you need to feed more than 3 people, just scale up the recipe as you feel fit, add an extra egg or two, and so on. The possibilities are many!
Recipe for: Savoury rice bake
Ingredients:
2 cups cooked or leftover rice
1 egg, beaten
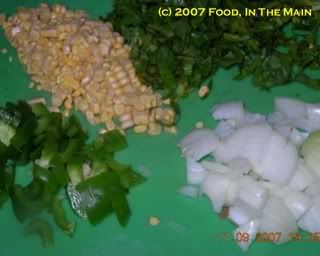
2 cups mixed chopped vegetables (I used onions, bell peppers, spinach and fresh corn)
2-3 ripe red tomatoes, sliced 1/2cm thick
3/4 cup cottage cheese (or use cream cheese if preferred)
1/3 cup + 2 tbsp low-fat cheddar cheese, grated
3 tbsp sharp parmesan cheese
1 tsp smoked paprika powder
1 tsp black peppercorns, powdered
2 green chillies, minced (optional)
2 tbp fresh herbs to taste, minced (oregano, basil, parsley, etc)
Salt to taste
Method:
1. Heat the oven to 180C.
2. In a lightly greased casserole dish, put in the rice, vegetables, cottage/cream cheese, 2 tbsp cheddar, 2 tbsp parmesan, the smoked paprika, black pepper, green chillies (if using), the fresh herbs and salt to taste, and mix well.
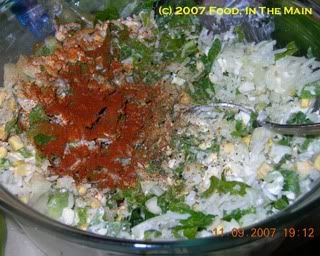
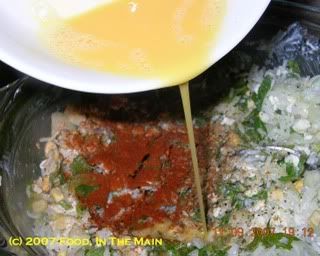
3. Check seasoning and adjust to taste, then pour in the beaten egg and mix again.
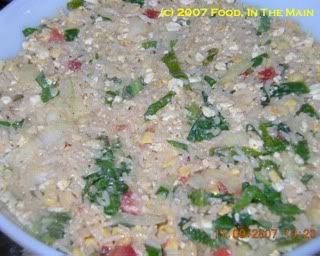
4. Smooth the top of the rice mix.
5. Now layer the sliced tomatoes in overlapping circles to cover the top of the casserole.
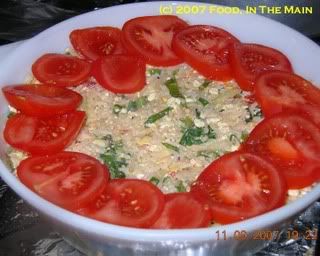
6. Sprinkle over the 1/3 cup cheddar cheese and the remaining 1 tbsp parmesan cheese.
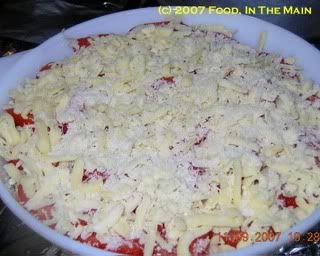
7. Bake at 180C for about 45 minutes or till the cheese is bubbling and golden.
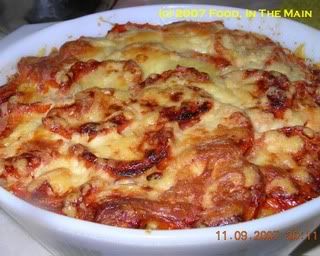
Allow the casserole to rest for 5 minutes, then serve hot along with steamed vegetables.
I wont beat around the bush re the milestone (Hey, I HEARD those sighs of relief!) - this is my 250th post! A record that wont mean much to anybody but me, but it IS a personal achievement because I've kept this blog going for quite a while. It's a good feeling because I'm not normally known for sticking with something once started. Doing this blog has been a lot of fun, and I expect I'll be going for a while yet.
I decided to make carrot halwa for my 250th post for two reasons - one, I dont make too many Indian sweets, and two, this recipe comes from my friend KiwiGee, in New Zealand. I'd pestered her for more recipes to try, and she sent me some. Of course what happened was that I sat firmly on those recipes, waiting for an opportunity to make them, in the meantime making her wonder if I'd forgotten! But then she sent a completely unsolicited recipe - for carrot halwa, and I decided that would be the perfect way to salute both my milestone and her contribution.
This is the first time I've made carrot halwa and I found the recipe very easy. It's also fairly quick to make, plus the ingredients are easily available abroad. A boon for those who arent close to Indian shops.
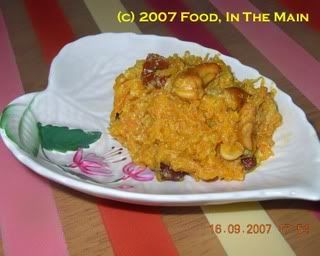
I made two slight changes to the recipe - one, I halved the quantity. One kilo of carrots would have been way too much! As it turned out, even half a kilo was a lot. And two, I added golden raisins along with the cashews. Carrots are just MADE to go with raisins (or possibly the other way around... whatever). And the halwa was gorgeous. Dont take my word for it, try it and see for yourself.
Recipe for: Kiwi Gee's carrot halwa
Ingredients:
1/2 kg fresh carrots (washed and grated)
1 tbsp ghee
Clove, cardamom powder (1/2 tsp)
3/4 cup sweetened condensed milk (I used Nestle Light)
1/4 cup ricotta cheese
Cashews - 10
Golden raisins - about 20
Method:
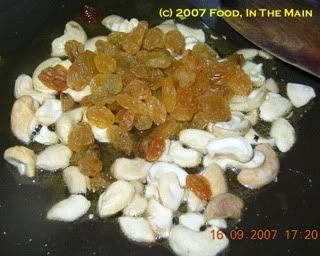
1. Put the ghee in a kadai and fry the cashews and raisins till they go light brown.
 | 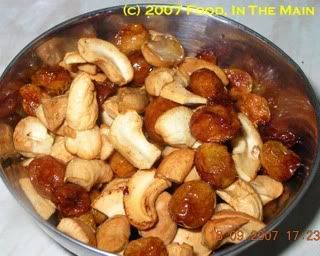 |
Keep aside.
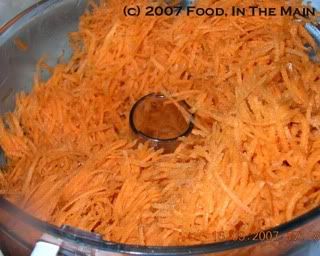
2. In the ghee remaining in the pan, add the grated carrot in and keep ‘frying’ until all the ‘liquid’ in the carrot has evaporated and it is almost cooked (the carrots will change colour from bright orange to pale yellowish-orange - see photo below).
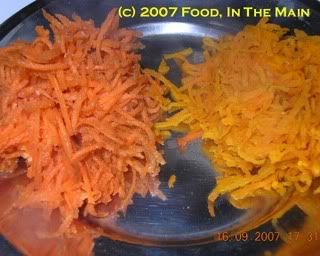
3. Then add in the ricotta cheese (if in India, you’d be adding maava, but unfortunately we are in NZ - or the UK) and keep turning the mixture on low flame.
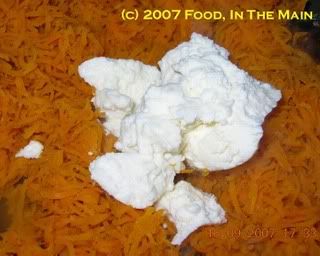
Mix well and cook on medium heat for a couple of minutes, mashing the carrots a bit.
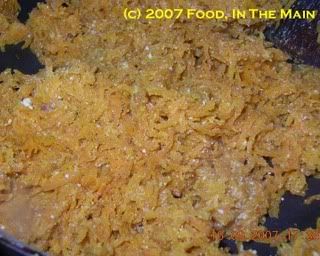
4. When the cheese is well mixed, add condensed milk (this has to be the sweetened variety, as we are not adding any sugar, remember).
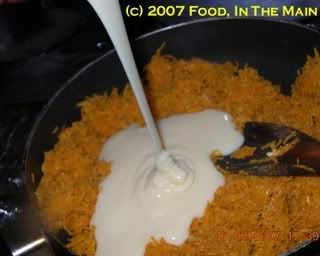
5. Cook for a further couple of minutes (or till the mixture turns thick - it shouldnt be runny) and then add the clove/cardamom powder and then turn off the hob.
6. Decorate with cashews and then, what else, eat!
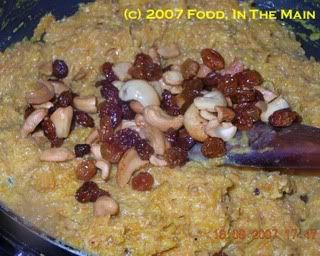
From start to finish, should not take more than half an hour (if you already have the carrot grated, that is)!!
Gini asked me for photos of my growing herbs, so here they are. And I've thrown in a few rose photos too, just for the heck of it (ok, it's really because I'm proud of my beautiful, fragrant, colourful babies!) :)
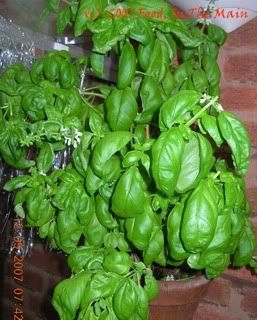
Italian basil - it nearly died last winter but somehow one stem stayed alive - and now look how it's grown!
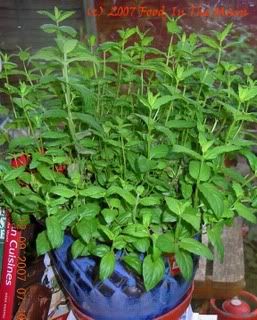
This is the mint I didnt kill (or havent killed yet, anyway)... it needs to be cut back a bit because it's growing leggy rather than bushy. Right after this photo session, methinks...
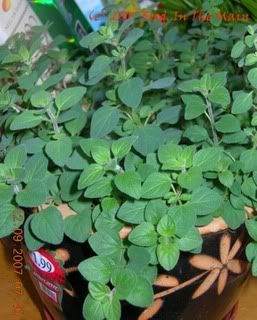
Oregano - what a lovely fresh aroma to this herb!
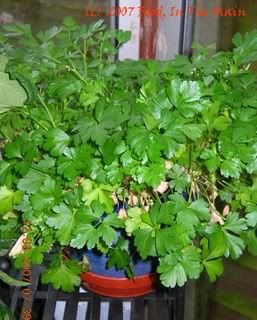
Flat leaf parsley - I also have the curly variety but it seems to be yellowing quickly.
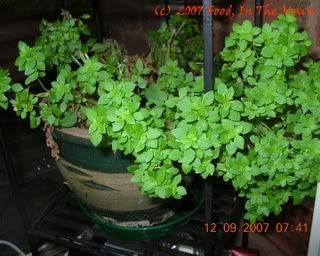
Thai basil - a little pepperier than the Italian, but not as much as holy basil. I remember the tulsi in my grandmother's place, which used to make my tongue tingle and go a little bit numb at the same time.
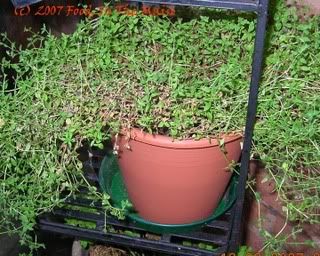
Finally, it's thyme...
...for the roses (anybody note the pun?) :D


 organised by Nags, of "For The Cook In Me"I have the worst trouble resisting cookbooks.
Well, actually I cant resist any books, but my greed for books in general is usually satisfied by a trip to the library every 2 weeks or so, to get 15 books at a time. And sometimes I supplement those with more books bought from doing a round of the second hand book stalls at the Shrewsbury market, various charity shops and the bargain bookstall as well. There's no saying what kind of books you might get at the latter places, and that's part of the joy in browsing through the shelves. A couple of months back, I picked up a sterling set of one of David Attenborough's TV series on Nature, for about £5 for the lot (10 books, 50p each). They were in pristine condition, with beautiful glossy colour photos of animals and birds and insects with the accompanying text. That was one of my happiest purchases from Oxfam! And yes, there are more books in my house than there is space for them, strictly speaking. They're everywhere.
However, although the library is good for general fiction, arts and crafts, etc, I dont much like borrowing cookbooks. Because eventually I have to return them. Cookbooks are long-time purchases for me, not a temporary loan. Whenever I go to Borders or W H Smith or any other bookshop, I spend ages in the cookery aisle, flipping through all sorts of tomes on all sorts of cuisines. I love thumbing through beautifully illustrated books on things I know I would NEVER be able to do - like fancy cake decoration. If I had the money (and the space), I would probably buy them all even if I never ever used them.
But inevitably I am drawn to the books on Indian cooking. I like to read through books on Indian cuisine written by non-Indians, for the same reason that I love travelogues on India - it's a chance to see familiar things (whether places or foods) through the eyes of someone to whom it's all new. It's a way of getting a different viewpoint on something that's as probably as familiar to us as our own face. Sometimes these books are good for a laugh, too - as I did when I read a recipe by Keith Floyd where he specified one heaping tablespoon of turmeric powder to be used. Yikes!
I am very choosy in the cookbooks I buy new. The photos have to be glossy, the print has to be pleasing, the layout easy on the eye, the write-ups have to be interesting and sensible (even fun if possible), even the font has to be one I like (I dislike Times Roman and wont buy anything in that font!). Basically, everything has to be just so. These criteria usually dont apply to cookbooks I buy second-hand, of course. Or for books that are difficult to get.
Which brings me to my first favourite cookbook - Vasantha Moorthy's The Complete Vegetable Cookbook.
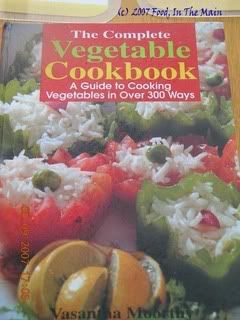
This book has lovely recipes, everyday recipes that you make at home - not really party fare. It's one of my most used because it has recipes for most "Indian" vegetables, made the way my mother or aunts might make them.
My second one is Indian Vegetarian Recipes. There isnt really an author for this, it's a compilation of hotel recipes, apparently.
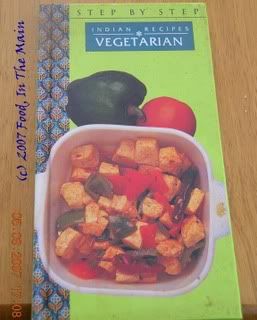
It's one of my earliest purchases (from Landmark in Chennai when they had only the Nungambakkam Road outlet - not the extended version either! I know because I wrote down the date and place. Jan 23, 1999!) and I've tried most of the recipes in it. They're slightly jazzed up but still homely. I like that.
The next two cookbooks are just as much a favourite with me as those mentioned above... but for a totally different reason. I've not tried out a SINGLE recipe from them. Maybe I will, at some point... but at the moment they're good for reading and re-reading and admiring the photographs and marvelling at the intricacy of the steps involved.
This one, Europe's Master Chefs, was a Christmas present from Pete last year. All I can say is, he must think I'm a Cordon Bleu chef. (Hmmm... a thought just struck me - perhaps it was a hint to improve my cooking skills.) The exoticness of the recipes, the ingredients used, the delicate and precise cooking methods - they are all compelling. Especially because they're so different from Indian cooking. But apart from that, another major reason for not having ever tried a recipe is because they're so overwhelmingly non-vegetarian. There are some dessert recipes too, of course - but oh man, they're complicated! You can tell just from looking at this:
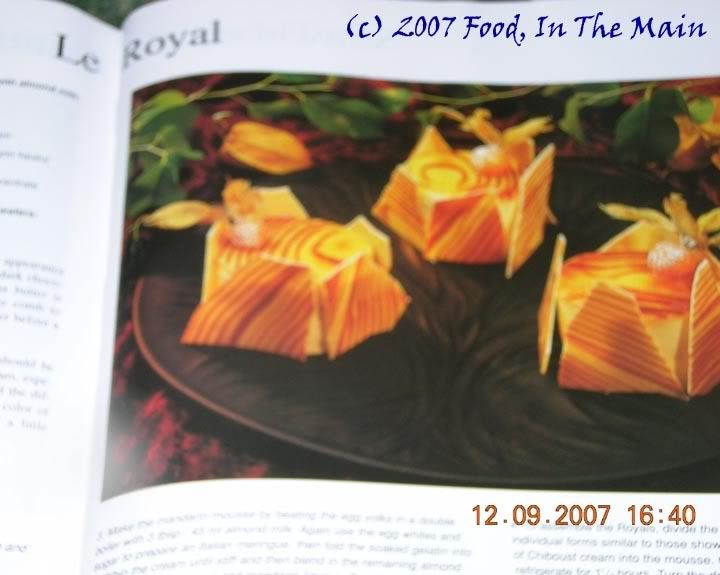
If I ever sorted, labelled and filed my cookbooks, this book in particular would come under the heading of "Look, Dont Cook". :)
The last cookbook I'm going to mention here is Jump Up and Kiss Me - a rather strange name for any cookbook.
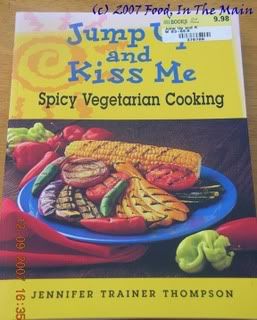
The recipes arent all that exotic, I suppose, and they ARE doable... but somehow I havent got around to trying out any of the recipes. But the write-ups are so engaging that I keep reading the recipes! One of these days I really should actually make something from it. One of these days...
I could write lots more, but I think I'm already well over the limit (numerically speaking) for this cookbook event. Nags had asked for just one, and I've already written about four! So here endeth this post. Hope you enjoyed reading this as much as I've had fun writing it (Nags, this one's for you).
Are broad beans also known as fava beans? I wasnt (and am not) sure, but I'd passed the big bean pods by in the vegetable aisle quite a few times, wanting to try some but never really buying any.
I asked Pete what one did with broad beans - I was really looking for answers to questions like "what does one do with the pod? is it edible?" and "How do you cook it?" etc - but his reply was less than useful, although his instantaneous response made me laugh. (His prompt reply: "One throws them away", from which I gathered that he didnt exactly count broad beans among his favouritest things in the world.)
But it didnt stop me wondering about those great misshapen-looking green pods and what their contents might look like and what they would taste like fresh. I'm not always the most adventurous of cooks - I need to get over the inertia of staying with the things I know and like - and a lot of times I end up just looking at unfamiliar vegetables and then moving on.
Finally I bought some broad beans when I went shopping a few days back... only to find, on getting home, that Pete had bought a ruck of them as well! So then I had way more fresh broad beans than I really wanted, especially as there was just me to eat them. I used some in the sesame vegetable rice, which was okay (although Pete picked out the beans painstakingly). But I still had a heck of a lot more beans to use up before they turned brown and horrible looking (oh yes, that was a fact I discovered - fresh broad beans go brown on the outside fairly quickly).
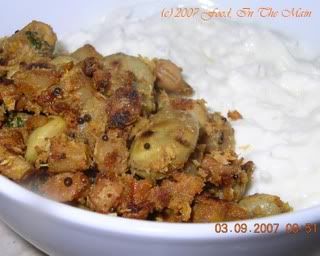
So I decided to try a sundal-type stir-fry... but because I had some carrots and potatoes left over from the previous recipe, I threw those in at the end. They didnt make much difference to the overall taste and it was a nice feeling to know that I didnt waste anything. I had the beans as a side dish with plain curd rice - very nice!
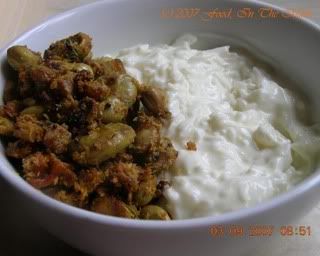
On the whole, broad beans are quite nice, but the taste - especially if the beans are not "Indianised" in some way - is one that needs to be acquired. No wonder Pete doesnt like them, if the only way he's had them is plain boiled!
Recipe for: Broad beans bhaji/sundal
Ingredients:
1-1/2 cups shelled fresh broad beans
1 tsp mustard seeds
1 tsp urad dal
a few curry leaves, torn roughly
2 tbsp grated coconut
pinch of asafoetida
1/2 tsp cumin seeds
2 tsp red chilli powder (or to taste)
2 tsp oil
Method:
1. Heat the oil in a pan and add the mustard seeds, urad dal, cumin seeds and curry leaves. Cover and let the seeds splutter.
2. Add the asafoetida powder, the red chilli powder and then the beans. Stir to coat the beans with the tempered oil, then lower the heat to simmer. Cover and let the beans cook for 5 minutes.
3. When the beans are nearly done, add the grated coconut and salt to taste. Stir to mix evenly, then turn up the heat and let the beans fry a little, stirring frequently.

4. Serve hot as a side dish or as a snack. (The beans dont taste so good when cold, at least to my palate.)
Another day, another food event, another day of participation in another food event - yep, this here is my entry for "Think Spice - Think Seeds" hosted by Sunita of Sunita's World.
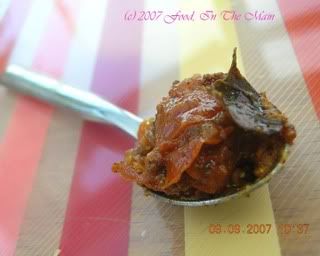
Not that it's anything extraordinarily out of the ordinary, because it isnt. I cant even be sure that I didnt read about a similar recipe somewhere else, sometime else... as far as I'm concerned, it was just a whim-of-the-moment to dry-roast and pound up some spices (which included mustard seeds) to make this tomato chutney. But what I CAN say is that it tastes different from the couple of recipes I posted on this blog in previous months. Different, but very nice. It's different to me in another way too, in that I usually cook the tomatoes down to a mush, and this time I didnt.
On a not entirely disconnected note, I bought a bottle of mustard oil a few months back, which I've been meaning to use... but I'm now looking for recipes which utilise it! If anyone has links or recipes, could they please point me in the right direction? I'd be MOST grateful...
Recipe for: Mustardy tomato chutney
Ingredients:
1 tbsp mustard seeds
1/2 tsp cumin seeds
1 tsp coriander seeds
1/4 tsp fenugreek seeds
2 cups ripe tomatoes, chopped (not too fine)
2 tsp red chilli powder (or to taste)
a few curry leaves
pinch of asafoetida
3 tbsp oil
1/2 tsp mustard seeds
Salt to taste
1/4 cup water (use as required)
Method:
1. Toast the 2 tsp mustard seeds, cumin seeds, coriander seeds and fenugreek seeds over medium heat in a small pan, till they're aromatic and change colour. Keep shaking the pan so that the seeds dont burn.
2. Cool and pound to a powder with a mortar and pestle. Reserve.
3. Heat the oil in a pan. Add the asafoetida powder, curry leaves and 1/2 tsp mustard seeds, cover and let them pop.
4. Add the tomatoes and cook them over high heat until they start getting soft (2-3 minutes). Now add the spice powder and chilli powder stir it in.
5. Fry for another 3 minutes on high heat, stirring frequently. Pour about half of the water into the pan, stir, cover and reduce the heat to medium high.
6. Let the tomatoes cook for 5 minutes covered. The water should be nearly gone. Add salt to taste, stir again. If you like, you can add the remaining water at this point and cook the chutney for another 5 minutes, if you feel the tomatoes are not done enough.
7. Serve hot or cold with chapaties, dosas or rice.
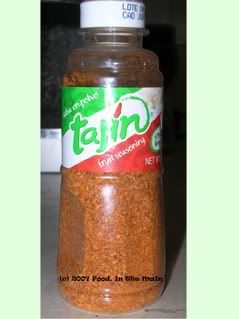 They call it fruit seasoning, but it's really chaat masala. I found this at a little local Mexican shop last year in Seattle, when we were visiting my sister. I bought it because I found it intriguing - and when I opened the bottle and sniffed at the contents, the sharp lemony-chilli aroma went straight to my taste buds and salivary glands without my tongue even getting a look in!
Not that my tongue was deprived for long, because I tried it (the seasoning, not my tongue) over pears and mangoes and apples and ooooh, it's chaat masala allright - it makes FANTASTIC fruit chaat! A bit salty and a bit lemony and all the flavour of chillies without the heat and SOOOO aromatic. Who knew the Mexicans used fruit seasoning, just as we do? Well, I didnt, for one.
If you like chaat, this lovely Mexican seasoning is perfect. If you can find it, buy it. You wont regret it. Those of you who already know about this seasoning, ignore my post, it will have nothing new in it for you :)


